Introdução
Learn two skills at once—restring a guitar and take great photographs for guides.
O que você precisa
-
-
This guide shows you how to replace your guitar strings and improve your photography skills!
-
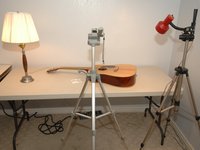
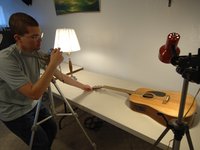
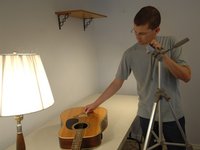
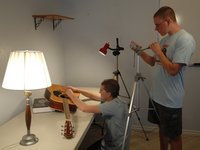
The photography setup doesn't have to be fancy. All you need is a camera, tripod, and some carefully-placed lights.
-
Before you start taking your real shots, take some sample pictures to test your lighting.
 Pergunte ao FixBot
-
-
-
Before you start taking your real shots, take some sample pictures to test your lighting.
-
How "white" your whites are
-
Shadows and reflections
-
Under- and overexposure
-
Auto-white-balance sometimes doesn't function properly. If you're indoors, use the tungsten or incandescent (3000K range) setting. If you're outdoors, select daylight (5600K). On some cameras you can also automatically set white balance by taking a picture of a sheet of paper.
-
When you take pictures on a light background, the picture will sometimes appear too dark. To compensate for this, increase the exposure.
-
-
-
Find a location that has plenty of light. Don't use a background that's too visually complex.
-
Use two lamps on the object, one on each side.
-
It may be tempting, but don't rotate the camera to take portrait shots. For layout consistency, we require all photos have a landscape 4:3 aspect ratio.
-
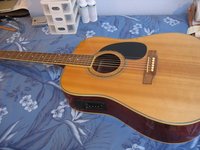
Mount the camera to a tripod if you can. Most of today's cameras work great for taking guide pictures. All of the guitar pictures were taken using a Canon PowerShot S410.
-
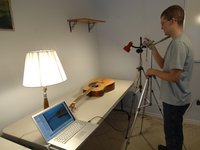
It certainly helps to hook the camera up to your computer after your few initial shots to see how they look on a bigger screen.
-
-
-
Many cameras have a close-up or macro mode (often termed the 'flower' setting). Use this mode if your subject is less than 2 feet from the camera.
-
Shoot at the highest resolution possible so you have more flexibility when cropping the shot. We require you upload an image that is at least 800 x 600 pixels.
-
Set your ISO to the lowest possible number (ideally 50-200 ISO). The ISO setting adjusts the camera's sensitivity to light. The higher this setting, the grainier the photo will be.
-
-
-
-
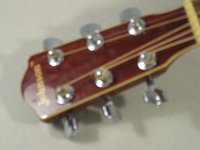
Finally, on to the guitar string instructions: Unwind the guitar key.
-
It's important to have your hand in the shot in order to convey the action being performed.
-
This can be difficult. It's easy to get your arm in the shot, or have your hand obstruct what you're trying to show.
-
Fill the frame with the part of the subject pertinent to the step you're describing. When in doubt, go closer - but don't use digital zoom.
-
A lone person can often take all the pictures with a fair amount of dexterity and the help of a tripod. Of course, practice makes perfect!
-
Most cameras have a short (2-10 second) timer option that can free your hands for a shot. This will also eliminate camera shake from pressing the shutter button.
-
-
-
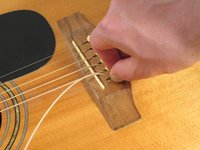
Remove the bridge pin to free the other side of the string.
-
Sometimes, you need to take the picture slightly differently than you would actually perform the task. Some things are impossible to show the actual action.
-
Removing a bridge pin takes some force wiggling back and forth, which you can't show in a picture. In this case, we removed the pin ahead of time, then put it back for the picture.
-
It's more important to show the 'goal' of the shot than the actual action. In this case, pulling the pin partially out shows the viewer what the complete pin looks like, even though the task is essentially complete by the time the photo is taken.
-
Make sure that your hand (or any other object) does not interfere with the action being performed.
-
-
-
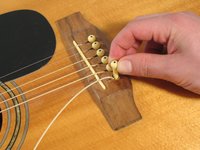
Thread the new guitar string through the bridge pin, and position it along the appropriate string guide.
-
Insert the pin fully into its hole.
-
You can often get a better angle on the shot if you prop up the object.
-
-
-
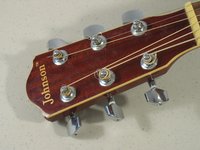
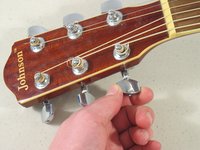
Insert the other side of the guitar string through the keyhole of the guitar peg.
-
For fine tasks like this, zoom way in the action.
-
Adjust the tripod legs so two legs are much shorter than the third. This allows you to cantilever the camera over the shot to get a more vertical angle.
-
If it's hard to show an action from just one angle, take two or three pictures for the same step.
-
-
-
Wind the string until it is somewhat tight, and then press it into the fretboard channel.
-
Continue winding until it is close to being tuned.
-
-
-
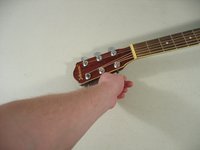
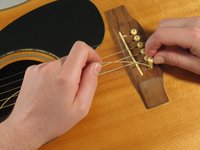
Use a guitar tuner to check the tune of the string. Adjust accordingly until the string is properly tuned.
-
This picture managed to capture:
-
A clear representation of the performed action (both person and object)
-
The end result that's being achieved
-


Cancelar: não concluí este guia.
46 outras pessoas executaram este guia.

3Comentários do guia
Good tips for what to include in your repair guide. Need information on where to put the information for the repair guide I want to provide. Is the intent that what is shown here is a template for a guide & I should change it to accomodate what I am doing. It is not clear how to proceed.
Uh, OK I see. Go to repair guides tab on this site and there's a button for creating a guide. That's how to get started ....
Thanks Greg, that is what I was looking for :-)