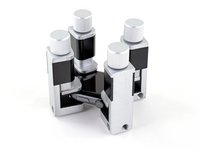
Ir para o conteúdo principal

How To Use Screen Vise Clamps

O que você precisa

  1. How To Use Screen Vise Clamps, Fit your device into a clamp: passo 1, imagem 1 %32
    Ferramenta utilizada nesse passo:
    Screen Vise Clamps 6-Pack
    $15.99
    Comprar
    • In order for the adhesive to bond correctly, you'll need to apply even pressure around the perimeter of your device.

    • Do not use vise clamps to forcibly close a bulging device.

    • Before beginning this repair, we recommend cleaning your device to avoid catching debris between the vise jaws and the device.

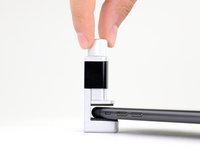
    • Open a screen vise clamp and slide it over the edge of your device, as far as it will go.

  2. How To Use Screen Vise Clamps: passo 2, imagem 1 %32 How To Use Screen Vise Clamps: passo 2, imagem 2 %32
    • If your device has a camera bump and the clamp is able to sit squarely over the center of a lens, you only need to use one clamp for the camera bump.

    • If the clamp is not able to sit squarely over the center of a lens, use two clamps spaced evenly over the camera bump.

  3. How To Use Screen Vise Clamps: passo 3, imagem 1 %32 How To Use Screen Vise Clamps: passo 3, imagem 2 %32
    • For watches, place clamps near the edges, and make sure the jaws press down flat on the display and not at an angle.

  4. How To Use Screen Vise Clamps, Lightly secure the clamp: passo 4, imagem 1 %32 How To Use Screen Vise Clamps, Lightly secure the clamp: passo 4, imagem 2 %32
    • Over-tightening may damage your device's screen or back cover.

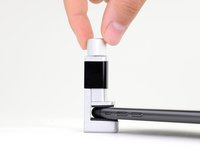
    • Spin the vise clamp knob clockwise to lower the upper jaw onto the screen.

    • Spin the knob until the jaw makes light contact with the screen, and then tighten down one half turn.

    • The clamp isn't meant to be very tight just yet.

  5. How To Use Screen Vise Clamps: passo 5, imagem 1 %32 How To Use Screen Vise Clamps: passo 5, imagem 2 %32 How To Use Screen Vise Clamps: passo 5, imagem 3 %32
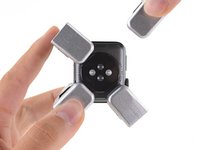
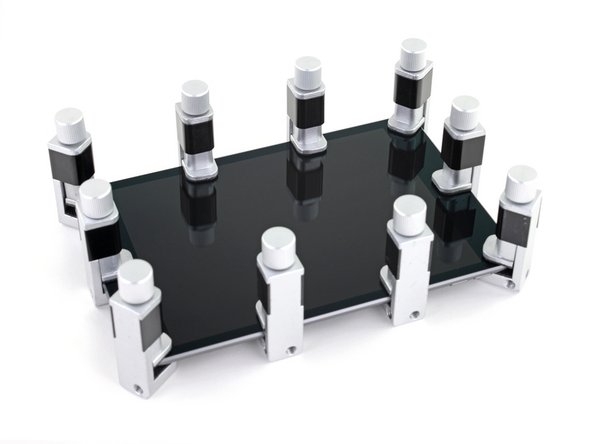
    • Repeat the previous steps for the five remaining vise clamps: one at each of the four corners, and one in the middle of each long edge.

    • For larger tablets, more than six vise clamps may be needed to ensure the adhesive bonds evenly around the entire perimeter.

    • Using a hair dryer or heat gun, evenly heat the edges all the way around the device until they are slightly too hot to touch. The heat will help the adhesive form a more complete bond.

    • Don't overheat the device, or you may cause the battery to ignite or damage other heat-sensitive components, like the display.

    • While the device is still hot, tighten all six vise clamps down one full turn.

    • Don't tighten any further to avoid damaging your device.

    • Leave the vise clamps in place for about thirty minutes.

Linha de Chegada

15 outras pessoas executaram este guia.

Carsten Frauenheim

Membro desde: 03/10/20

113.672 Reputação

Autoria de 338 guias

Equipe

iFixit Membro de iFixit

Staff

Membros da 135

Autoria de 16.817 guias

0 comentários

Adicione um comentário

Exibir estatísticas:

Últimas 24 horas: 15

Últimos 7 dias: 109

Últimos 30 dias: 406

Duração total: 14,182