Ir para o conteúdo principal

Hover-1 XLS Brake Replacement

O que você precisa

  1. Hover-1 XLS Brake Replacement, Front Brake: passo 1, imagem 1 %32 Hover-1 XLS Brake Replacement, Front Brake: passo 1, imagem 2 %32 Hover-1 XLS Brake Replacement, Front Brake: passo 1, imagem 3 %32
    • Remove the two, 23 mm Hex #5 screws holding the brake to the bike.

    • Slide the brake mechanism off and turn it upside down to reveal the screw holding the brake wire.

  2. Hover-1 XLS Brake Replacement: passo 2, imagem 1 %32
    • Remove the one, 14 mm Hex #4 screw pushing down the brake wire to the brake mechanism on the bottom.

  3. Hover-1 XLS Brake Replacement: passo 3, imagem 1 %32 Hover-1 XLS Brake Replacement: passo 3, imagem 2 %32
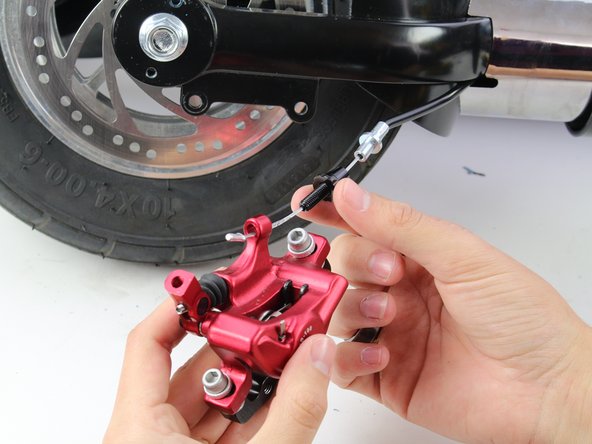
    • Remove the side screw holding the brake wire and mechanism together with your hands.

    • Slide the brake mechanism off from the brake wire.

Conclusão

To reassemble your device, follow these instructions in reverse order.

Uma outra pessoa concluiu este guia.

Jonathan Hidalgo

Membro desde: 01/24/19

575 Reputação

Autoria de 5 guias

Equipe

Cal Poly, Team S1-G2, White Winter 2019 Membro de Cal Poly, Team S1-G2, White Winter 2019

CPSU-WHITE-W19S1G2

Membros da 3

Autoria de 6 guias

0 comentários

Adicione um comentário

Exibir estatísticas:

Últimas 24 horas: 2

Últimos 7 dias: 5

Últimos 30 dias: 34

Duração total: 795