Introdução
Learn how to replace the battery with this guide. Any power related problems may need a battery replacement. For this guide, you will need a Phillips #2 screwdriver and a metal spudger.
O que você precisa
-
-
Flip the Hover-1 Chrome upside down.
-
Use a Phillips #2 screwdriver to remove the fourteen 14 mm screws from the bottom of the Hover-1.
-
Break the two black tape circles, and remove the two 15 mm Phillips screws underneath.
-
-
-
-
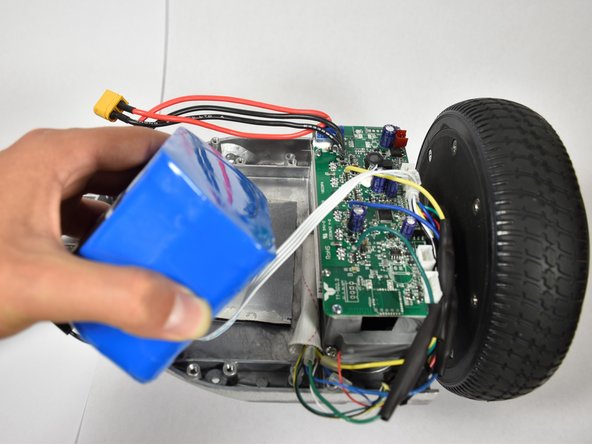
Place the metal spudger end between the blue battery and the adhesive pad that attaches it to the metal body.
-
Use the spudger to pry the battery loose from the adhesive.
-


To reassemble your device, follow these instructions in reverse order.
To reassemble your device, follow these instructions in reverse order.
Cancelar: não concluí este guia.
Uma outra pessoa concluiu este guia.
Equipe

Cal Poly, Team S4-G1, White Fall 2018 Membro de Cal Poly, Team S4-G1, White Fall 2018
CPSU-WHITE-F18S4G1
Membros da 4
Autoria de 6 guias