Introdução
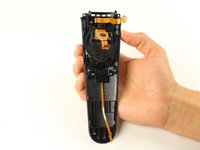
The HTC Vive controller front panel buttons may be worn or can't click from extended use. This could cause functionality problems during use. When removing buttons be careful not to tear the rubber pinholes. This guide will show you how to replace the front panel buttons.
O que você precisa
-
-
Turn over the Vive controller so that the bottom saucer is facing up.
-
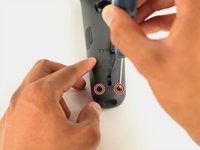
Use the T5 Torx screwdriver to remove three black 21mm screws from the bottom saucer.
 Pergunte ao FixBot
-
-
-
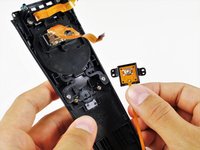
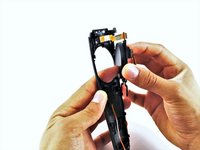
Use the nylon spudger to separate the top and bottom saucer covers all around the edges.
-
Remove only the top saucer cover by pulling up with your hand.
-
-
-
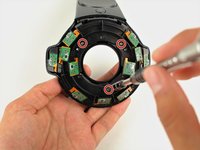
Use the Phillips 00 screwdriver to remove the three silver 12.8mm screws from the exposed upper sensor panel.
-
-
-
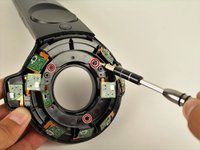
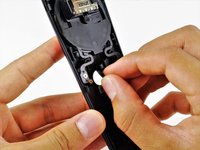
Use the T5 Torx screwdriver to remove the two black 5.2mm screws on the back gray panel.
-
-
-
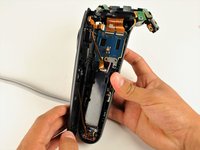
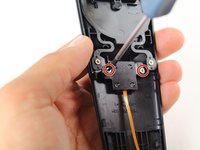
Turn over the Vive controller so that the exposed bottom saucer panel is facing up.
-
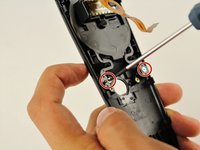
Use the T5 Torx screwdriver to remove the three black 5.2mm screws.
-
-
-
-
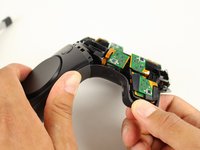
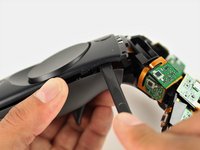
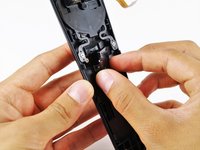
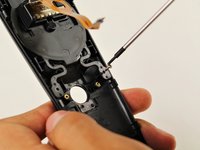
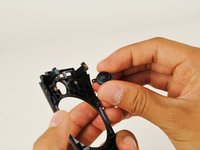
Use the nylon spudger to separate the front panel gently by running the spudger around the edges of the handle.
-
Gently lift the right side of the panel to the left.
-
-
-
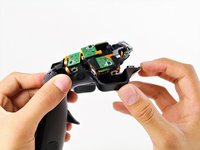
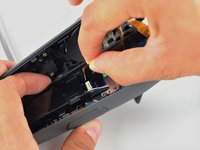
Disconnect the upper ribbon cable gently by pulling the ribbon up and away from the motherboard with two fingers.
-
-
-
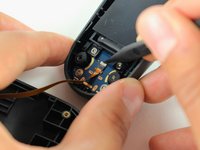
Disconnect the middle ribbon cable gently by pulling the ribbon cable up and away from the motherboard with two fingers.
-
-
-
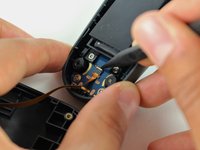
Use the nylon spudger to lift the white tab by 90 degrees.
-
Disconnect the bottom ribbon cable gently by pulling the ribbon cable down with two fingers.
-
-
-
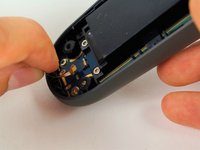
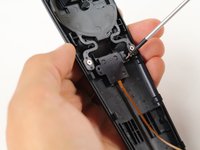
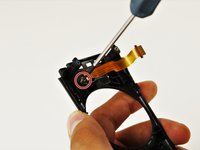
Use the T5 Torx head screwdriver to remove the two silver 4.2mm screws from rear plastic cover of the system button.
-
-
-
Lift the plastic cover up and out of the front panel using your hand.
-
-
-
Push the system button with your finger until it pops out of the front panel.
-
-
-
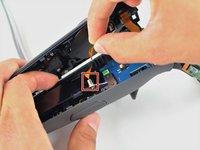
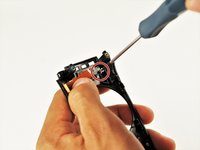
Use the T5 Torx head screwdriver to remove the two silver 4.2mm screws from rear portion of the trackpad.
-
Lift the trackpad up and out of the panel using your hand.
-
-
-
Use the T5 Torx head screwdriver to remove the two silver 4.2mm screws from the rear plastic cover of the menu button.
-
-
-
Push the menu button with your finger until it pops out of the front panel.
-


To reassemble your device, follow these instructions in reverse order.
Cancelar: não concluí este guia.
8 outras pessoas executaram este guia.
Equipe

Cal Poly, Team S15-G5, Livingston Fall 2017 Membro de Cal Poly, Team S15-G5, Livingston Fall 2017
CPSU-LIVINGSTON-F17S15G5
4 Membros
Autoria de 51 guias
5Comentários do guia
Okay great! But where can I buy replacement parts?
Thanks for the guide! Even though iFixit doesn’t have the replacement parts, I was able to fix my button that was off-center and get my controller back up and running! The only issue is that with step 5, the T5 screwdriver that comes with the iFixit tool kits doesn’t work, as it’s too wide. I had to go out and buy a narrower driver, but still much less expensive than the controller. Thanks again!
I had my front panel TOUCHPAD STUCK, in the sense it could sense my thumb touch, but NOT my thumb press on the upper-right part (presses on the other directions were detected). I figured out how to fix it:
The touchpad presses are detected by a little sensor on the controller: it’s the little pink button we can see on the picture of Step 8 on the dark-blue board. This button is pressed when pressing the touchpad, via a little black round plastic thingy behind the very center of the touchpad : we can see it on the top of picture of Step 11, the little black circle. If this black circle is off-center or simply *too low*, the contact with the pink button will not happen properly. I personnaly got the black circle thingy off, placed another thin layer of material below it (of approximately the size of the thingy) and placed it back, so it would be more in contact with the pink button. Solved on my both controllers !
Thanks for this really good guide which helped me solve this !
Hi! My ribbon cable to the touchpad is damaged. Does anyonw know whre to buy a replacment? Seems like it’s soldered to the rumblepack also.
I replaced the little disc that Jesuis Une was talking about with a piece of PTFE used for mouse skates. The disc is 5/32 or 4.0 mm. I used a punch to knock a piece of 0.6 mm PTFE from the excess edging and it works like a charm.