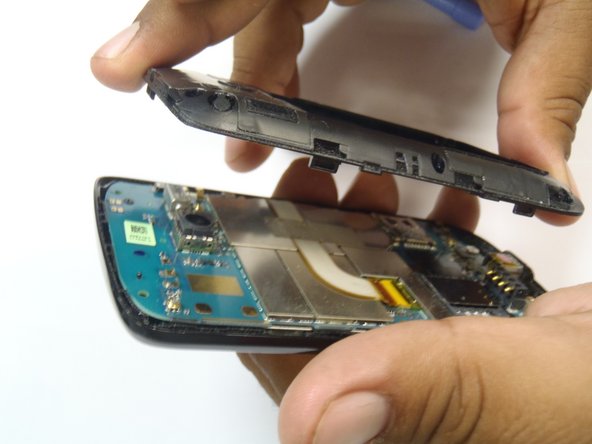
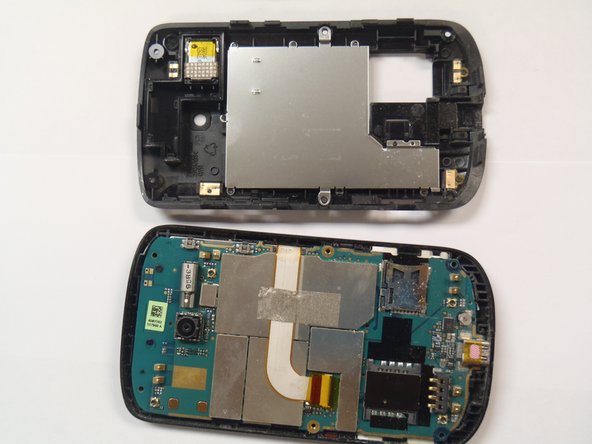
Ir para o conteúdo principal

HTC Ozone Frame Replacement

O que você precisa

  1. HTC Ozone Frame Replacement, Rear Battery Cover: passo 1, imagem 1 %32
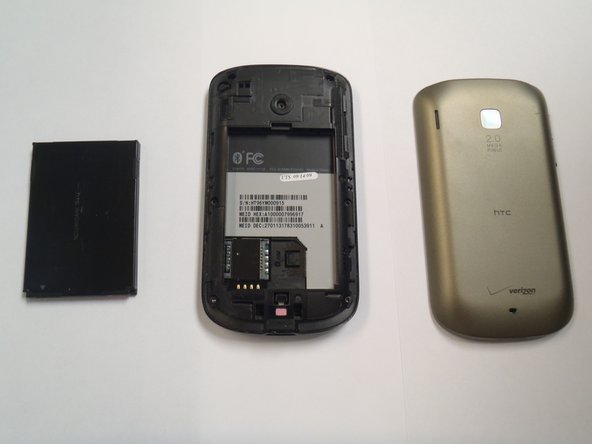
    • Flip the phone over to have the rear cover facing up.

    • The camera lens should be towards the top of the phone.

  2. HTC Ozone Frame Replacement: passo 2, imagem 1 %32 HTC Ozone Frame Replacement: passo 2, imagem 2 %32
    • Slide the cover up, towards the top of phone, to unlock the battery cover.

    • Lift the cover off phone and remove it.

  3. HTC Ozone Frame Replacement, Battery: passo 3, imagem 1 %32 HTC Ozone Frame Replacement, Battery: passo 3, imagem 2 %32 HTC Ozone Frame Replacement, Battery: passo 3, imagem 3 %32
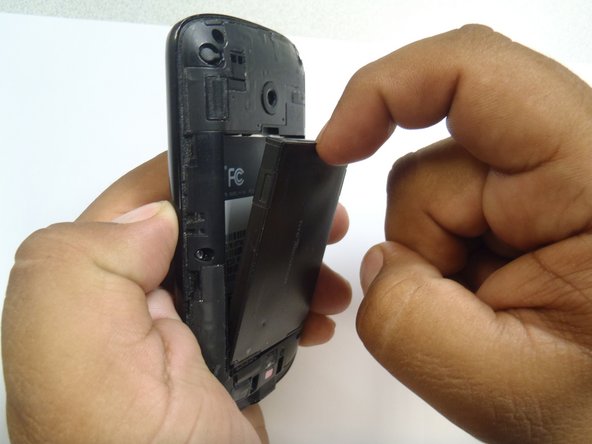
    • Use your finger to push the top of the battery downwards and lift the battery out of the phone.

  4. HTC Ozone Frame Replacement, Frame: passo 4, imagem 1 %32 HTC Ozone Frame Replacement, Frame: passo 4, imagem 2 %32 HTC Ozone Frame Replacement, Frame: passo 4, imagem 3 %32
    • Remove the six Torx #5 screws that are securing the rear frame.

  5. HTC Ozone Frame Replacement: passo 5, imagem 1 %32 HTC Ozone Frame Replacement: passo 5, imagem 2 %32 HTC Ozone Frame Replacement: passo 5, imagem 3 %32
    Ferramenta utilizada nesse passo:
    Plastic Cards
    $2.99
    Comprar
    • Pry the frame open, releasing the eight plastic tabs around the edge of the frame, using the plastic opening tool.

    • A plastic card can be used instead of the plastic opening tool.

Conclusão

To reassemble your device, follow these instructions in reverse order.

Uma outra pessoa concluiu este guia.

Marco Jokada

Membro desde: 04/28/11

247 Reputação

Autoria de 6 guias

Equipe

CSU Los Angeles, Team 1-2, Nelson Spring 2011 Membro de CSU Los Angeles, Team 1-2, Nelson Spring 2011

CSULA-NELSON-S11S1G2

Membros da 5

Autoria de 12 guias

0 comentários

Adicione um comentário

Exibir estatísticas:

Últimas 24 horas: 0

Últimos 7 dias: 0

Últimos 30 dias: 2

Duração total: 1,371