Ir para o conteúdo principal
Participe da comunidade de reparos - Criar conta

HTC One Mini 2 Back Plate Replacement

O que você precisa

  1. HTC One Mini 2 Back Plate Replacement, Sim and MicroSD Card: passo 1, imagem 1 %32 HTC One Mini 2 Back Plate Replacement, Sim and MicroSD Card: passo 1, imagem 2 %32 HTC One Mini 2 Back Plate Replacement, Sim and MicroSD Card: passo 1, imagem 3 %32
    • Insert the end of a paper clip into the holes on each side of the phone to eject the SIM card and Micro SD card.

    • Set the cardholders aside.

    Pergunte ao FixBot
  2. HTC One Mini 2 Back Plate Replacement: passo 2, imagem 1 %32
    • Heat up the top grey speaker plate with the iFixit iOpener for two minutes.

    Pergunte ao FixBot
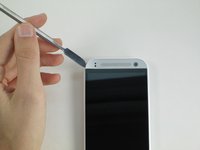
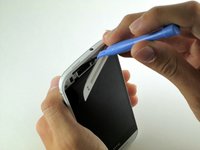
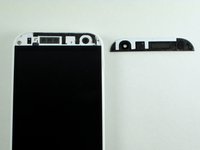
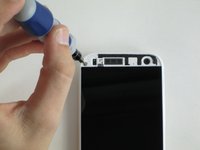
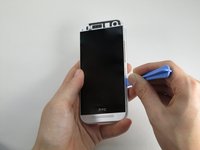
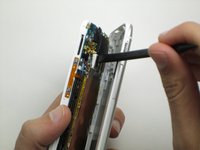
  3. HTC One Mini 2 Back Plate Replacement, Front Plate: passo 3, imagem 1 %32 HTC One Mini 2 Back Plate Replacement, Front Plate: passo 3, imagem 2 %32 HTC One Mini 2 Back Plate Replacement, Front Plate: passo 3, imagem 3 %32
    • Use a metal spudger to pry up the left edge of the upper grey front plate.

    • Place the spudger between the inside white plastic edge and the grey plate. Do not pry between the two white plastic frames.

    • Don’t pry against the glass. Pry against only the left side as there is a delicate antenna under the plate.

    • Use the narrow plastic pry tool to carefully separate the black ribbon antenna from the grey plate.

    Pergunte ao FixBot
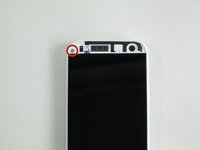
  4. HTC One Mini 2 Back Plate Replacement: passo 4, imagem 1 %32 HTC One Mini 2 Back Plate Replacement: passo 4, imagem 2 %32
    • Remove the 2mm screw with a T5 torx screwdriver head from the iFixit tool kit.

    Pergunte ao FixBot
  5. HTC One Mini 2 Back Plate Replacement: passo 5, imagem 1 %32 HTC One Mini 2 Back Plate Replacement: passo 5, imagem 2 %32
    • Use the plastic pry tool to pry around the edge of the phone.

    • Pry carefully around the card slots.

    • Slowly pull up from the right side of the screen like opening a book.

    • The plastic piece for the power button may fall out. Set it aside for reassembly.

    • Use the plastic spudger to peel the foam adhesive around the camera away from the back plate.

    Pergunte ao FixBot
Conclusão

To reassemble your device, follow these instructions in reverse order.

5 outras pessoas executaram este guia.

Equipe

Cal Poly, Team 4-48, Amido Fall 2014 Membro de Cal Poly, Team 4-48, Amido Fall 2014

CPSU-AMIDO-F14S4G48

5 Membros

Autoria de 17 guias

1Comentário do guia

what is the black ribbon antenna on the front

deancvijic90 - Responder Compartilhar

Comentar

Visualizações:

Últimas 24 horas: 2

Últimos 7 dias: 10

Últimos 30 dias: 68

Ao todo: 10,750