Ir para o conteúdo principal

HTC Evo 3D Motherboard Replacement

O que você precisa

  1. HTC Evo 3D Motherboard Replacement, Motherboard: passo 1, imagem 1 %32 HTC Evo 3D Motherboard Replacement, Motherboard: passo 1, imagem 2 %32 HTC Evo 3D Motherboard Replacement, Motherboard: passo 1, imagem 3 %32
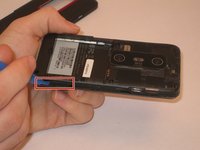
    • Remove the outer casing of the phone with your hands by prying and lifting at the latch.

  2. HTC Evo 3D Motherboard Replacement: passo 2, imagem 1 %32 HTC Evo 3D Motherboard Replacement: passo 2, imagem 2 %32
    • Remove the battery with your hands, lifting at the marked area.

    • Remove the SD card by gently pulling down on the bottom of the card.

  3. HTC Evo 3D Motherboard Replacement: passo 3, imagem 1 %32
    • Remove the four T5 screws using the corresponding screwdriver.

    • Remove the two J000 screws using the corresponding screwdriver.

  4. HTC Evo 3D Motherboard Replacement: passo 4, imagem 1 %32 HTC Evo 3D Motherboard Replacement: passo 4, imagem 2 %32
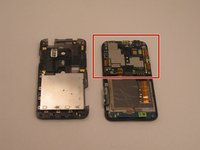
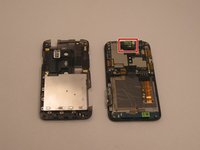
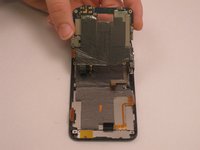
    • With the battery, SD card, and screws removed, the inner case of the phone can now be removed.

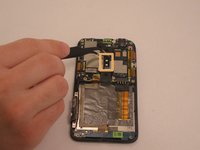
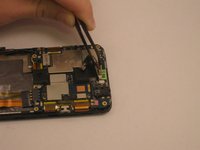
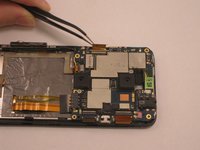
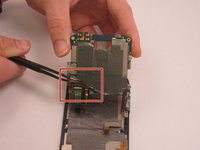
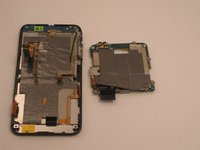
    • Using the plastic opening tool, pry the inner case off at the marked area. Continue prying around the entire perimeter of the phone.

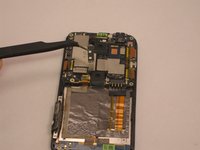
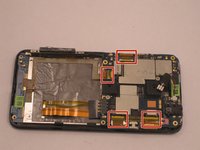
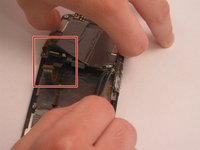
    • This will remove the inner case, and allow access into the inner portion of the phone.

    • Be sure not to rip or damage the ribbons inside this shell.

  5. HTC Evo 3D Motherboard Replacement: passo 5, imagem 1 %32 HTC Evo 3D Motherboard Replacement: passo 5, imagem 2 %32 HTC Evo 3D Motherboard Replacement: passo 5, imagem 3 %32
    • Pictured here is the motherboard.

    • Using precision tweezers, remove the flash mechanism by prying the sides of the piece.

  6. HTC Evo 3D Motherboard Replacement: passo 6, imagem 1 %32 HTC Evo 3D Motherboard Replacement: passo 6, imagem 2 %32 HTC Evo 3D Motherboard Replacement: passo 6, imagem 3 %32
    • Next we will remove the vibration mechanism shown here.

    • Using precision tweezers or fingers, gently pull on the wires connecting the vibration mechanism to the motherboard.

    • The piece should come loose easily.

  7. HTC Evo 3D Motherboard Replacement: passo 7, imagem 1 %32 HTC Evo 3D Motherboard Replacement: passo 7, imagem 2 %32 HTC Evo 3D Motherboard Replacement: passo 7, imagem 3 %32
    • The next step is to disconnect all ribbons attached to the motherboard.

    • Begin by using tweezers to remove the plastic covering the ribbons.

    • Each ribbon needs to be removed by unlocking the white tab and pulling on the ribbon.

    • Unlock by lifting the white tab directly up.

    • The ribbons easily rip and require careful handling.

  8. HTC Evo 3D Motherboard Replacement: passo 8, imagem 1 %32 HTC Evo 3D Motherboard Replacement: passo 8, imagem 2 %32
    • At this point the motherboard is almost fully detached.

    • Lift the motherboard and using precision tweezers, peel up the insulation cover on the bottom left corner.

  9. HTC Evo 3D Motherboard Replacement: passo 9, imagem 1 %32 HTC Evo 3D Motherboard Replacement: passo 9, imagem 2 %32 HTC Evo 3D Motherboard Replacement: passo 9, imagem 3 %32
    • Disconnect the two ribbons on the backside of the mother board using precision tweezers.

    • Disconnect the Cellular/WIFI antenna by pulling directly up on the black wire.

    • The motherboard will now be free from the rest of the phone.

Conclusão

To reassemble your device, follow these instructions in reverse order.

3 outras pessoas executaram este guia.

Matthew Pope

Membro desde: 08/26/15

441 Reputação

Autoria de 2 guias

Equipe

USF Tampa, Team 14-20, Meier Fall 2015 Membro de USF Tampa, Team 14-20, Meier Fall 2015

USFT-MEIER-F15S14G20

Membros da 5

Autoria de 10 guias

0 comentários

Adicione um comentário

Exibir estatísticas:

Últimas 24 horas: 0

Últimos 7 dias: 0

Últimos 30 dias: 2

Duração total: 900