Ir para o conteúdo principal
Participe da comunidade de reparos - Criar conta

HTC Desire 510 Touch screen Glass and/or LCD Display

O que você precisa

Vídeo de Apresentação

  1. HTC Desire 510 Touch screen Glass and/or LCD Display, BATTERY REMOVAL: passo 1, imagem 1 %32 HTC Desire 510 Touch screen Glass and/or LCD Display, BATTERY REMOVAL: passo 1, imagem 2 %32 HTC Desire 510 Touch screen Glass and/or LCD Display, BATTERY REMOVAL: passo 1, imagem 3 %32
    • Switch off the phone, remove the battery and any installed SIM and memory cards.

    • Remove 7x Torx T5 screws.

    Pergunte ao FixBot

    Comentar

  2. HTC Desire 510 Touch screen Glass and/or LCD Display, REAR BEZEL REMOVAL: passo 2, imagem 1 %32 HTC Desire 510 Touch screen Glass and/or LCD Display, REAR BEZEL REMOVAL: passo 2, imagem 2 %32 HTC Desire 510 Touch screen Glass and/or LCD Display, REAR BEZEL REMOVAL: passo 2, imagem 3 %32
    • Use a plastic tool to remove the rear bezel.

    • The loudspeaker is on the inner side of the rear bezel.

    Pergunte ao FixBot

    Comentar

  3. HTC Desire 510 Touch screen Glass and/or LCD Display, FLEX CABLES DISCONNECTING: passo 3, imagem 1 %32 HTC Desire 510 Touch screen Glass and/or LCD Display, FLEX CABLES DISCONNECTING: passo 3, imagem 2 %32 HTC Desire 510 Touch screen Glass and/or LCD Display, FLEX CABLES DISCONNECTING: passo 3, imagem 3 %32
    • Disconnect the touch screen flex cable.

    • Disconnect the light sensor flex cable.

    • Unstuck the vibra-motor from the middle frame.

    • Remove the coaxial antenna cable from the middle frame.

    • The LCD display flex cable is connected to the bottom side of the board.

    Pergunte ao FixBot

    Comentar

  4. HTC Desire 510 Touch screen Glass and/or LCD Display, LOGIC BOARD REMOVAL: passo 4, imagem 1 %32 HTC Desire 510 Touch screen Glass and/or LCD Display, LOGIC BOARD REMOVAL: passo 4, imagem 2 %32 HTC Desire 510 Touch screen Glass and/or LCD Display, LOGIC BOARD REMOVAL: passo 4, imagem 3 %32
    • At the upper left side, the board is held by a plastic locking clip. Use a plastic tool and start the separating from here.

    • Gently disconnect the LCD display flex cable.

    • Now remove the logic board.

    Pergunte ao FixBot

    Comentar

  5. HTC Desire 510 Touch screen Glass and/or LCD Display, PREPARATION THE GLASS: passo 5, imagem 1 %32 HTC Desire 510 Touch screen Glass and/or LCD Display, PREPARATION THE GLASS: passo 5, imagem 2 %32 HTC Desire 510 Touch screen Glass and/or LCD Display, PREPARATION THE GLASS: passo 5, imagem 3 %32
    • Put a scotch tape to prevent the glass from scattering.

    • Use a hot gun or hair dryer and warm the glass. This will make the adhesive soften and the separation easier.

    Pergunte ao FixBot

    Comentar

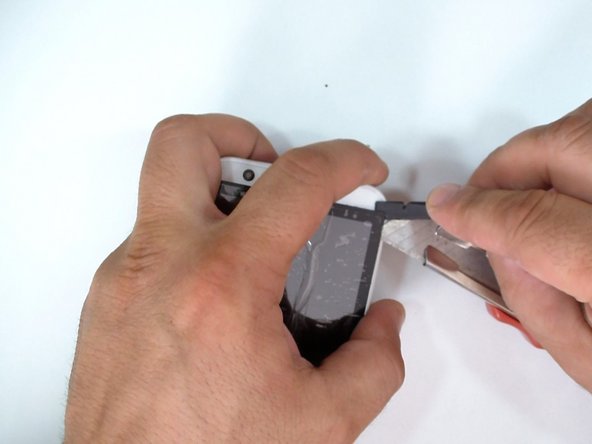
  6. HTC Desire 510 Touch screen Glass and/or LCD Display, SEPARATION THE GLASS: passo 6, imagem 1 %32 HTC Desire 510 Touch screen Glass and/or LCD Display, SEPARATION THE GLASS: passo 6, imagem 2 %32 HTC Desire 510 Touch screen Glass and/or LCD Display, SEPARATION THE GLASS: passo 6, imagem 3 %32
    • Use a cutter and slightly lift the glass in one of the corners. When you make enough room, put a plastic tool.

    • Continue the separating with plastic tools to prevent the middle frame from scratches.

    Pergunte ao FixBot

    Comentar

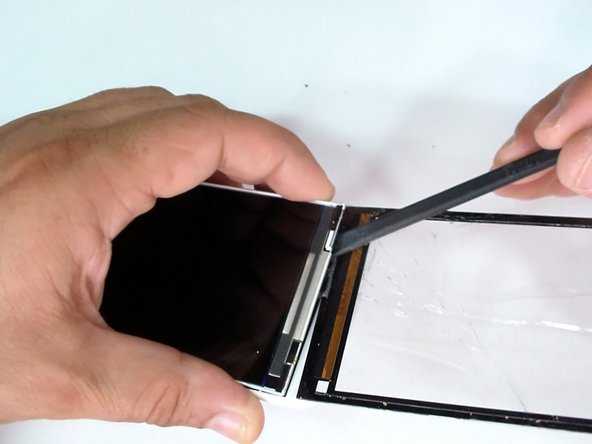
  7. HTC Desire 510 Touch screen Glass and/or LCD Display, SEPARATION THE GLASS (2): passo 7, imagem 1 %32 HTC Desire 510 Touch screen Glass and/or LCD Display, SEPARATION THE GLASS (2): passo 7, imagem 2 %32 HTC Desire 510 Touch screen Glass and/or LCD Display, SEPARATION THE GLASS (2): passo 7, imagem 3 %32
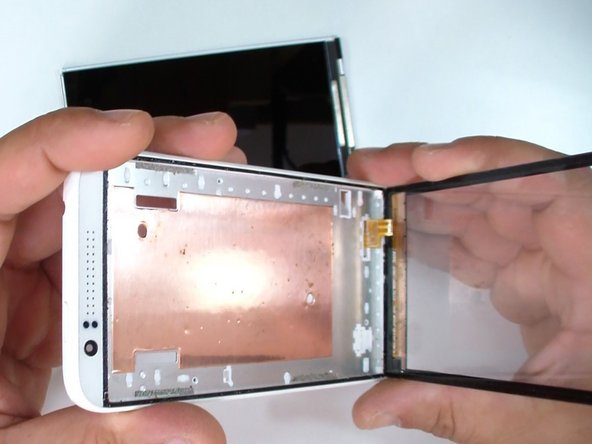
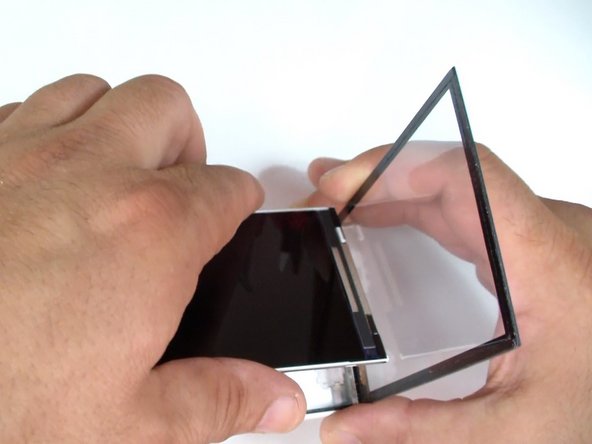
    • The digitizer flex cable goes under the LCD display.

    • Slightly lift the display and unstuck the digitizer ribbon cable from the from the rear side of the display.

    Pergunte ao FixBot

    Comentar

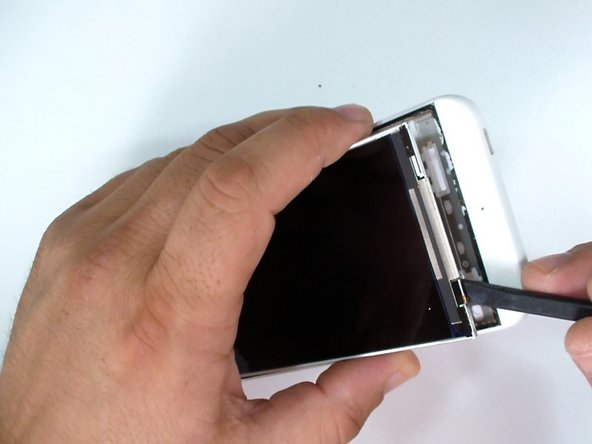
  8. HTC Desire 510 Touch screen Glass and/or LCD Display, LCD DISPLAY: passo 8, imagem 1 %32 HTC Desire 510 Touch screen Glass and/or LCD Display, LCD DISPLAY: passo 8, imagem 2 %32 HTC Desire 510 Touch screen Glass and/or LCD Display, LCD DISPLAY: passo 8, imagem 3 %32
    • If you have a broken LCD display, use a plastic tool and remove it from the middle frame.

    • It's not glued to the frame.

    Pergunte ao FixBot

    Comentar

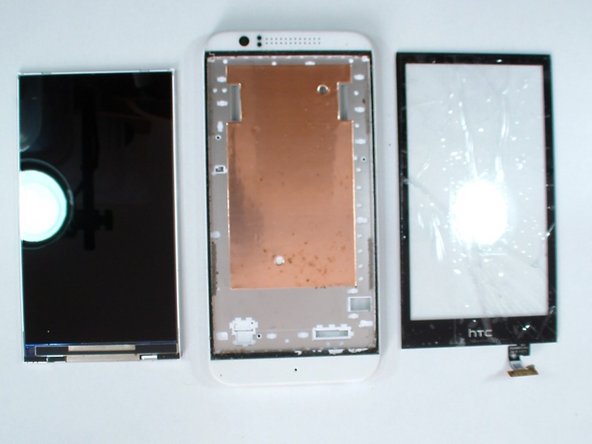
  9. HTC Desire 510 Touch screen Glass and/or LCD Display, INSTALLING THE NEW SPARE PART: passo 9, imagem 1 %32 HTC Desire 510 Touch screen Glass and/or LCD Display, INSTALLING THE NEW SPARE PART: passo 9, imagem 2 %32 HTC Desire 510 Touch screen Glass and/or LCD Display, INSTALLING THE NEW SPARE PART: passo 9, imagem 3 %32
    • Install a new adhesive tape on the digitizer glass.

    • First put the touch screen flex cable in the right hole and then install the LCD Display.

    Pergunte ao FixBot

    Comentar

  10. HTC Desire 510 Touch screen Glass and/or LCD Display, REASSEMBLING: passo 10, imagem 1 %32 HTC Desire 510 Touch screen Glass and/or LCD Display, REASSEMBLING: passo 10, imagem 2 %32
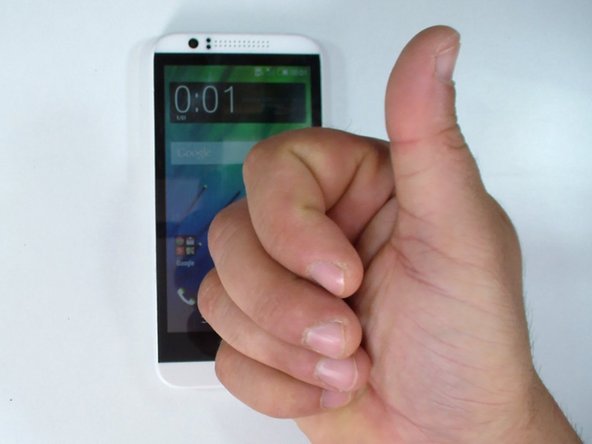
    • Now is time to reassemble the phone.

    • That's all.

    • .

    • .

    • .

    • .

    • Did you do it successfully?

    Pergunte ao FixBot

    Comentar

Conclusão

To reassemble your device, follow these instructions in reverse order.

Cancelar: não concluí este guia.

10 outras pessoas executaram este guia.

ZFix

Membro desde: 12/09/13

197.270 Reputação

Autoria de 330 guias

Equipe

Master Techs Membro de Master Techs

Community

334 Membros

Autoria de 1.701 guias

3Comentários do guia

thanks for this mate, super helpful

kommer - Responder Compartilhar

I did exactly this and when I turn on my phone, the digitizer recognizes touches for a few milliseconds (buggy touches) when I touch it then it stops recognizing touches. What did I do wrong?

Generic Email - Responder Compartilhar

hello i want to buy HTC desire 510 Screen because my htc mobile Touch is not working. i want to buy. plz tell me to am i buy .

imran Ali Gaming - Responder Compartilhar

Comentar

Visualizações:

Últimas 24 horas: 0

Últimos 7 dias: 12

Últimos 30 dias: 53

Ao todo: 16,068