Ir para o conteúdo principal

HP Prime Graphing Calculator G8X92A Button Panel Replacement

O que você precisa

  1. HP Prime Graphing Calculator G8X92A Button Panel Replacement, Battery: passo 1, imagem 1 %32 HP Prime Graphing Calculator G8X92A Button Panel Replacement, Battery: passo 1, imagem 2 %32
    • Power down the device.

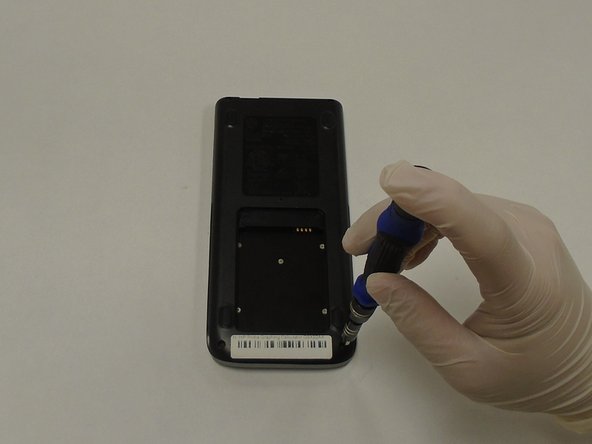
    • Flip the device face side down so the back of the device is facing up.

  2. HP Prime Graphing Calculator G8X92A Button Panel Replacement: passo 2, imagem 1 %32 HP Prime Graphing Calculator G8X92A Button Panel Replacement: passo 2, imagem 2 %32 HP Prime Graphing Calculator G8X92A Button Panel Replacement: passo 2, imagem 3 %32
    • Using a Phillips #00 screwdriver, remove the two 4.5 mm screws securing the battery cover located at the bottom center of the device.

    • Remove the cover.

  3. HP Prime Graphing Calculator G8X92A Button Panel Replacement: passo 3, imagem 1 %32 HP Prime Graphing Calculator G8X92A Button Panel Replacement: passo 3, imagem 2 %32 HP Prime Graphing Calculator G8X92A Button Panel Replacement: passo 3, imagem 3 %32
    • Remove the battery.

  4. HP Prime Graphing Calculator G8X92A Button Panel Replacement, Button Panel: passo 4, imagem 1 %32 HP Prime Graphing Calculator G8X92A Button Panel Replacement, Button Panel: passo 4, imagem 2 %32
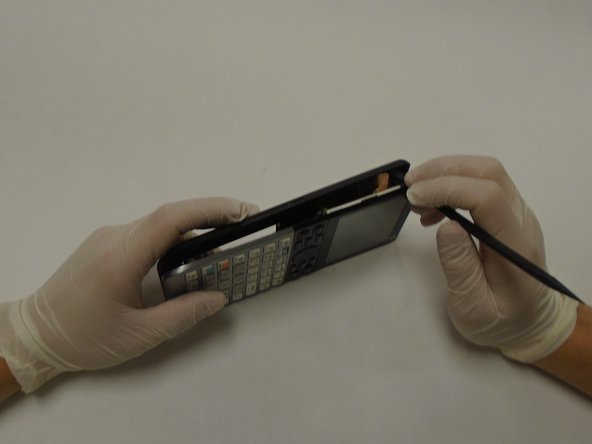
    • Using a Phillips #00 screwdriver, remove the four 4.5 mm screws securing the back panel to the device.

  5. HP Prime Graphing Calculator G8X92A Button Panel Replacement: passo 5, imagem 1 %32 HP Prime Graphing Calculator G8X92A Button Panel Replacement: passo 5, imagem 2 %32 HP Prime Graphing Calculator G8X92A Button Panel Replacement: passo 5, imagem 3 %32
    • Using a spudger, gently pry apart the front and back panels.

  6. HP Prime Graphing Calculator G8X92A Button Panel Replacement: passo 6, imagem 1 %32 HP Prime Graphing Calculator G8X92A Button Panel Replacement: passo 6, imagem 2 %32 HP Prime Graphing Calculator G8X92A Button Panel Replacement: passo 6, imagem 3 %32
    Ferramenta utilizada nesse passo:
    Tweezers
    $4.99
    Comprar
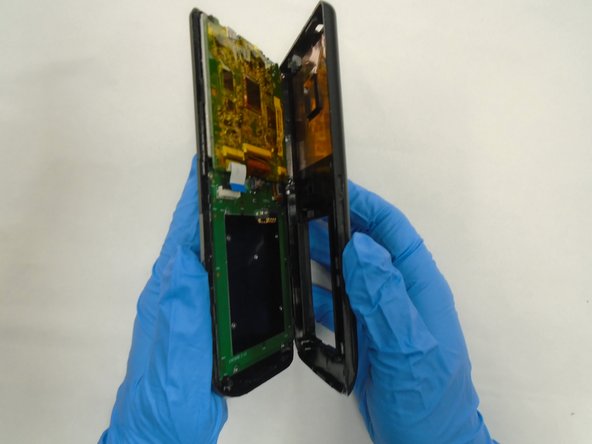
    • Using a Phillips #00 screwdriver, remove the eleven 3 mm screws securing the battery board/button panel located at the bottom half of the device.

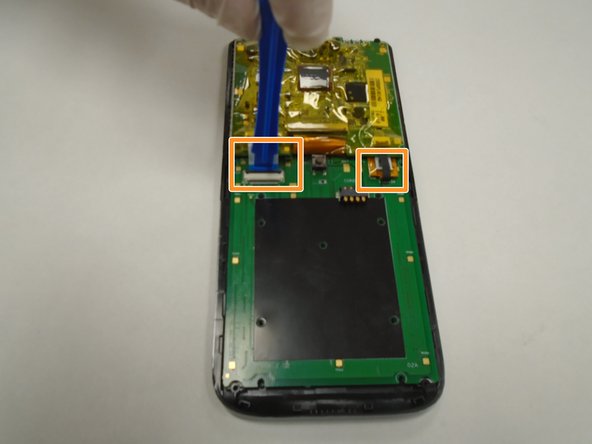
    • Using a plastic opening tool, gently pry the retaining clip securing the ribbon cable to the top-left side of the board.

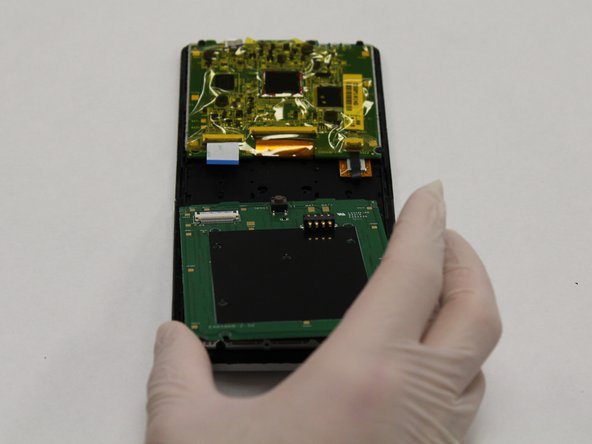
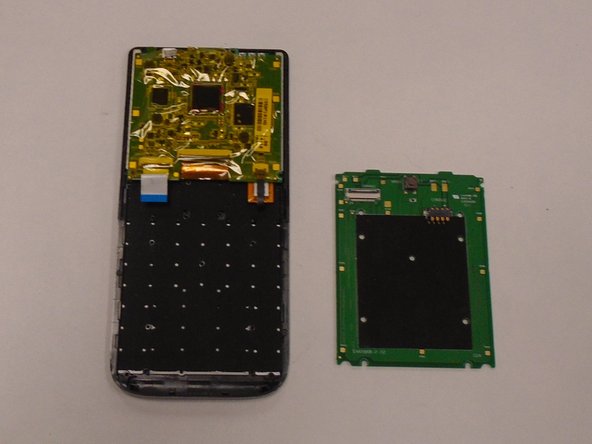
    • Using plastic tweezers, gently unplug the ribbon cable from the board.

  7. HP Prime Graphing Calculator G8X92A Button Panel Replacement: passo 7, imagem 1 %32 HP Prime Graphing Calculator G8X92A Button Panel Replacement: passo 7, imagem 2 %32 HP Prime Graphing Calculator G8X92A Button Panel Replacement: passo 7, imagem 3 %32
    • Using a plastic opening tool, gently pry upward on the battery board/button panel from the bottom to remove.

Conclusão

To reassemble your device, follow these instructions in reverse order.

2 outras pessoas executaram este guia.

0 comentários

Adicione um comentário

Exibir estatísticas:

Últimas 24 horas: 0

Últimos 7 dias: 2

Últimos 30 dias: 18

Duração total: 1,085