Esta versão pode conter edições incorretas. Mude para o último instantâneo verificado.
O que você precisa
-
Este passo não foi traduzido. Ajude a traduzi-lo
-
Lay the computer face-down on a flat surface. Orient the computer to match the image.
-
Locate the battery release switch, as indicated in the image by the red rectangle. Slide the switch from right to left, and remove the battery.
-
-
Este passo não foi traduzido. Ajude a traduzi-lo
-
Remove the two 5mm Phillips screws on the right side of the RAM cover.
-
Lift the right side of the RAM cover, and remove it.
-
-
-
Este passo não foi traduzido. Ajude a traduzi-lo
-
Remove the 11.0mm screw securing the optical drive to the computer.
-
-
Este passo não foi traduzido. Ajude a traduzi-lo
-
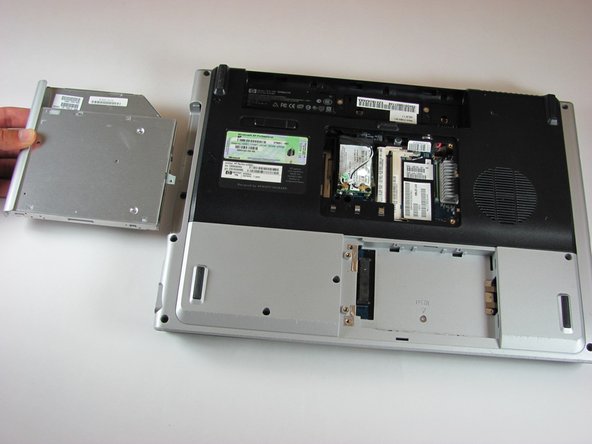
Locate the optical drive. The optical drive is located on the left side of the RAM bay.
-
Press the exposed edge of the optical drive gently with the spudger until the drive releases from the computer frame.
-
Pull the optical drive completely out of the computer frame.
-


Cancelar: não concluí este guia.
Uma outra pessoa concluiu este guia.
Equipe

Cal Poly, Team 21-34, Regan Fall 2010 Membro de Cal Poly, Team 21-34, Regan Fall 2010
CPSU-REGAN-F10S21G34
Membros da 4
Autoria de 11 guias