Esta versão pode conter edições incorretas. Mude para o último instantâneo verificado.
O que você precisa
-
Este passo não foi traduzido. Ajude a traduzi-lo
-
Shut down the computer.
-
Disconnect all external devices and cables from the computer.
-
-
Este passo não foi traduzido. Ajude a traduzi-lo
-
Locate the gray sliding tab next to the black bar where the battery is located.
-
Slide the gray sliding tab to the left until you hear a distinct click.
-
The inside edge of the battery should pop up.
-
-
Este passo não foi traduzido. Ajude a traduzi-lo
-
Grasp the inside edge of the battery.
-
Lift the inside edge of the battery up to detach the battery from the laptop.
-
-
Este passo não foi traduzido. Ajude a traduzi-lo
-
With the battery removed, locate the hard drive access panel.
-
-
Este passo não foi traduzido. Ajude a traduzi-lo
-
Identify the two screws that attach the hard drive access panel.
-
Remove the identified screws with your #00 Philips screwdriver.
-
Lift the left edge of the access panel up and to the right to detach the hard drive access panel from the laptop.
-
-
Este passo não foi traduzido. Ajude a traduzi-lo
-
Identify the plastic tab located on the left side of the hard drive.
-
Grasp the tab, gently lift up, and slide the tab to the left to remove the hard drive from the laptop.
-
-
Este passo não foi traduzido. Ajude a traduzi-lo
-
Locate RAM access door on the bottom side of the laptop.
-
-
Este passo não foi traduzido. Ajude a traduzi-lo
-
Locate the two screws holding down the RAM access cover
-
Unscrew the two screws with a size 00 Philips screwdriver.
-
-
-
Este passo não foi traduzido. Ajude a traduzi-lo
-
Lift up on the screw side of the RAM access cover to remove it.
-
-
Este passo não foi traduzido. Ajude a traduzi-lo
-
Gently pull apart the metal tabs located on both sides of the stick of RAM.
-
The RAM stick should tilt upwards.
-
-
Este passo não foi traduzido. Ajude a traduzi-lo
-
Repeat the previous two steps for the remaining stick of RAM.
-
-
Este passo não foi traduzido. Ajude a traduzi-lo
-
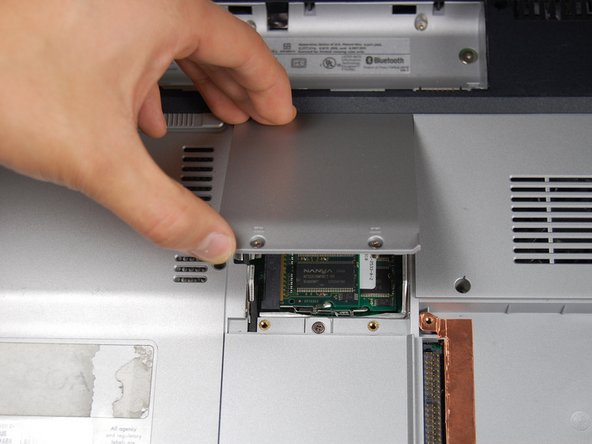
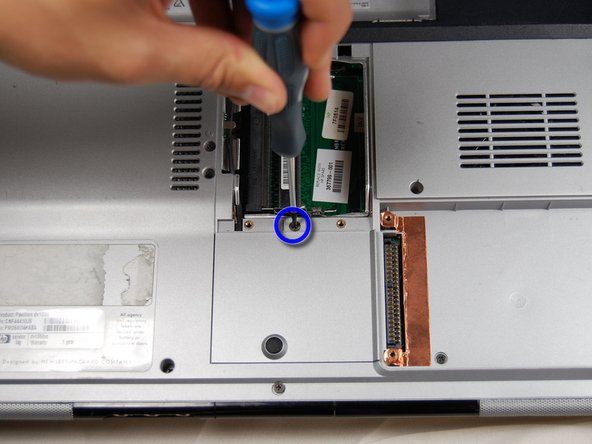
Locate the small panel below the panel you just removed.
-
Loosen the one screw in the middle with a #00 Phillips screwdriver. Again, the screw will not fall out of the panel when loosened.
-
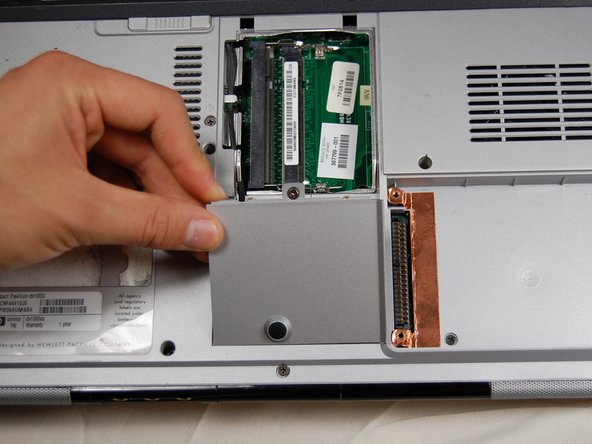
Lift the panel up and out of its slot to remove.
-
-
Este passo não foi traduzido. Ajude a traduzi-lo
-
Identify the two connections at the top of the bluetooth card.
-
Using your fingers, gently pull up on the white clip until it releases.
-
Remove the black clip in the same manner as the white clip
-
-
Este passo não foi traduzido. Ajude a traduzi-lo
-
Locate the two clips on either side of the Bluetooth card.
-
Using your fingers, press the clips outwards, away from the card until the card pops up.
-
Grab the card gently from the top and pull the card up and out of the slot.
-
-
Este passo não foi traduzido. Ajude a traduzi-lo
-
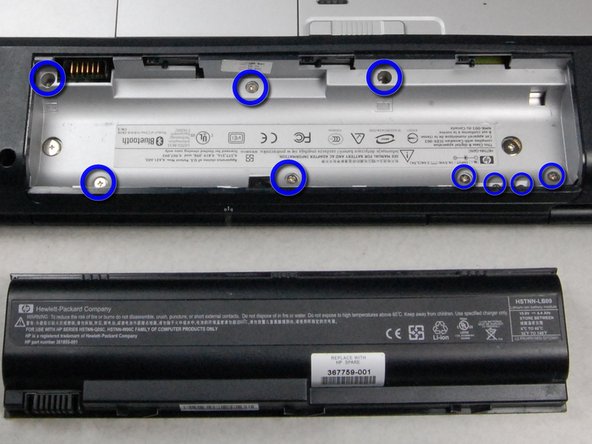
Remove and set aside all of the highlighted screws in the first picture with a #00 Phillips screwdriver.
-
Remove and separately set aside all of the highlighted screws in the second picture with a #00 Phillips screwdriver.
-
-
Este passo não foi traduzido. Ajude a traduzi-lo
-
Turn the laptop right side up, and open it to reveal the keyboard.
-
Press the two white clips forward and lift the tape out of the clip.
-
-
Este passo não foi traduzido. Ajude a traduzi-lo
-
Locate the MediaKeys. They are the black strip right above where the keyboard was.
-
Using the spudger, gently pry up the MediaKeys.
-
-
Este passo não foi traduzido. Ajude a traduzi-lo
-
Remove the two screws next to the left hinge of the monitor with a #00 Phillips screwdriver.
-
Keep these screws separate from the other screws you have removed.
-
-
Este passo não foi traduzido. Ajude a traduzi-lo
-
Using the spudger, loosen the casing behind the battery and the two sides.
-
The case should lift easily upwards and outwards towards you if you are facing the battery compartment.
-
-
Este passo não foi traduzido. Ajude a traduzi-lo
-
Remove the highlighted screws with the #00 Phillips screwdriver.
-
-
Este passo não foi traduzido. Ajude a traduzi-lo
-
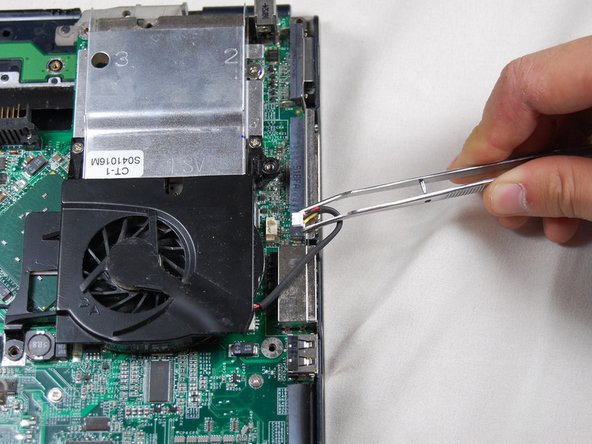
Squeeze the white plastic part of the wire connected to the computer and gently pull. This will detach the fan from the computer.
-
-
Este passo não foi traduzido. Ajude a traduzi-lo
-
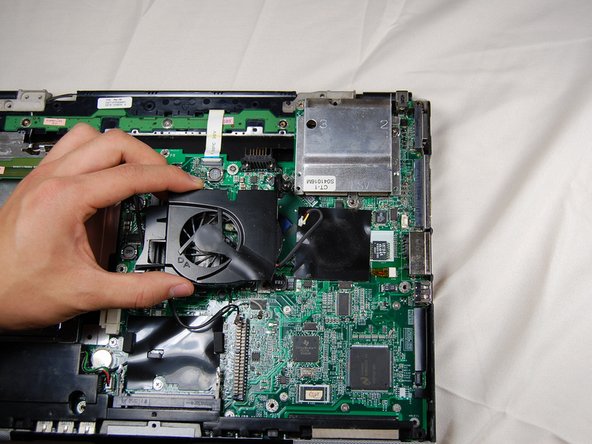
With the wire removed, the fan should lift up easily from the board.
-
-
Este passo não foi traduzido. Ajude a traduzi-lo
-
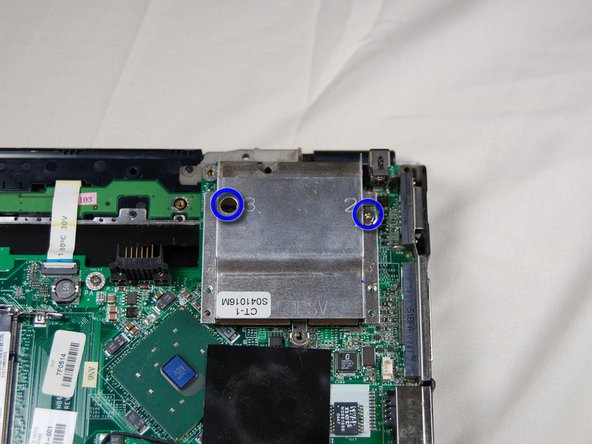
After removing the fan, locate the heat sink. The heat sink is the silver box above where the fan used to be.
-
Remove the two highlighted screws with a #00 Phillips screwdriver.
-
-
Este passo não foi traduzido. Ajude a traduzi-lo
-
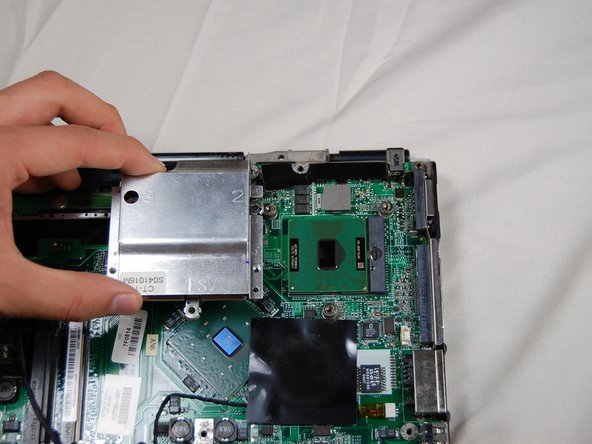
After removing the screws gently lift the heat sink away from the computer.
-


Cancelar: não concluí este guia.
4 outras pessoas executaram este guia.
Equipe

Cal Poly, Team 10-37, Forte Spring 2011 Membro de Cal Poly, Team 10-37, Forte Spring 2011
CPSU-FORTE-S11S10G37
Membros da 5
Autoria de 9 guias
Um comentário
wow your tutorials are very good, it made me understand easier even its a picture, the description is making me easier to read…..