Ir para o conteúdo principal

HP Pavilion G6-1d16dx Motherboard Replacement

O que você precisa

  1. HP Pavilion G6-1d16dx Motherboard Replacement, Battery: passo 1, imagem 1 %32
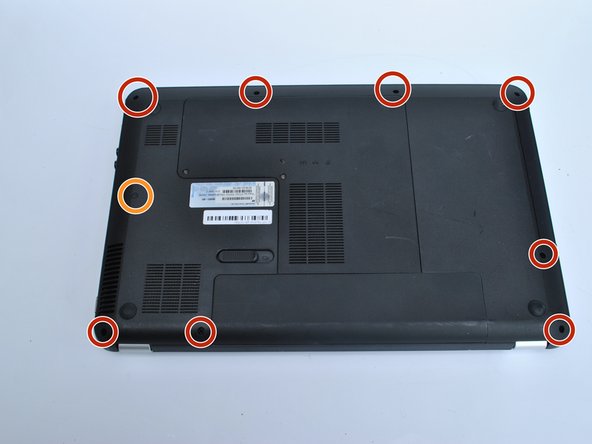
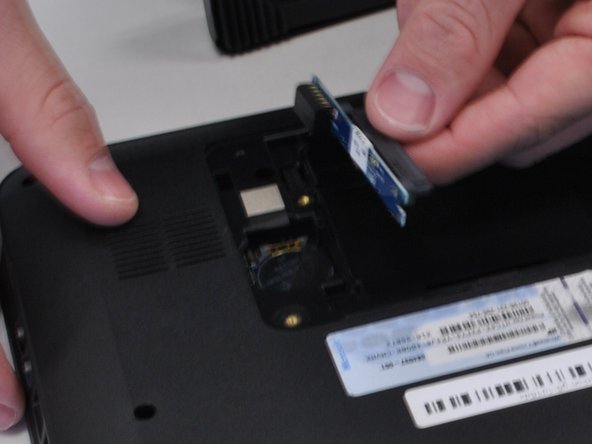
    • Flip the computer so that the bottom side is facing up, and locate the battery above the screen hinges.

  2. HP Pavilion G6-1d16dx Motherboard Replacement: passo 2, imagem 1 %32
    • Slide the switch under the battery compartment to release the battery.

  3. HP Pavilion G6-1d16dx Motherboard Replacement: passo 3, imagem 1 %32
    • Remove the battery.

    • The battery will have popped out of the compartment when it was released.

  4. HP Pavilion G6-1d16dx Motherboard Replacement, Motherboard: passo 4, imagem 1 %32
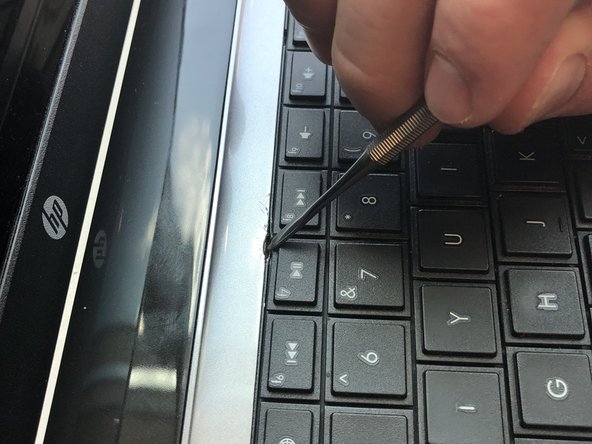
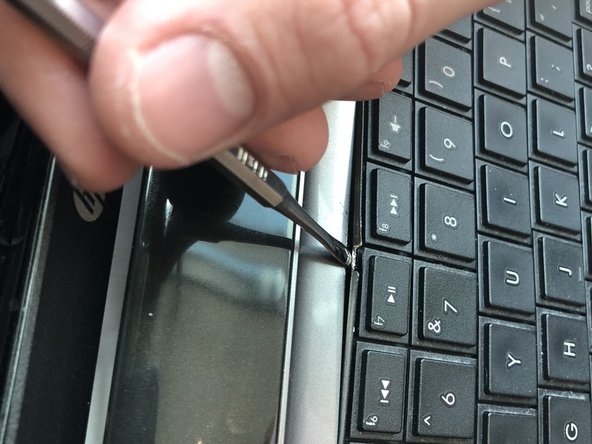
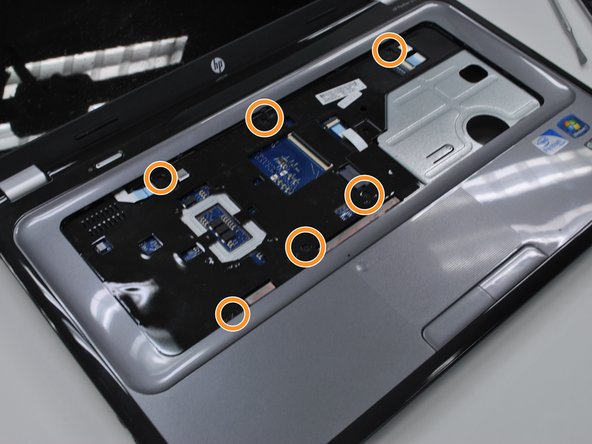
    • Unscrew the two silver screws holding the protective cover in place until they make a clicking noise.

    • The screws do not remove from the cover.

  5. HP Pavilion G6-1d16dx Motherboard Replacement: passo 5, imagem 1 %32 HP Pavilion G6-1d16dx Motherboard Replacement: passo 5, imagem 2 %32
    • Unsnap the Cover by lifting the edge along the battery compartment.

    • Remove all of the body screws.

    • Remove the rubber cap and the screw underneath it.

  6. HP Pavilion G6-1d16dx Motherboard Replacement: passo 6, imagem 1 %32 HP Pavilion G6-1d16dx Motherboard Replacement: passo 6, imagem 2 %32 HP Pavilion G6-1d16dx Motherboard Replacement: passo 6, imagem 3 %32
    • The keyboard is held in by nine tabs

    • Using a metal tool, depress the center tab and pry up the keyboard by pivoting the tool towards the screen.

  7. HP Pavilion G6-1d16dx Motherboard Replacement: passo 7, imagem 1 %32 HP Pavilion G6-1d16dx Motherboard Replacement: passo 7, imagem 2 %32
    • Slide the tool that is now under the keyboard sideways along the edge and use another tool to depress the other tabs along the edge of the keyboard.

    • As you depress the tabs, the edges of the keyboard will pop up.

    • Lift off the keyboard

  8. HP Pavilion G6-1d16dx Motherboard Replacement: passo 8, imagem 1 %32
    • Flip up the black tab holding the keyboard in place via the ribbon cable and pull out the cable

  9. HP Pavilion G6-1d16dx Motherboard Replacement: passo 9, imagem 1 %32 HP Pavilion G6-1d16dx Motherboard Replacement: passo 9, imagem 2 %32 HP Pavilion G6-1d16dx Motherboard Replacement: passo 9, imagem 3 %32
    • Remove the two remaining ribbon cables.

    • Remove the screws holding in the protective cover underneath the keyboard.

    • Pop the cover off using any flat metal tool, starting with where you took out the optical drive

    • It will be very sticky near the edge closest to the screen. This is where the sticker in the battery compartment is stuck to. just use a little more force.

  10. HP Pavilion G6-1d16dx Motherboard Replacement: passo 10, imagem 1 %32
    • Unplug the ribbon cable on the right side of the motherboard.

  11. HP Pavilion G6-1d16dx Motherboard Replacement: passo 11, imagem 1 %32 HP Pavilion G6-1d16dx Motherboard Replacement: passo 11, imagem 2 %32
    • Underneath the computer, unscrew the hard drive connector screw, and pop out the hard drive plug-in.

  12. HP Pavilion G6-1d16dx Motherboard Replacement: passo 12, imagem 1 %32
    • Unscrew all mother board screws and lift the motherboard out of the body.

    • For replacing the screen hinges and screen, skip this step

Conclusão

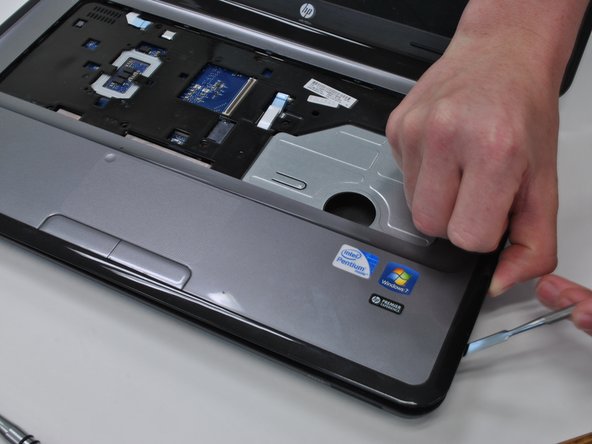
To reassemble your device, follow these instructions in reverse order.

4 outras pessoas executaram este guia.

0 comentários

Adicione um comentário

Exibir estatísticas:

Últimas 24 horas: 0

Últimos 7 dias: 0

Últimos 30 dias: 19

Duração total: 2,108