Esta versão pode conter edições incorretas. Mude para o último instantâneo verificado.
O que você precisa
-
Este passo não foi traduzido. Ajude a traduzi-lo
-
Start with the bottom of the laptop facing up.
-
Locate the small panel under the battery, which houses the wifi adapter, and unscrew the one 5mm Phillips #0 screw holding the panel in place.
-
Remove the panel and set it aside.
-
-
-
Este passo não foi traduzido. Ajude a traduzi-lo
-
Unscrew the two 3mm Phillips #0 screw which is located at the corners of the wifi adapter.
-
-
Este passo não foi traduzido. Ajude a traduzi-lo
-
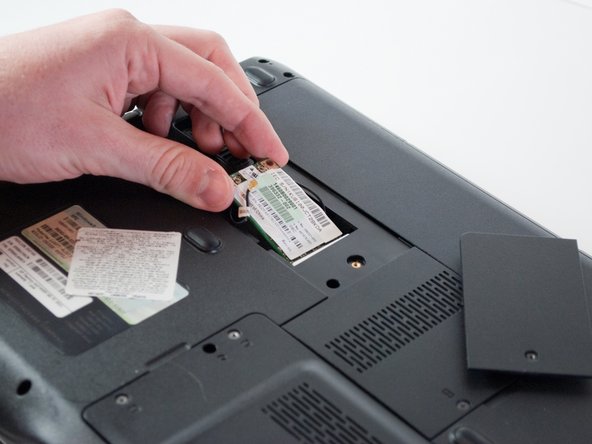
Pull the 2 black wires with the gold pieces out of the wifi adapter.
-
The wifi adapter is now free to be removed.
-


Cancelar: não concluí este guia.
Uma outra pessoa concluiu este guia.
Equipe

Cal Poly, Team 13-66, Johann Spring 2013 Membro de Cal Poly, Team 13-66, Johann Spring 2013
CPSU-JOHANN-S13S13G66
Membros da 3
Autoria de 6 guias