Esta versão pode conter edições incorretas. Mude para o último instantâneo verificado.
O que você precisa
-
Este passo não foi traduzido. Ajude a traduzi-lo
-
Locate the battery compartment at the rear of the device.
-
There is a slider button located under the left side of the battery compartment. It is indicated by a battery symbol. Move the slider to the left and lift the battery out.
-
-
-
Este passo não foi traduzido. Ajude a traduzi-lo
-
Remove the 6 rubber screw covers from the screen panel using the plastic opener tools by applying firm pressure to the edges.
-
-
Este passo não foi traduzido. Ajude a traduzi-lo
-
Remove the 4 M2.5x4-Lg #0 Phillips screws from the top of the screen panel.
-
Remove the 2 M2.5x8-Lg #1 Phillips screws from the bottom of the screen panel.
-
-
Este passo não foi traduzido. Ajude a traduzi-lo
-
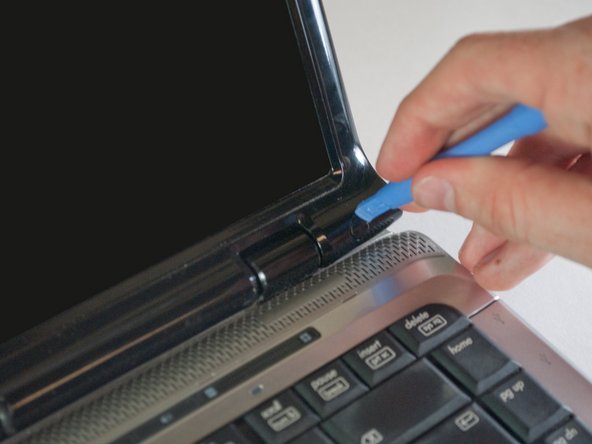
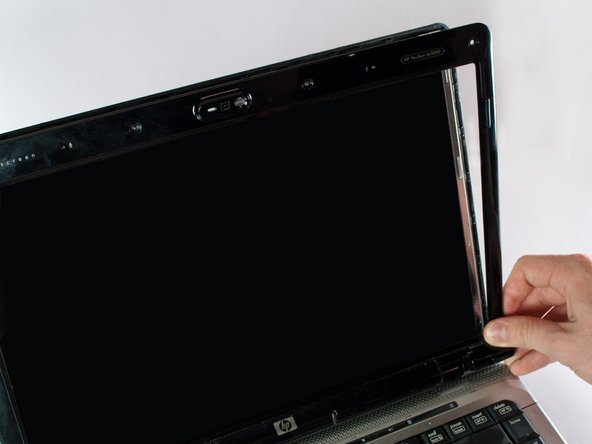
Slide a plastic opener tool along the outside edges of the front screen panel to start to separate it from the back screen panel.
-
Once it has started to separate, gently pull off the screen panel by working along the edge, and set it aside.
-
-
Este passo não foi traduzido. Ajude a traduzi-lo
-
Locate the screw on the left side of the cameras mounting bracket.
-
Remove the M2.5x4-Lg #0 Phillips screw
-
-
Este passo não foi traduzido. Ajude a traduzi-lo
-
Pull the camera from the back screen panel and rotate it so you are looking at the back.
-
Remove the 2 M2x3-Lg #00 Phillips screws and place the mounting bracket aside.
-
-
Este passo não foi traduzido. Ajude a traduzi-lo
-
Disconnect the cable on the right side of the camera board by pulling firmly on the connector.
-


Cancelar: não concluí este guia.
Uma outra pessoa concluiu este guia.
Equipe

UMass Dartmouth, Team 6-5, Vijaybhaskar Spring 2014 Membro de UMass Dartmouth, Team 6-5, Vijaybhaskar Spring 2014
UMASSD-VIJAYBHASKAR-S14S6G5
Membros da 3
Autoria de 3 guias