Ir para o conteúdo principal

Esta versão pode conter edições incorretas. Mude para o último instantâneo verificado.

Pré-requisito somente
Este guia destina-se apenas a ser usado como pré-requisito para outros guias. É incompleto por si só.

O que você precisa

  1. Este passo não foi traduzido. Ajude a traduzi-lo

    : passo 1, imagem 1 %32
    • If present, carefully peel the piece of tape covering the WWAN board.

  2. Este passo não foi traduzido. Ajude a traduzi-lo

    : passo 2, imagem 1 %32 : passo 2, imagem 2 %32
    • Pry the WWAN antenna connectors (2 total) up off the WWAN board.

    • During reassembly, remember to correctly connect the antenna cables to their respective terminals. The red labeled antenna is connected to the "MAIN" terminal and the blue labeled antenna is connected to the "AUX" terminal.

  3. Este passo não foi traduzido. Ajude a traduzi-lo

    : passo 3, imagem 1 %32 : passo 3, imagem 2 %32 : passo 3, imagem 3 %32
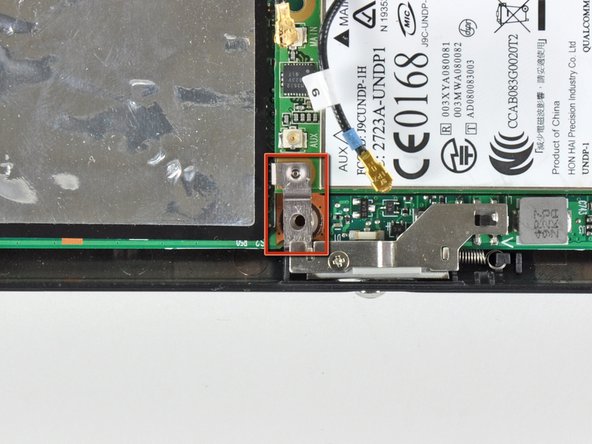
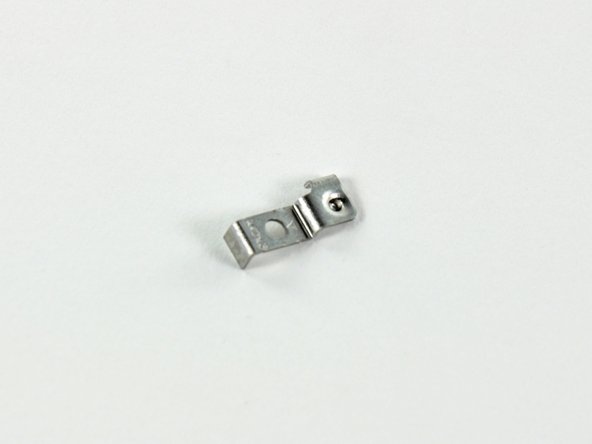
    • Remove the single 3 mm Phillips screw securing the WWAN metal bracket and WWAN board to the motherboard.

    • During reassembly, before securing the WWAN board to the upper case, be sure the metal bracket is correctly placed (as highlighted in the second picture).

    • Be cautious of the metal bracket's displacement. It can easily become lost during disassembly.

  4. Este passo não foi traduzido. Ajude a traduzi-lo

    : passo 4, imagem 1 %32 : passo 4, imagem 2 %32
    • Upon removing the Phillips screw that secures the WWAN board to the motherboard, the WWAN board should pop up from its left side.

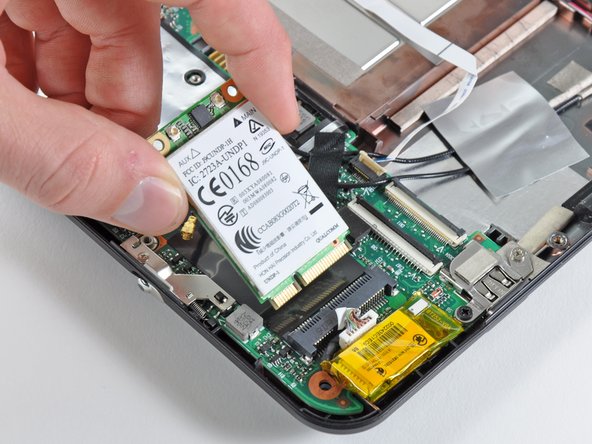
    • Grasp the WWAN board and pull it straight out of its socket on the motherboard.

Linha de Chegada

0 comentários

Adicione um comentário

Exibir estatísticas:

Últimas 24 horas: 2

Últimos 7 dias: 2

Últimos 30 dias: 2

Duração total: 50