Ir para o conteúdo principal

HP Envy m6-p114dx Hard drive Replacement

O que você precisa

  1. HP Envy m6-p114dx Hard drive Replacement, Back Panel: passo 1, imagem 1 %32 HP Envy m6-p114dx Hard drive Replacement, Back Panel: passo 1, imagem 2 %32 HP Envy m6-p114dx Hard drive Replacement, Back Panel: passo 1, imagem 3 %32
    • Power the device off, unplug it, and ground yourself.

  2. HP Envy m6-p114dx Hard drive Replacement: passo 2, imagem 1 %32
    • Remove the twelve screws in the back case using a Phillips #1 screwdriver.

  3. HP Envy m6-p114dx Hard drive Replacement: passo 3, imagem 1 %32
    • Carefully wedge an iFixit opening tool under the cover and slide it alongside the case to ensure that all clips are un-clipped.

  4. HP Envy m6-p114dx Hard drive Replacement, Battery: passo 4, imagem 1 %32 HP Envy m6-p114dx Hard drive Replacement, Battery: passo 4, imagem 2 %32
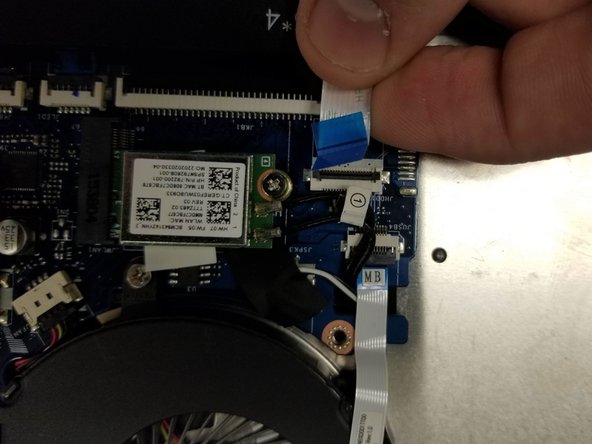
    • Remove the cable connecting the hard drive to the motherboard by carefully lifting the black tab, then pulling out the disconnected ribbon cable.

  5. HP Envy m6-p114dx Hard drive Replacement: passo 5, imagem 1 %32 HP Envy m6-p114dx Hard drive Replacement: passo 5, imagem 2 %32
    • Remove the cable connecting the battery to the motherboard by gripping the fabric and pulling downward.

    • The cable is connected next to the RAM cards.

  6. HP Envy m6-p114dx Hard drive Replacement: passo 6, imagem 1 %32 HP Envy m6-p114dx Hard drive Replacement: passo 6, imagem 2 %32
    • Remove the six screws that hold the battery down with a Phillips #0 screwdriver.

    • Once the screws are removed you should be able to easily lift up on the battery to remove it. (You may need to detach the ribbon cable glued to the battery )

  7. HP Envy m6-p114dx Hard drive Replacement, Speaker: passo 7, imagem 1 %32 HP Envy m6-p114dx Hard drive Replacement, Speaker: passo 7, imagem 2 %32 HP Envy m6-p114dx Hard drive Replacement, Speaker: passo 7, imagem 3 %32
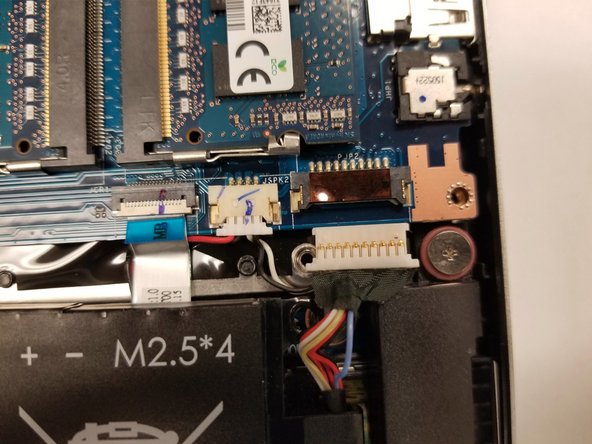
    • Unscrew the two screws that have a pink spacer below them with a Phillips #0 screwdriver.

    • Lift directly up to remove the main speaker.

    • Gently pull the wire out of the plastic track that it's set in.

  8. HP Envy m6-p114dx Hard drive Replacement: passo 8, imagem 1 %32
    • Follow the cable around the inside of the case and remove the cable to the main board

    • Once this is removed you can fully remove the speaker!

  9. HP Envy m6-p114dx Hard drive Replacement, Hard drive: passo 9, imagem 1 %32 HP Envy m6-p114dx Hard drive Replacement, Hard drive: passo 9, imagem 2 %32 HP Envy m6-p114dx Hard drive Replacement, Hard drive: passo 9, imagem 3 %32
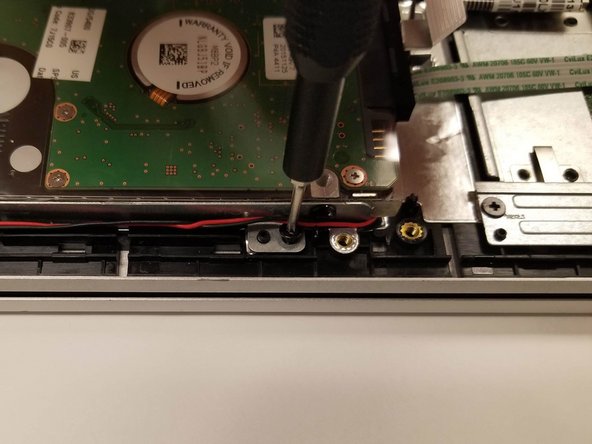
    • There are wires over some of the screws, use a thin implement to get the wires out of their track.

    • Unplug the SATA cable from the motherboard (covered in the teardown for the battery).
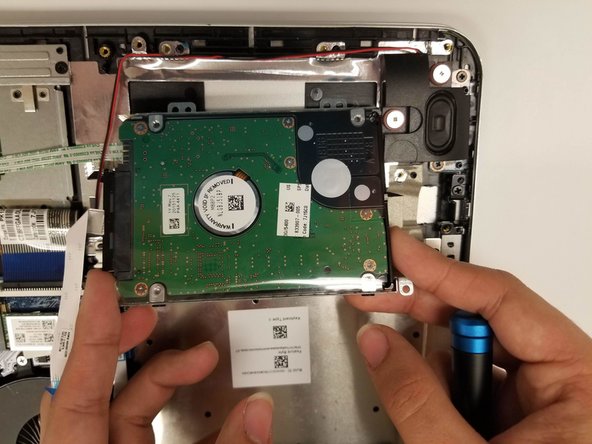
    • Remove the 4 screws

    • Remove the Hard drive from the unit

Conclusão

To reassemble your device, follow these instructions in reverse order.

Uma outra pessoa concluiu este guia.

Taylor Cheney

Membro desde: 08/26/19

527 Reputação

Autoria de 4 guias

Equipe

Gateway, Team S1-G1, Saknee Fall 2019 Membro de Gateway, Team S1-G1, Saknee Fall 2019

GCC-SAKNEE-F19S1G1

Membros da 2

Autoria de 5 guias

Um comentário

Thanks for this guide. It really helped out and drastically sped up the whole process.

I needed to install a 2.5" SSD and new RAM to my girlfriend's machine and have never opened up a HP laptop.

Appreciate all the effort that went in to this!

Matthew D. H. - Responder

Adicione um comentário

Exibir estatísticas:

Últimas 24 horas: 2

Últimos 7 dias: 4

Últimos 30 dias: 8

Duração total: 545