Ir para o conteúdo principal

Este guia tem alterações mais recentes. Mudar para a última versão não verificada.

HP Envy dv6-7363cl Fan Replacement

O que você precisa

  1. HP Envy dv6-7363cl Fan Replacement, Battery: passo 1, imagem 1 %32
    • Flip the device upside-down so that its bottom is facing up.

  2. HP Envy dv6-7363cl Fan Replacement: passo 2, imagem 1 %32
    • Push the lever underneath the battery to the left.

  3. HP Envy dv6-7363cl Fan Replacement: passo 3, imagem 1 %32 HP Envy dv6-7363cl Fan Replacement: passo 3, imagem 2 %32
    • Lift the battery up out of its socket.

  4. HP Envy dv6-7363cl Fan Replacement, Fan: passo 4, imagem 1 %32
    • Remove the circled screws from the back panel.

  5. HP Envy dv6-7363cl Fan Replacement: passo 5, imagem 1 %32
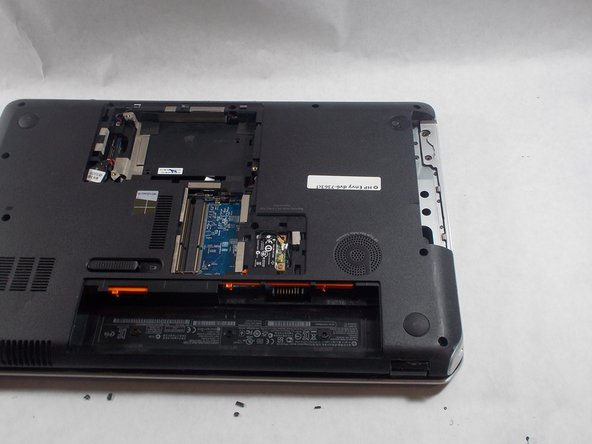
    • Lift and remove the back panel of the device.

    There is an additional screw behind the back panel that secures the keyboard.

    Darrel Wallace - Responder

  6. HP Envy dv6-7363cl Fan Replacement: passo 6, imagem 1 %32 HP Envy dv6-7363cl Fan Replacement: passo 6, imagem 2 %32 HP Envy dv6-7363cl Fan Replacement: passo 6, imagem 3 %32
    • Flip the laptop back over and carefully pry the keyboard frame out of the device.

    It should be noted that the frame is only the upper black part of the keyboard strata. Additionally, there are tabs that hinge the entire frame at the side closest to the camera. Picture 3 does a good job showing this.

    zabadoo - Responder

  7. HP Envy dv6-7363cl Fan Replacement: passo 7, imagem 1 %32 HP Envy dv6-7363cl Fan Replacement: passo 7, imagem 2 %32 HP Envy dv6-7363cl Fan Replacement: passo 7, imagem 3 %32
    • Lift the keyboard out of the device and carefully remove ribbon cables.

    If you are unsure of how ribbon cables attach, the linked youtube video may be helpful (you’ll only find the first type if memory serves).

    https://www.youtube.com/watch?v=3AH3FCj4...

    zabadoo - Responder

  8. HP Envy dv6-7363cl Fan Replacement: passo 8, imagem 1 %32 HP Envy dv6-7363cl Fan Replacement: passo 8, imagem 2 %32 HP Envy dv6-7363cl Fan Replacement: passo 8, imagem 3 %32
    • Flip device onto its back, remove disk tray and circled screw.

    One screw that holds the drive in place needs to be removed first.

    Muadh Ali - Responder

  9. HP Envy dv6-7363cl Fan Replacement: passo 9, imagem 1 %32 HP Envy dv6-7363cl Fan Replacement: passo 9, imagem 2 %32
    • Flip device right-side-up and remove ribbon cables from plastic cover beneath keyboard. Remove plastic cover from device.

    Once you remove the keyboard, there should be cutouts that allow you to disconnect the cables without having to lift up on the top case.

    techr - Responder

  10. HP Envy dv6-7363cl Fan Replacement: passo 10, imagem 1 %32 HP Envy dv6-7363cl Fan Replacement: passo 10, imagem 2 %32 HP Envy dv6-7363cl Fan Replacement: passo 10, imagem 3 %32
    • Disconnect red cord from DVD drive and remove DVD drive.

  11. HP Envy dv6-7363cl Fan Replacement: passo 11, imagem 1 %32 HP Envy dv6-7363cl Fan Replacement: passo 11, imagem 2 %32 HP Envy dv6-7363cl Fan Replacement: passo 11, imagem 3 %32
    • Remove circled screws.

  12. HP Envy dv6-7363cl Fan Replacement: passo 12, imagem 1 %32 HP Envy dv6-7363cl Fan Replacement: passo 12, imagem 2 %32
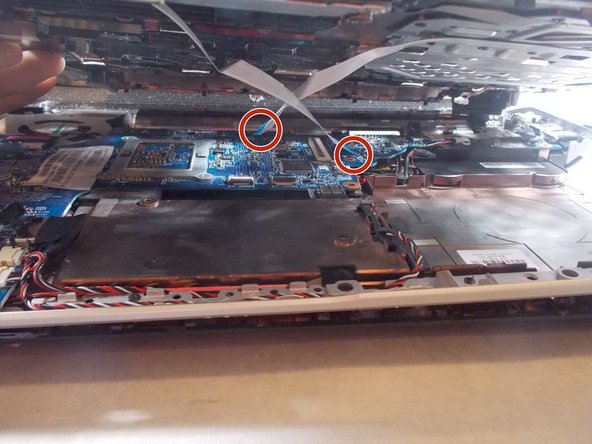
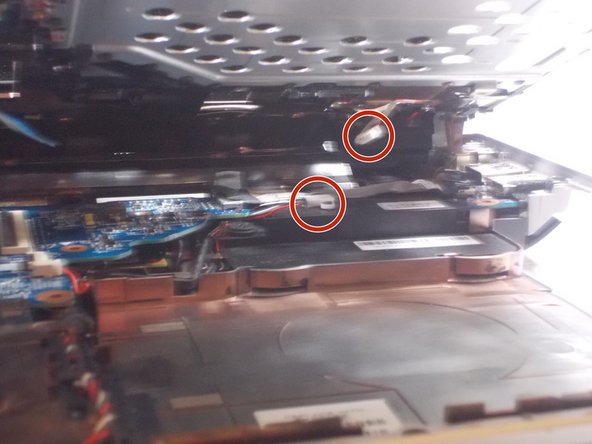
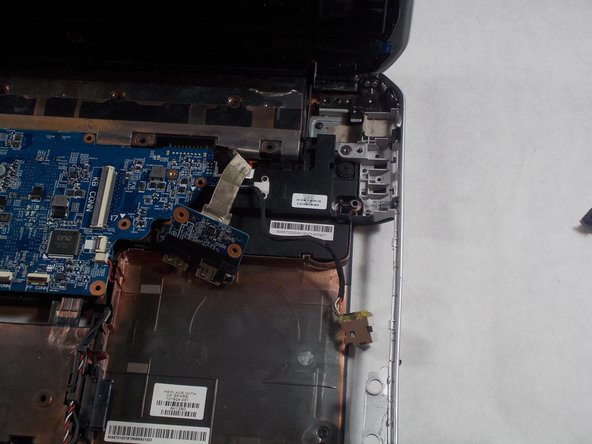
    • Disconnect red and white cords from blue circuit board.

    There are a few other cables to disconnect at this step. Next to the red and white cords you just disconnected, there’s the black and sliver which seems to run to the right. Under the motherboard, there is the SATA cable you need to disconnect. Finally, the LCD cable, which runs above the fan. Carefully life up on it.

    techr - Responder

  13. HP Envy dv6-7363cl Fan Replacement: passo 13, imagem 1 %32 HP Envy dv6-7363cl Fan Replacement: passo 13, imagem 2 %32 HP Envy dv6-7363cl Fan Replacement: passo 13, imagem 3 %32
    • Gently pull circled pieces from their holsters.

  14. HP Envy dv6-7363cl Fan Replacement: passo 14, imagem 1 %32 HP Envy dv6-7363cl Fan Replacement: passo 14, imagem 2 %32
    • Turn device onto its back and remove circled screws from Wi-Fi card. Flip device back over and unscrew disk reader (circled in green).

  15. HP Envy dv6-7363cl Fan Replacement: passo 15, imagem 1 %32
    • Remove circled screws from blue circuit board and lift fan assembly out of device.

    Does the fan come with the copper part on the fan. Can you show us the picture when you lift it out? and how to re-attach the fan to the copper? Thank you. Ann

    Ann - Responder

Conclusão

To reassemble your device, follow these instructions in reverse order.

Uma outra pessoa concluiu este guia.

dylananthony

Membro desde: 10/20/16

564 Reputação

Autoria de 3 guias

Equipe

2 comentários

My laptop is a slightly different model and everything provided by the author is likely accurate for their model. I only mention this to caution that your repair may be slightly different depending on your specific model. Mine was different in a few areas though held mostly true with my dv6t-7000. Cheers!

zabadoo - Responder

Salom menga shu modeldagi kompyuterni ustgi qopqogʻini topib pochta qila olasizmi iloji boʻlsa iltimos nomerim +998991768069 shu nomerga telfon qib bogʻlanishiz mumkin men bilan

Shamsullo Quzratov - Responder

Adicione um comentário

Exibir estatísticas:

Últimas 24 horas: 0

Últimos 7 dias: 4

Últimos 30 dias: 30

Duração total: 4,343