Ir para o conteúdo principal

HP Envy 5660 Scanner Piece Replacement

O que você precisa

  1. HP Envy 5660 Scanner Piece Replacement, Scanner Glass: passo 1, imagem 1 %32
    • Open the cartridge access area.

  2. HP Envy 5660 Scanner Piece Replacement: passo 2, imagem 1 %32
    • Remove the three 11.5 mm screws with a T10 bit.

  3. HP Envy 5660 Scanner Piece Replacement: passo 3, imagem 1 %32 HP Envy 5660 Scanner Piece Replacement: passo 3, imagem 2 %32 HP Envy 5660 Scanner Piece Replacement: passo 3, imagem 3 %32
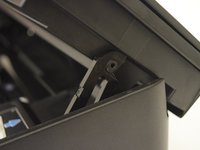
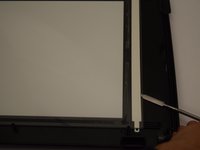
    • Locate the cover hinge on the right side of the printer.

    • Pull the hinge off of the scanner to allow the scanner to open to 90 degress.

  4. HP Envy 5660 Scanner Piece Replacement: passo 4, imagem 1 %32 HP Envy 5660 Scanner Piece Replacement: passo 4, imagem 2 %32
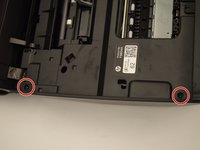
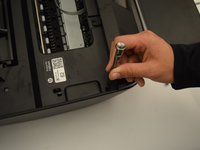
    • Remove the 12 mm screws on the left side of the printer with a T10 bit.

  5. HP Envy 5660 Scanner Piece Replacement: passo 5, imagem 1 %32 HP Envy 5660 Scanner Piece Replacement: passo 5, imagem 2 %32
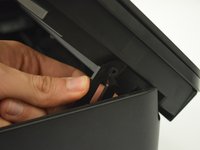
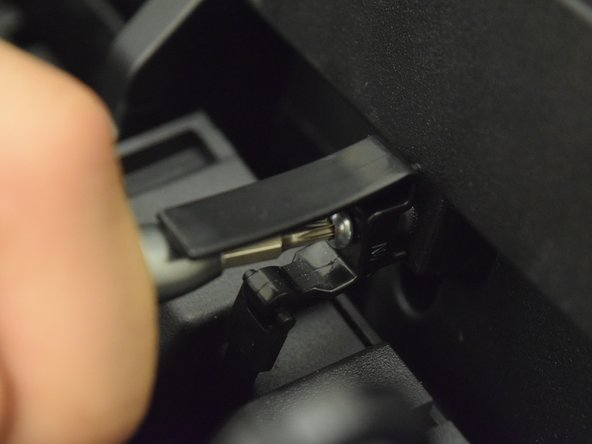
    • Remove the 11.5 mm screw with a T10 bit to release the spring-loaded hinge.

    • Since this is a compression spring, the hinge will snap downwards as soon as it is loosened.

  6. HP Envy 5660 Scanner Piece Replacement: passo 6, imagem 1 %32 HP Envy 5660 Scanner Piece Replacement: passo 6, imagem 2 %32 HP Envy 5660 Scanner Piece Replacement: passo 6, imagem 3 %32
    • Pull the plastic side cover off of the printer.

    • You may need to lift the printer and push the cover downwards as it is latched onto the bottom of the printer.

    • Plastic opening tools or a metal spudger may also be used.

  7. HP Envy 5660 Scanner Piece Replacement: passo 7, imagem 1 %32
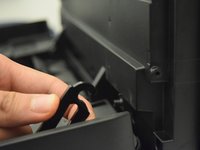
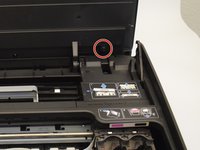
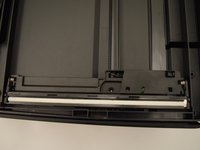
    • Remove the five 11.5 mm screws located at the bottom of the scanner.

    • Steps 3-6 were intended to create easier access to these screws. However, they will still be difficult to reach.

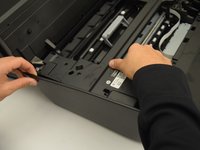
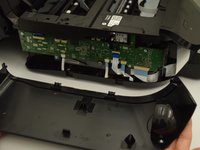
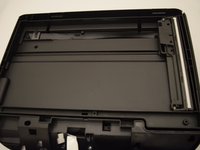
    • The top of the scanner will now easily pull off.

  8. HP Envy 5660 Scanner Piece Replacement: passo 8, imagem 1 %32 HP Envy 5660 Scanner Piece Replacement: passo 8, imagem 2 %32
    • Pry the old scanning glass up with a metal spudger.

    • There are adhesives under the scanning glass. Be careful not to break the glass while removing it.

  9. HP Envy 5660 Scanner Piece Replacement, Scanner Piece: passo 9, imagem 1 %32 HP Envy 5660 Scanner Piece Replacement, Scanner Piece: passo 9, imagem 2 %32 HP Envy 5660 Scanner Piece Replacement, Scanner Piece: passo 9, imagem 3 %32
    • The scanning piece is located in the bottom half of the scanner that was not separated from the printer.

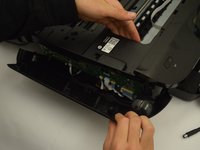
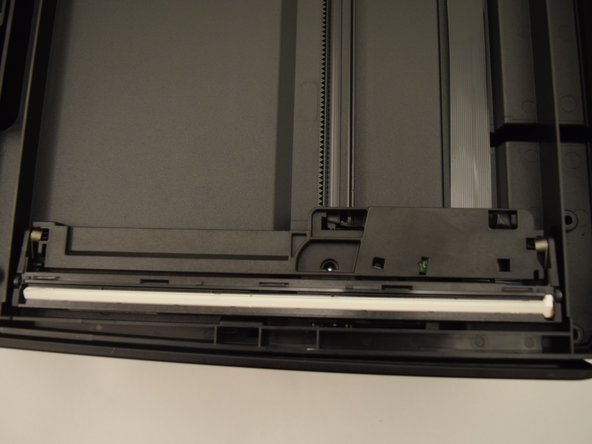
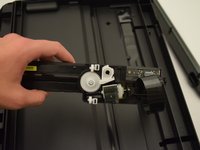
    • Lift the scanning piece and detach the ribbon cable by gently pulling on it.

Conclusão

To reassemble your device, follow these instructions in reverse order.

Uma outra pessoa concluiu este guia.

Ryan Steakley

Membro desde: 01/23/18

781 Reputação

Autoria de 5 guias

Equipe

Cal Poly, Team S1-G6, Livingston Winter 2018 Membro de Cal Poly, Team S1-G6, Livingston Winter 2018

CPSU-LIVINGSTON-W18S1G6

Membros da 4

Autoria de 10 guias

0 comentários

Adicione um comentário

Exibir estatísticas:

Últimas 24 horas: 0

Últimos 7 dias: 1

Últimos 30 dias: 8

Duração total: 890