Esta versão pode conter edições incorretas. Mude para o último instantâneo verificado.
O que você precisa
-
Este passo não foi traduzido. Ajude a traduzi-lo
-
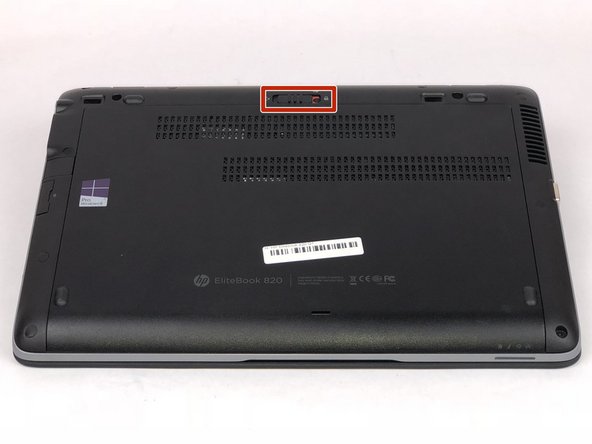
Turn over laptop so that the bottom is showing.
-
Unlock the latch.
-
-
Este passo não foi traduzido. Ajude a traduzi-lo
-
Remove the back cover and you will then be able to see the battery.
-
-
Este passo não foi traduzido. Ajude a traduzi-lo
-
Unlatch the two latches securing the battery in the case.
-
-
Este passo não foi traduzido. Ajude a traduzi-lo
-
Use a plastic opening tool to lift and remove the battery.
-
-
-
Este passo não foi traduzido. Ajude a traduzi-lo
-
Remove the two Phillips #0 screws securing the keyboard to the laptop.
-
Turn the laptop over and lift the display to reveal the keyboard.
-
-
Este passo não foi traduzido. Ajude a traduzi-lo
-
Insert the plastic spudger between the keyboard and the housing.
-
-
Este passo não foi traduzido. Ajude a traduzi-lo
-
4 tabs are located at the top of the keyboard, which lock it in place.
-
Pry and twist the spudger along the top of the keyboard until each tab is released.
-
-
Este passo não foi traduzido. Ajude a traduzi-lo
-
Flip up the connecting flap on each of the three ribbon cables.
-
-
Este passo não foi traduzido. Ajude a traduzi-lo
-
Remove each of the three cables by gently pulling them from their respective connectors.
-


Cancelar: não concluí este guia.
4 outras pessoas executaram este guia.
Equipe

IUPUI, Team S1-G2, Harley Fall 2018 Membro de IUPUI, Team S1-G2, Harley Fall 2018
IUPUI-HARLEY-F18S1G2
Membros da 2
Autoria de 4 guias
Um comentário
Good guide. Thanks!
But you missed step 1. Remove two screws that hold the keyboard in place