Ir para o conteúdo principal

HP ElitePad 900 LCD Replacement

O que você precisa

  1. HP ElitePad 900 LCD Replacement, Front Panel Assembly: passo 1, imagem 1 %32
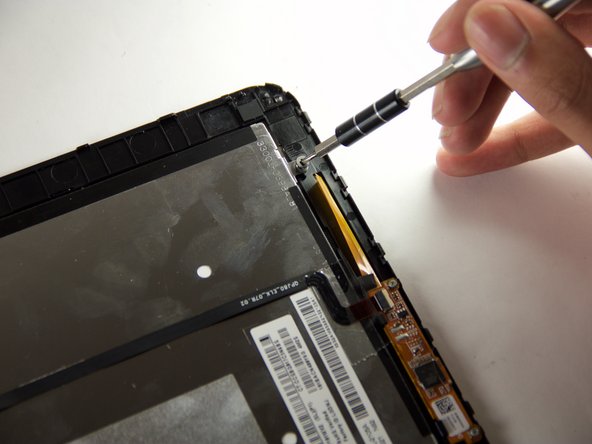
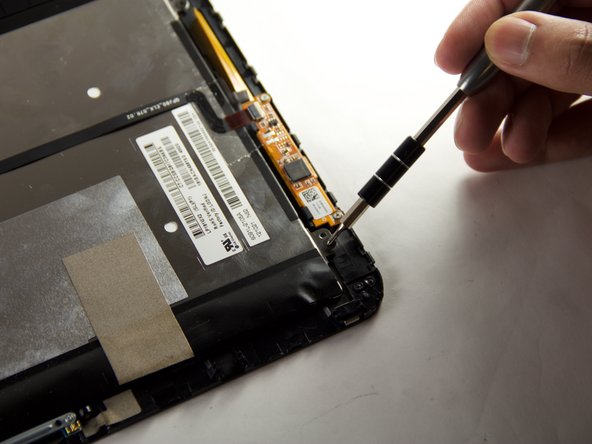
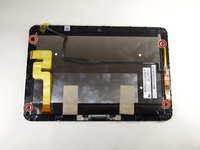
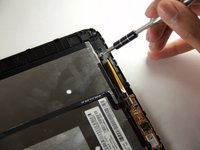
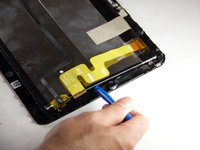
    • Unscrew the two 2.8mm Phillips #000 screws near the power connector.

  2. HP ElitePad 900 LCD Replacement: passo 2, imagem 1 %32 HP ElitePad 900 LCD Replacement: passo 2, imagem 2 %32
    • Use a suction cup to pull the display assembly up.

  3. HP ElitePad 900 LCD Replacement: passo 3, imagem 1 %32 HP ElitePad 900 LCD Replacement: passo 3, imagem 2 %32
    • Use the tip of a spudger to disconnect the two display ZIF connectors.

  4. HP ElitePad 900 LCD Replacement, LCD: passo 4, imagem 1 %32 HP ElitePad 900 LCD Replacement, LCD: passo 4, imagem 2 %32 HP ElitePad 900 LCD Replacement, LCD: passo 4, imagem 3 %32
    • Remove the four 1.6mm Phillips #000 screws securing the LCD to the digitizer.

  5. HP ElitePad 900 LCD Replacement: passo 5, imagem 1 %32
    • Use the tip of a spudger to disconnect the ribbon cable ZIF connector.

  6. HP ElitePad 900 LCD Replacement: passo 6, imagem 1 %32 HP ElitePad 900 LCD Replacement: passo 6, imagem 2 %32 HP ElitePad 900 LCD Replacement: passo 6, imagem 3 %32
    • Use a plastic opening tool to separate the LCD from the digitizer.

Conclusão

To reassemble your device, follow these instructions in reverse order.

2 outras pessoas executaram este guia.

Kyle Marques

Membro desde: 09/03/15

889 Reputação

Autoria de 6 guias

Equipe

USF Tampa, Team 12-4, Blackwell Fall 2015 Membro de USF Tampa, Team 12-4, Blackwell Fall 2015

USFT-BLACKWELL-F15S12G4

Membros da 4

Autoria de 6 guias

0 comentários

Adicione um comentário

Exibir estatísticas:

Últimas 24 horas: 1

Últimos 7 dias: 3

Últimos 30 dias: 7

Duração total: 1,327