Ir para o conteúdo principal

HP Elite x2 G1 1012 Battery Replacement

O que você precisa

  1. HP Elite x2 G1 1012 Battery Replacement, Display: passo 1, imagem 1 %32
    • Be sure to power off and unplug your device before you begin your repair.

    • With the screen face down, lift up the stand as far as it goes.

    • Make sure not to force it past the resting point.

  2. HP Elite x2 G1 1012 Battery Replacement: passo 2, imagem 1 %32 HP Elite x2 G1 1012 Battery Replacement: passo 2, imagem 2 %32
    • Use a T5 driver to remove the six screws on the back of the tablet.

  3. HP Elite x2 G1 1012 Battery Replacement: passo 3, imagem 1 %32
    • After removing the screws, delicately close the stand.

    • Flip the tablet on its back so that the screen is facing up.

  4. HP Elite x2 G1 1012 Battery Replacement: passo 4, imagem 1 %32 HP Elite x2 G1 1012 Battery Replacement: passo 4, imagem 2 %32
    • Use the suction cup to carefully separate the screen from the device. Pull upwards with a fluid and smooth motion.

    • Do not lift too fast! There will still be wires connecting the screen to the device. Make sure they are not tampered with.

  5. HP Elite x2 G1 1012 Battery Replacement: passo 5, imagem 1 %32 HP Elite x2 G1 1012 Battery Replacement: passo 5, imagem 2 %32 HP Elite x2 G1 1012 Battery Replacement: passo 5, imagem 3 %32
    • Remove the tape on the lower left side of the screen.

    • Underneath the tape, disconnect the LCM cable, the larger wire that was underneath the tape, from the back of the tablet screen.

  6. HP Elite x2 G1 1012 Battery Replacement: passo 6, imagem 1 %32 HP Elite x2 G1 1012 Battery Replacement: passo 6, imagem 2 %32
    • Disconnect the flex cable from the device using the spudger.

    • Remove the Display Assembly from the device.

  7. HP Elite x2 G1 1012 Battery Replacement, Battery: passo 7, imagem 1 %32
    • Use a Phillips #00 screwdriver to remove the seven screws holding the battery in place.

    • Five 1.6x2.5 mm and two 1.6x2 screws should be on the battery.

  8. HP Elite x2 G1 1012 Battery Replacement: passo 8, imagem 1 %32 HP Elite x2 G1 1012 Battery Replacement: passo 8, imagem 2 %32
    • Disconnect the red, white, and black wires and remove the battery from the device.

    • Make sure to properly dispose of the dead battery.

Conclusão

To reassemble your device, follow these instructions in reverse order.

7 outras pessoas executaram este guia.

Colin Mika

Membro desde: 04/19/18

943 Reputação

Autoria de 6 guias

Equipe

Cal Poly, Team S24-G7, Maness Spring 2018 Membro de Cal Poly, Team S24-G7, Maness Spring 2018

CPSU-MANESS-S18S24G7

Membros da 4

Autoria de 6 guias

5 comentários

Thanks a lot for the information!

Santi Costa - Responder

Thanks for the help. Successfully change my battery.

Christopher Rath - Responder

One problem that people might run into is the device not recognizing the battery firmware if it is an aftermarket battery and not a genuine HP one. Where the device will work but only if it is plugged into the charger. It even shows the battery charging but very slowly. If you disconnect the charger the device will instantly shut off. What is the fix for that?

Adam Stansbery - Responder

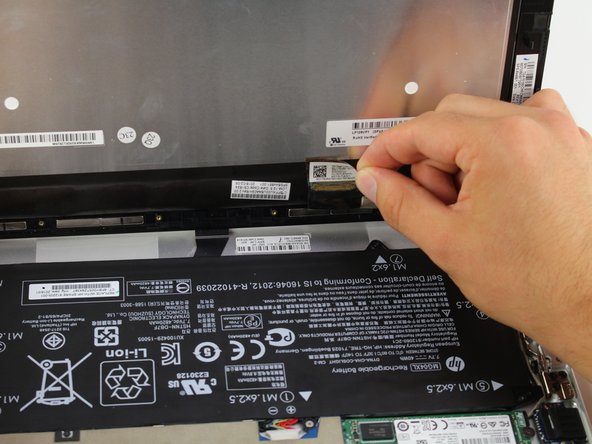
Why must the flex cable be disconnected? If you are able to secure the screen in proper position it does not appear that it would interfere with the battery change.

Bart Farkus - Responder

Na vervanging batterij aangesloten op charger, witte led knippert enkele malen en gaat dan uit. De batterij indicator in windows geeft niet aan dat er geladen wordt. Wat zou de oorzaak kunnen zijn?

Tim Röttger - Responder

Adicione um comentário

Exibir estatísticas:

Últimas 24 horas: 4

Últimos 7 dias: 28

Últimos 30 dias: 112

Duração total: 9,912