Esta versão pode conter edições incorretas. Mude para o último instantâneo verificado.
O que você precisa
-
Este passo não foi traduzido. Ajude a traduzi-lo
-
Open the front access panel by placing your finger in the front slot and pulling gently.
-
-
Este passo não foi traduzido. Ajude a traduzi-lo
-
Open the protective lid that is covering the glass. Press gently against the base of the panel to remove the lid from the rest of the printer.
-
-
Este passo não foi traduzido. Ajude a traduzi-lo
-
Carefully lift the top panel off of the printer.
-
Do not tear or damage the two cables that connect the top lid to the motherboard.
-
-
-
Este passo não foi traduzido. Ajude a traduzi-lo
-
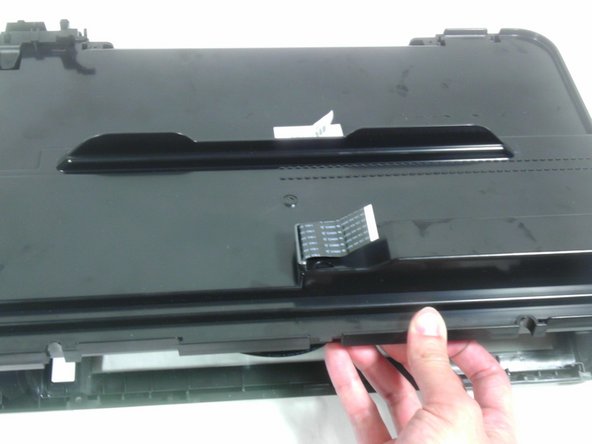
Remove the two cables by gripping each one close to their connection ports on the motherboard and gently disconnecting them.
-
-
Este passo não foi traduzido. Ajude a traduzi-lo
-
Remove one 9mm T10 Torx screw from the back of the printer lid.
-
-
Este passo não foi traduzido. Ajude a traduzi-lo
-
Press outward on the plastic tab holding the back panel in place.
-
-
Este passo não foi traduzido. Ajude a traduzi-lo
-
Pull the back panel towards you and lift it away from the rest of the printer cover.
-
-
Este passo não foi traduzido. Ajude a traduzi-lo
-
Remove one 9mm T10 Torx screw from the white retaining tab.
-
-
Este passo não foi traduzido. Ajude a traduzi-lo
-
To remove the scanner glass, gently push it towards you.
-
Slide glass panel until it is completely removed from printer.
-


Cancelar: não concluí este guia.
3 outras pessoas executaram este guia.
Equipe

Cal Poly, Team 18-35, Regan Winter 2013 Membro de Cal Poly, Team 18-35, Regan Winter 2013
CPSU-REGAN-W13S18G35
Membros da 5
Autoria de 15 guias