Introdução
If the cooling system in your HP Chromebook 11a-nb0013dx is not functioning properly your Chromebook may be hot to the touch, have performance issues, or shutdown unexpectedly.
In this Chromebook the cooling system is located inside the motherboard. Because of this, a damaged motherboard can cause overheating. If reapplying the thermal paste does not solve the overheating problem in your Chromebook, the mother board may be damaged and needs to be relaced.
Before begining this guide make sure to power off your Chromebook completely.
O que você precisa
-
-
Position the Chromebook with the bottom facing up.
-
Locate the 8 screws on the back of the Chromebook.
-
Next, remove the 8 (8mm) screws using the phillips screw driver with the #0 bit.
-
-
-
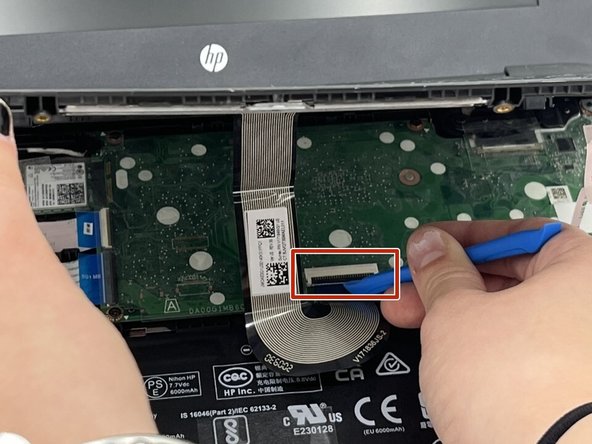
Gentally lift up the keyboard and locate the two ribbons attatched to the motherboard.
-
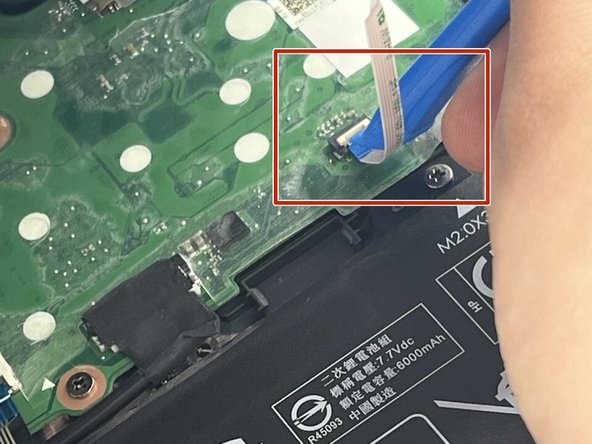
Use the IFixit Opening Tool to lift the two tabs located on the zero insertion force (ZIF) connectors.
-
To do this, use the tip of the IFixit Opening Tool to flip up the small locking flap and gently pull the ribbon out.
-
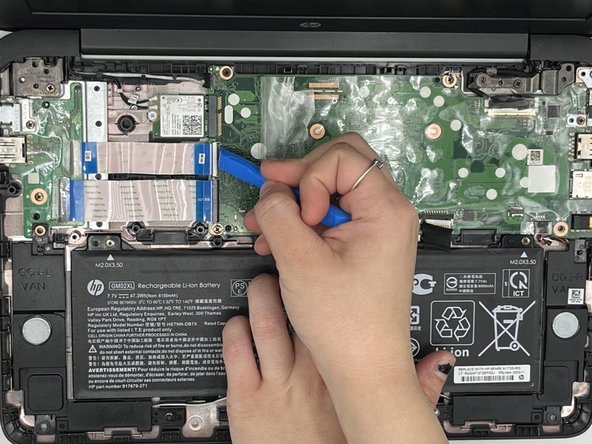
Then, fully remove the keyboard and set aside.
-
-
-
-
Locate the bundled cable connector connecting the battery to the motherboard.
-
Use the precision tweezers to peel back the black tape covering the bundled cable connector.
-
Next, use the precision tweezers to grab the edge of the connector and slowly pull the cable towards you.
-
-
-
Locate the bundled cable connector connecting the speakers to the motherboard.
-
Using the precision tweezers, peel back the plastic that is covering the bundled cable connector.
-
Then, use the precision tweezers to grab the edges of the bundled cable connector and remove by pulling towards the battery.
-
-
-
Locate the ribbons and their ZIF connectors connecting the motherboard and the daughterboard.
-
Use the precision tweezers to peel back the plastic and uncover the ZIF connectors located at the end of each ribbon.
-
Use the IFixit Opening Tool to flip up the locking flap holding the ribons in place.
-
Then, gently pull out each ribon.
-
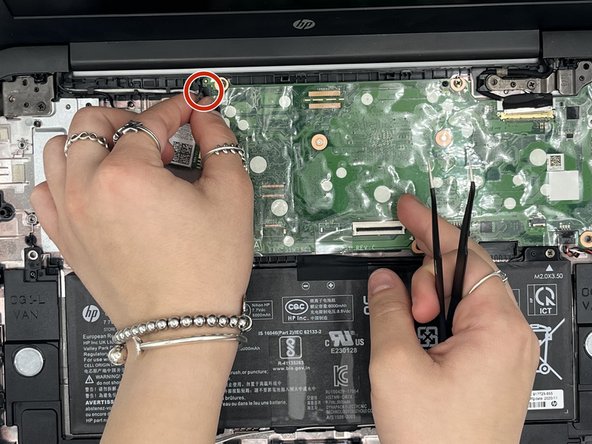
On the top left corner of the motherboard, gently unplug the bundled cable from the motherboard.
-


To reassemble your device, follow these instructions in reverse order.
To reassemble your device, follow these instructions in reverse order.
Equipe

University of North Texas, Team 3-4, Saru Jimmy Spring 2023 Membro de University of North Texas, Team 3-4, Saru Jimmy Spring 2023
UNT-SARU JIMMY-S23S3G4
Membros da 3
Autoria de 5 guias