Introdução
This guide will show you how to remove an old or faulty hard drive from your HP 255 G8. This model is the HP #7N4W2AA Notebook.
This guide is necessary because the hard drives is vital component of computers, and when the hard drive fails, the computer will not function as intended. Additionally, hard drives may be temporarily removed for maintenance, or hard drives can be replaced for upgraded versions or data migration.
Before you begin, clear your desk or work station to set the HP Notebook on for repair. Also be sure to power off your laptop and unplug your device from the charger. For an extra safety step and to avoid any potential damage to your laptop, disconnect the battery from the motherboard before you begin.
O que você precisa
-
-
Flip your laptop over so the bottom case is facing up.
-
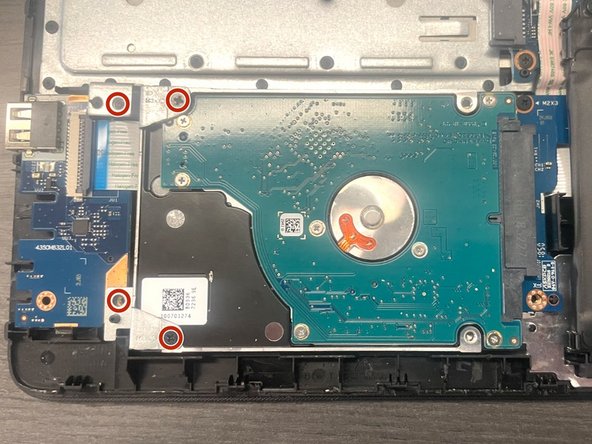
Use a spudger to remove the two rubber strips covering the screws.
-
-


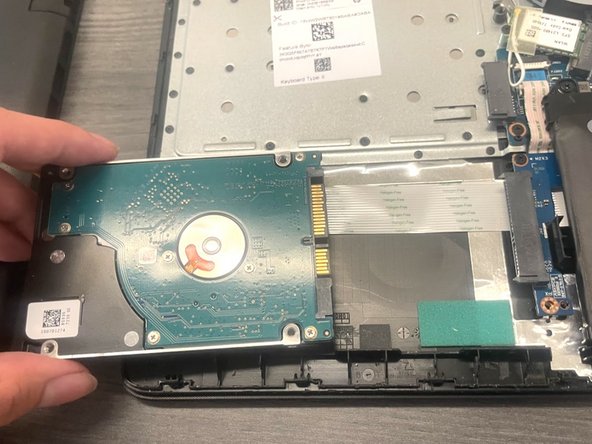

To reassemble your device, follow these instructions in reverse order.
To reassemble your device, follow these instructions in reverse order.
Cancelar: não concluí este guia.
Uma outra pessoa concluiu este guia.
Equipe

CSU Los Angeles, Team 7-12, Grodsky Spring 2024 Membro de CSU Los Angeles, Team 7-12, Grodsky Spring 2024
CSULA-GRODSKY-S24S7G12
1 Membro
1 Guia de autoria