Esta versão pode conter edições incorretas. Mude para o último instantâneo verificado.
O que você precisa
-
Este passo não foi traduzido. Ajude a traduzi-lo
-
The first step you should take is to turn the laptop off.
-
Next you want to get the prying tool and wedge it into the seam of the screen and outer casing.
-
-
-
Este passo não foi traduzido. Ajude a traduzi-lo
-
Once it is wedged in on one of the upper corners you want to gently lift and slide the tool down the sides and top of the seam until the frame pops off.
-
Continue moving the tool down, while wedged, to release the grasp. You will be left with just the screen in the casing.
-
-
Este passo não foi traduzido. Ajude a traduzi-lo
-
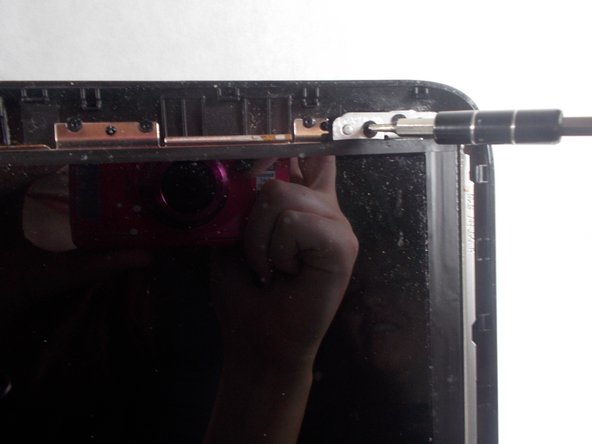
Next, you will want to unscrew the Phillips PM2.0×5.2 screws at the top of the screen with the #0 bit, this will allow the screen to pop off easily.
-
Once all the screws are removed, gently remove the screen from the outer casing.
-


Cancelar: não concluí este guia.
Uma outra pessoa concluiu este guia.

Equipe

UMass Dartmouth, Team S2-G4, Bernier Spring 2018 Membro de UMass Dartmouth, Team S2-G4, Bernier Spring 2018
UMASSD-BERNIER-S18S2G4
Membros da 3
Autoria de 5 guias