Ir para o conteúdo principal

HKC P774A Camera Replacement

O que você precisa

  1. HKC P774A Camera Replacement, Digitizer: passo 1, imagem 1 %32 HKC P774A Camera Replacement, Digitizer: passo 1, imagem 2 %32 HKC P774A Camera Replacement, Digitizer: passo 1, imagem 3 %32
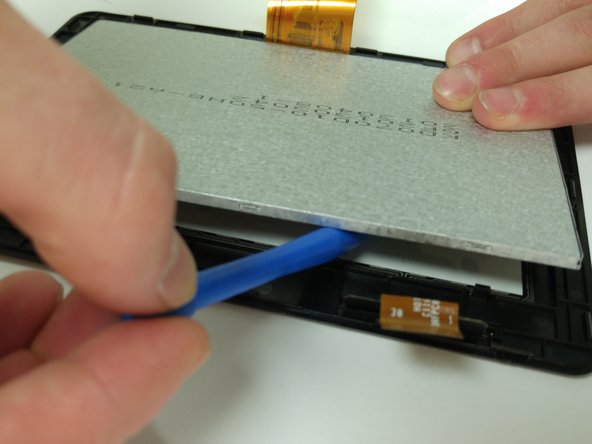
    • Insert the flat end of the spudger into the side of the device

    • This will create a gap between the device and screen housing.

    • Insert the plastic opening tool into this gap and move it along this gap.

    • Make sure not to bent the digitizer during this step.

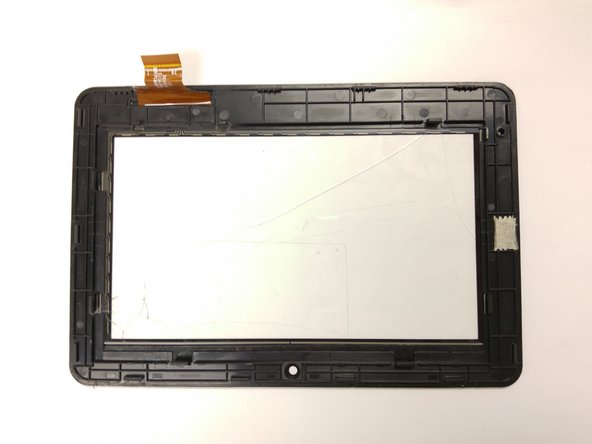
    • The screen housing and device will now be separated.

  2. HKC P774A Camera Replacement: passo 2, imagem 1 %32 HKC P774A Camera Replacement: passo 2, imagem 2 %32 HKC P774A Camera Replacement: passo 2, imagem 3 %32
    • Once the digitizer has been been removed from the body, disconnect the digitizer band from the motherboard.

    • Two small black pins (circled in red) will need to be unlocked.

    • Unlock the pins by pulling them outward with the tweezers.

    • Make sure the pins are released entirely before attempting to remove the band.

    • Remove the band using the tweezers.

  3. HKC P774A Camera Replacement: passo 3, imagem 1 %32 HKC P774A Camera Replacement: passo 3, imagem 2 %32 HKC P774A Camera Replacement: passo 3, imagem 3 %32
    • Once the digitizer has been disconnected from the motherboard, the LCD screen must be removed from the digitizer.

    • Push open the tabs (circled in red) using the flat end of the plastic spudger.

    • Be sure not to bend the digitizer while prying.

    • Continue to release all tabs while continuing to pry the LCD away from the digitizer.

  4. HKC P774A Camera Replacement, Camera: passo 4, imagem 1 %32 HKC P774A Camera Replacement, Camera: passo 4, imagem 2 %32 HKC P774A Camera Replacement, Camera: passo 4, imagem 3 %32
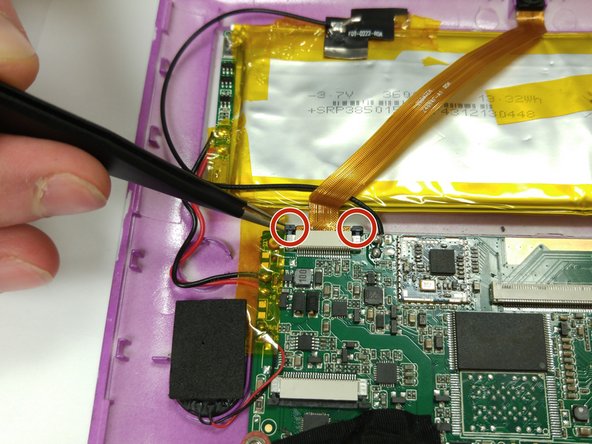
    • Use the tweezers to pull out the black pins (circled in red).

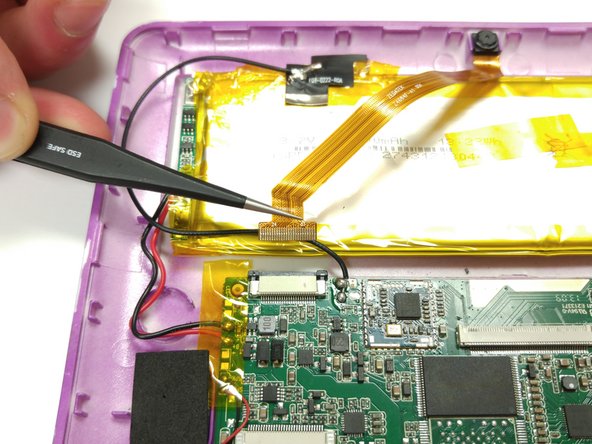
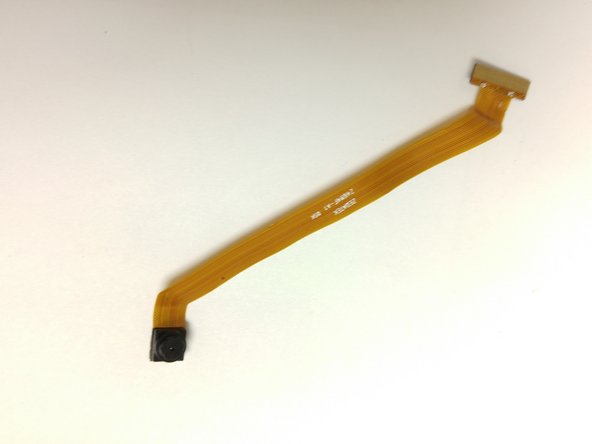
    • Use the tweezers to remove the camera band from the motherboard.

    • Handle the band with care.

  5. HKC P774A Camera Replacement: passo 5, imagem 1 %32 HKC P774A Camera Replacement: passo 5, imagem 2 %32 HKC P774A Camera Replacement: passo 5, imagem 3 %32
    • Use the flat end of the plastic spudger to pry the camera lens from the case.

    • Use the tweezers to remove the camera and band.

Conclusão

To reassemble your device, follow these instructions in reverse order.

Sean McCauley

Membro desde: 10/26/15

512 Reputação

Autoria de 4 guias

Equipe

Montana Tech, Team 10-1, Shirk Fall 2015 Membro de Montana Tech, Team 10-1, Shirk Fall 2015

MTUM-SHIRK-F15S10G1

Membros da 4

Autoria de 8 guias

0 comentários

Adicione um comentário

Exibir estatísticas:

Últimas 24 horas: 0

Últimos 7 dias: 0

Últimos 30 dias: 0

Duração total: 59