Ir para o conteúdo principal

Google Pixelbook Go Right Charging Port Replacement

O que você precisa

  1. Google Pixelbook Go Right Charging Port Replacement, Back Panel: passo 1, imagem 1 %32 Google Pixelbook Go Right Charging Port Replacement, Back Panel: passo 1, imagem 2 %32
    • Flip the device so that the back is facing up.

    • Peel the rubber stoppers off the top and bottom of the device.

  2. Google Pixelbook Go Right Charging Port Replacement: passo 2, imagem 1 %32 Google Pixelbook Go Right Charging Port Replacement: passo 2, imagem 2 %32
    • Remove ten 3 mm screws from around the edge of the back panel using a T5 Torx screwdriver.

  3. Google Pixelbook Go Right Charging Port Replacement: passo 3, imagem 1 %32 Google Pixelbook Go Right Charging Port Replacement: passo 3, imagem 2 %32 Google Pixelbook Go Right Charging Port Replacement: passo 3, imagem 3 %32
    • Use an iFixit opening tool to pry up the back panel cover.

    • There is an orange ribbon cable that connects the cover to the base, so don't separate the two pieces completely.

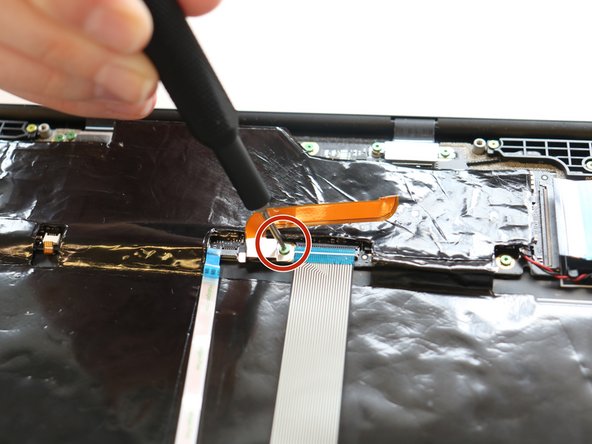
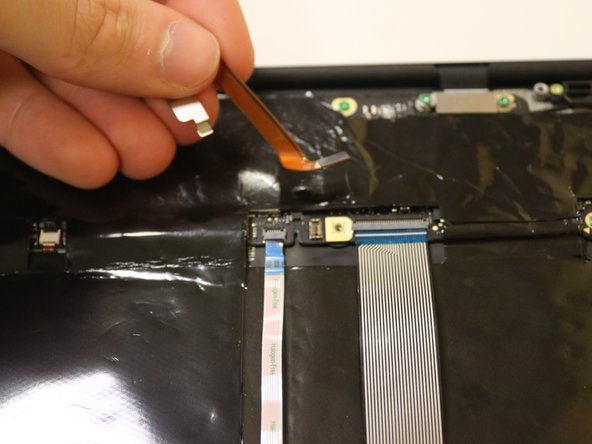
    • Remove the single 2 mm screw using a Torx T3 screwdriver.

    • Disconnect the orange cable from the base of the device.

  4. Google Pixelbook Go Right Charging Port Replacement: passo 4, imagem 1 %32
    • Insert wisdom here.

  5. Google Pixelbook Go Right Charging Port Replacement, Right Charging Port: passo 5, imagem 1 %32
    • Remove the three pink screws from the right charging port using a T3 Torx screwdriver.

  6. Google Pixelbook Go Right Charging Port Replacement: passo 6, imagem 1 %32 Google Pixelbook Go Right Charging Port Replacement: passo 6, imagem 2 %32
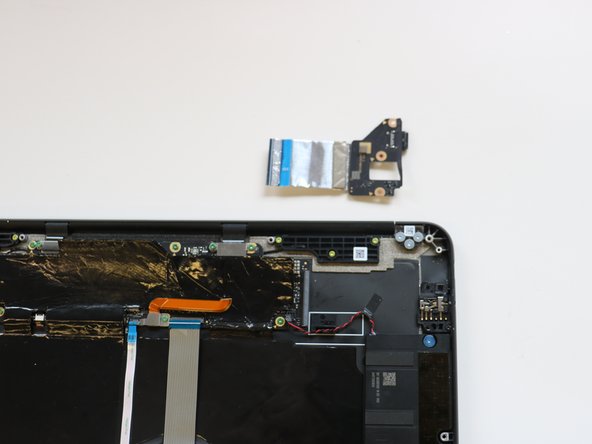
    • Remove the right charging port by picking it up and lifting it from the computer.

Conclusão

To reassemble your device, follow these instructions in reverse order.

Katie Brennan

Membro desde: 03/01/23

85 Reputação

Autoria de 1 guia

0 comentários

Adicione um comentário

Exibir estatísticas:

Últimas 24 horas: 0

Últimos 7 dias: 1

Últimos 30 dias: 12

Duração total: 165