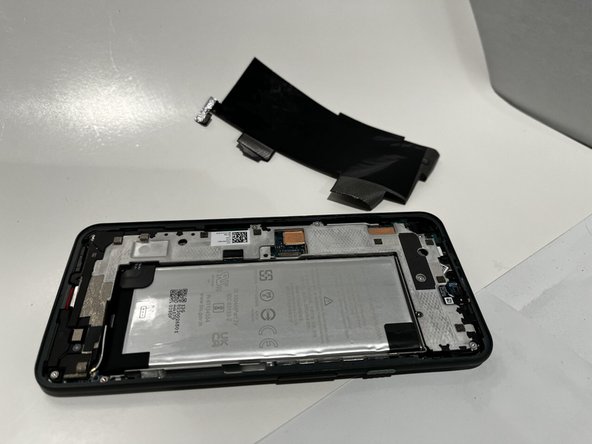
Ir para o conteúdo principal

Google Pixel 5a Midframe Replacement

Guia arquivado
Este guia é mantido exclusivamente para fins históricos. Use a versão atualizada do guia para executar o reparo.

O que você precisa

  1. Google Pixel 5a Midframe Replacement, Screen: passo 1, imagem 1 %32 Google Pixel 5a Midframe Replacement, Screen: passo 1, imagem 2 %32 Google Pixel 5a Midframe Replacement, Screen: passo 1, imagem 3 %32
    • Shut down the device before starting screen removal.

    • Insert a paper clip or SIM card removal tool into the SIM card tray hole.

    • Apply a small amount of pressure until the tray pops out.

    • Slide the SIM card tray out of your Google Pixel 5a.

  2. Google Pixel 5a Midframe Replacement: passo 2, imagem 1 %32 Google Pixel 5a Midframe Replacement: passo 2, imagem 2 %32
    • Pry the screen off of your device using an opening tool around all four sides.

  3. Google Pixel 5a Midframe Replacement: passo 3, imagem 1 %32 Google Pixel 5a Midframe Replacement: passo 3, imagem 2 %32 Google Pixel 5a Midframe Replacement: passo 3, imagem 3 %32
    • Remove the 4 mm screw using a T4 Torx screwdriver.

    • Disconnect the ribbon cable holding the screen in place.

    • Remove the screen from the rest of the phone.

  4. Google Pixel 5a Midframe Replacement, Midframe: passo 4, imagem 1 %32 Google Pixel 5a Midframe Replacement, Midframe: passo 4, imagem 2 %32 Google Pixel 5a Midframe Replacement, Midframe: passo 4, imagem 3 %32
    • Peel back the black plastic film covering the battery.

  5. Google Pixel 5a Midframe Replacement: passo 5, imagem 1 %32 Google Pixel 5a Midframe Replacement: passo 5, imagem 2 %32
    Ferramenta utilizada nesse passo:
    Tweezers
    $4.99
    Comprar
    • Use a pair of tweezers to remove the black plastic cover.

  6. Google Pixel 5a Midframe Replacement: passo 6, imagem 1 %32 Google Pixel 5a Midframe Replacement: passo 6, imagem 2 %32 Google Pixel 5a Midframe Replacement: passo 6, imagem 3 %32
    • Use a spudger to peel back the protective tape covering two screws.

  7. Google Pixel 5a Midframe Replacement: passo 7, imagem 1 %32 Google Pixel 5a Midframe Replacement: passo 7, imagem 2 %32 Google Pixel 5a Midframe Replacement: passo 7, imagem 3 %32
    • Using a T4 screwdriver, remove the six 4 mm screws.

    • Using a T4 screwdriver, remove the two 3 mm screws.

    • Using a T4 screwdriver, remove the 5 mm screw.

  8. Google Pixel 5a Midframe Replacement: passo 8, imagem 1 %32
    • Using a T4 screwdriver, remove the single 1 mm screw.

  9. Google Pixel 5a Midframe Replacement: passo 9, imagem 1 %32 Google Pixel 5a Midframe Replacement: passo 9, imagem 2 %32
    • Place a spudger under the metal bracket that covers the charging port.

    • Pry the metal bracket upwards, and remove it from the phone.

  10. Google Pixel 5a Midframe Replacement: passo 10, imagem 1 %32 Google Pixel 5a Midframe Replacement: passo 10, imagem 2 %32 Google Pixel 5a Midframe Replacement: passo 10, imagem 3 %32
    • Place an opening tool under the midframe.

    • Pry the midframe up, and remove it from the phone.

Conclusão

To reassemble your device, follow these instructions in reverse order.

0 comentários

Adicione um comentário

Exibir estatísticas:

Últimas 24 horas: 0

Últimos 7 dias: 0

Últimos 30 dias: 0

Duração total: 49