Ir para o conteúdo principal

Ge Profile Refrigerator with Bottom Freezer Drawer Model PFSS9PKYASS Ice and Water Dispenser Replacement

  1. Ge Profile Refrigerator with Bottom Freezer Drawer Model PFSS9PKYASS Ice and Water Dispenser Replacement, Remove Control Panel: passo 1, imagem 1 %32
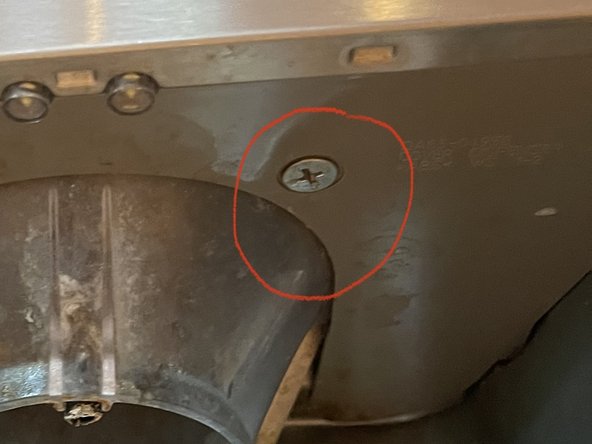
    • Unplug the refrigerator or turn off the breaker for the power circuit it is on. Then remove the Philips screw you see in this photo

  2. Ge Profile Refrigerator with Bottom Freezer Drawer Model PFSS9PKYASS Ice and Water Dispenser Replacement, Pull Off Control Panel: passo 2, imagem 1 %32 Ge Profile Refrigerator with Bottom Freezer Drawer Model PFSS9PKYASS Ice and Water Dispenser Replacement, Pull Off Control Panel: passo 2, imagem 2 %32 Ge Profile Refrigerator with Bottom Freezer Drawer Model PFSS9PKYASS Ice and Water Dispenser Replacement, Pull Off Control Panel: passo 2, imagem 3 %32
    • After removing the screw pry off the control panel. Insert a flat head screw driver into the slot shown here and pull the right side of the panel towards you and slightly upward. Clips at sides of the panel will release it. The top of the control panel has a tab that fits into a slot in the door, as shown.

  3. Ge Profile Refrigerator with Bottom Freezer Drawer Model PFSS9PKYASS Ice and Water Dispenser Replacement, Disconnect Panel: passo 3, imagem 1 %32
    • Pull the wiring harness clip free from the control panel and put the panel aside.

  4. Ge Profile Refrigerator with Bottom Freezer Drawer Model PFSS9PKYASS Ice and Water Dispenser Replacement, Unplug Water Hose: passo 4, imagem 1 %32 Ge Profile Refrigerator with Bottom Freezer Drawer Model PFSS9PKYASS Ice and Water Dispenser Replacement, Unplug Water Hose: passo 4, imagem 2 %32 Ge Profile Refrigerator with Bottom Freezer Drawer Model PFSS9PKYASS Ice and Water Dispenser Replacement, Unplug Water Hose: passo 4, imagem 3 %32
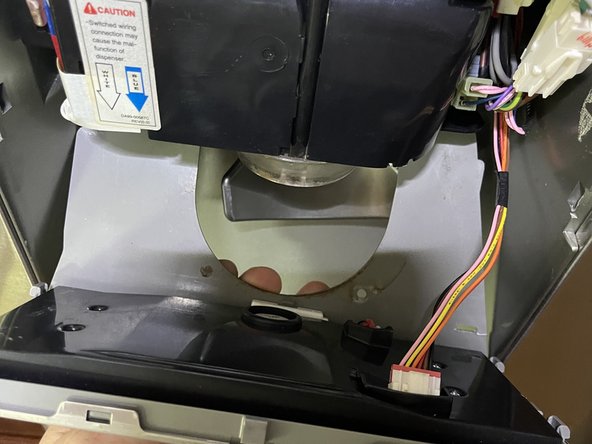
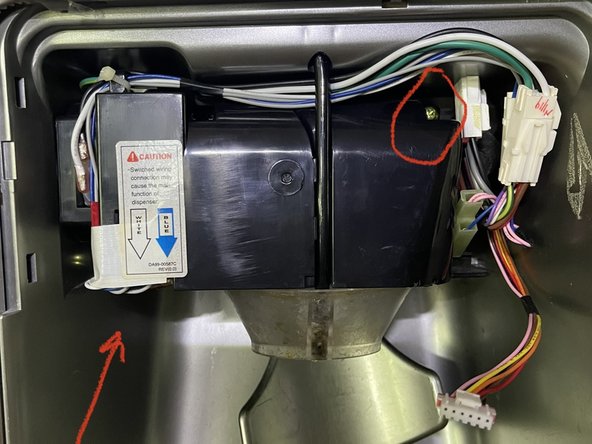
    • Pull the water hose free of its slot in the unit and up and out of the dispenser cone.

  5. Ge Profile Refrigerator with Bottom Freezer Drawer Model PFSS9PKYASS Ice and Water Dispenser Replacement, Remove Screws Holding in Unit: passo 5, imagem 1 %32
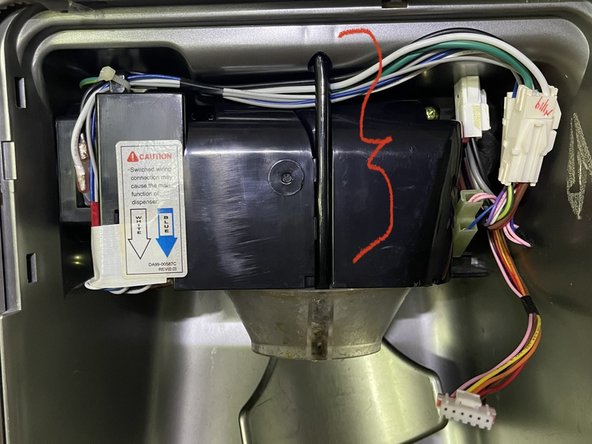
    • There are two brass-colored Philips screws to remove. One is at the top right, visible in this photo, and the other is at the bottom left, not visible here but where the arrow indicates.

  6. Ge Profile Refrigerator with Bottom Freezer Drawer Model PFSS9PKYASS Ice and Water Dispenser Replacement, Disconnect two wiring harnesses: passo 6, imagem 1 %32 Ge Profile Refrigerator with Bottom Freezer Drawer Model PFSS9PKYASS Ice and Water Dispenser Replacement, Disconnect two wiring harnesses: passo 6, imagem 2 %32 Ge Profile Refrigerator with Bottom Freezer Drawer Model PFSS9PKYASS Ice and Water Dispenser Replacement, Disconnect two wiring harnesses: passo 6, imagem 3 %32
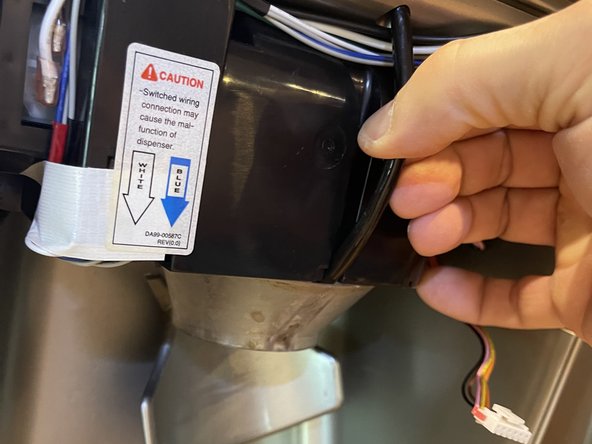
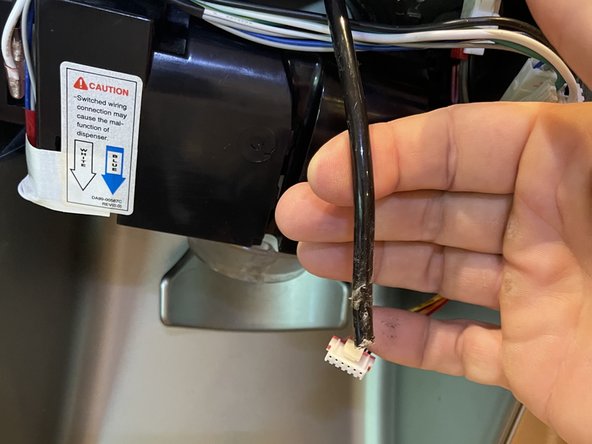
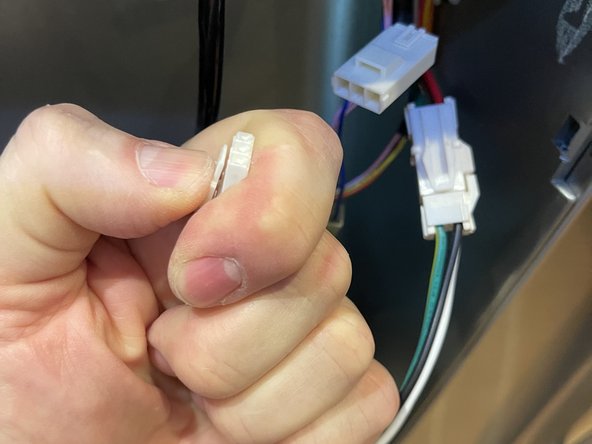
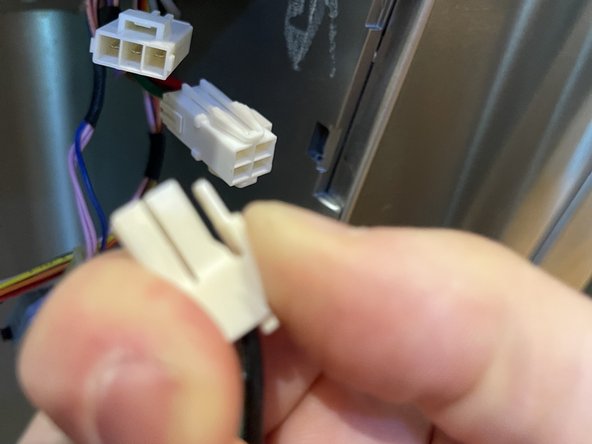
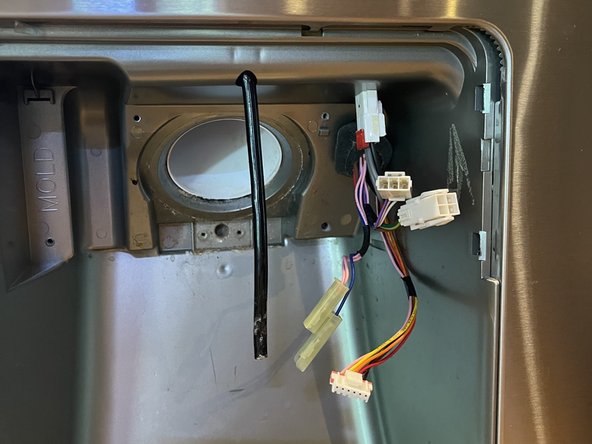
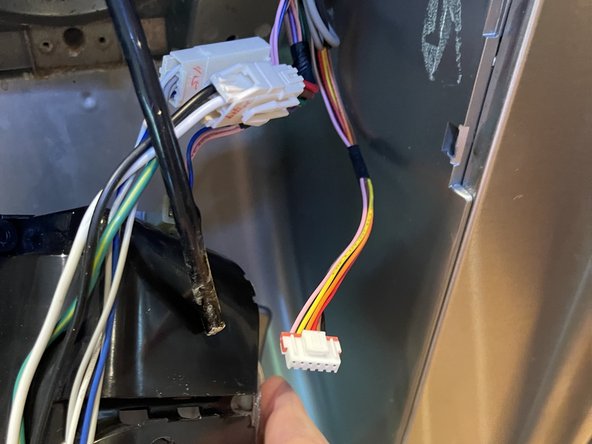
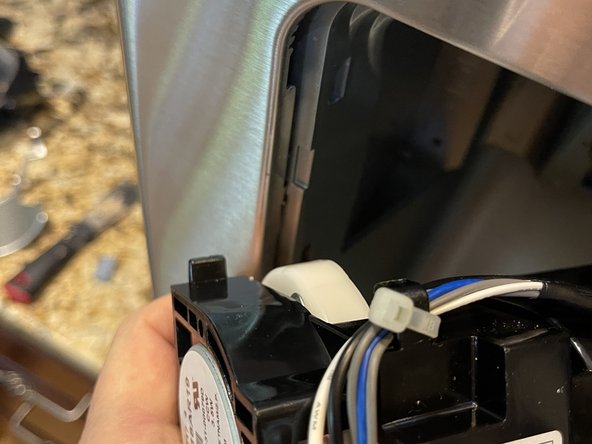
    • The unit can now be pulled out of the door. Disconnect two wiring harnesses by squeezing down on the tabs that each one has. This will release the clips.

  7. Ge Profile Refrigerator with Bottom Freezer Drawer Model PFSS9PKYASS Ice and Water Dispenser Replacement, Disconnect Paddle Switch: passo 7, imagem 1 %32 Ge Profile Refrigerator with Bottom Freezer Drawer Model PFSS9PKYASS Ice and Water Dispenser Replacement, Disconnect Paddle Switch: passo 7, imagem 2 %32
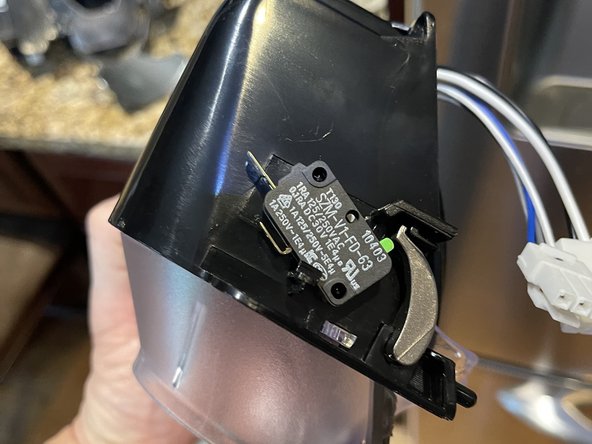
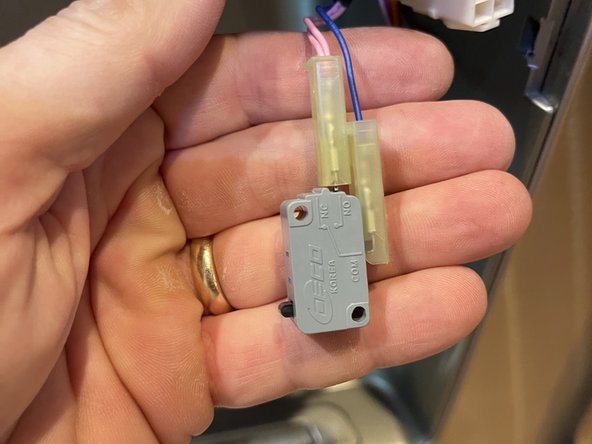
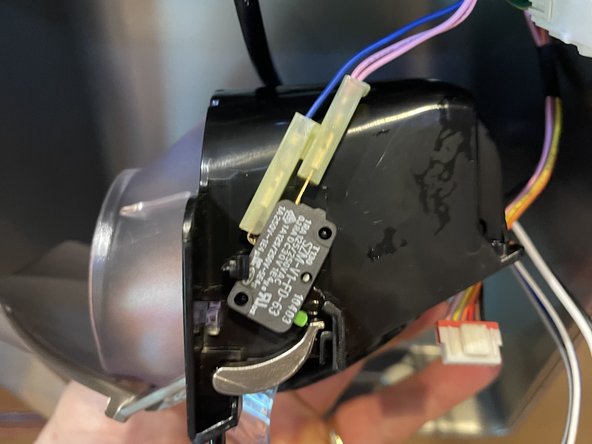
    • On the right side of the unit is a switch that the paddle presses to activate ice or water flow. Its electric wires slide off. The switch on my old unit fell off the unit, perhaps because the old paddle arm was broken off. Photos show new unit and old switch with wires attached.

  8. Ge Profile Refrigerator with Bottom Freezer Drawer Model PFSS9PKYASS Ice and Water Dispenser Replacement, Connect New Unit Paddle Switch: passo 8, imagem 1 %32 Ge Profile Refrigerator with Bottom Freezer Drawer Model PFSS9PKYASS Ice and Water Dispenser Replacement, Connect New Unit Paddle Switch: passo 8, imagem 2 %32
    • Old unit should now be completely removed and set aside. Slide the paddle switch wires onto the new unit.

  9. Ge Profile Refrigerator with Bottom Freezer Drawer Model PFSS9PKYASS Ice and Water Dispenser Replacement, Connect Wiring Harnesses and Water Hose: passo 9, imagem 1 %32 Ge Profile Refrigerator with Bottom Freezer Drawer Model PFSS9PKYASS Ice and Water Dispenser Replacement, Connect Wiring Harnesses and Water Hose: passo 9, imagem 2 %32
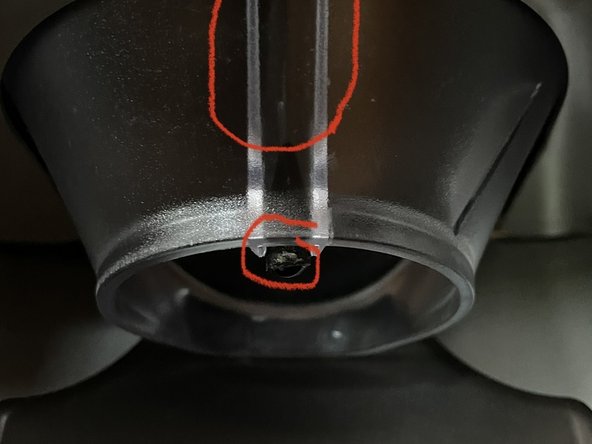
    • Connect the two wiring harnesses to the new unit. Connect these first and then tuck behind the water hose. Press water hose into its slot on the front of unit. Then feed the end of the water hose into the dispenser cone. Use forefinger inside the cone to guide the hose into its slot down the front of the cone and into the circle holder at bottom

  10. Ge Profile Refrigerator with Bottom Freezer Drawer Model PFSS9PKYASS Ice and Water Dispenser Replacement, Attach Dispenser Unit to Door: passo 10, imagem 1 %32 Ge Profile Refrigerator with Bottom Freezer Drawer Model PFSS9PKYASS Ice and Water Dispenser Replacement, Attach Dispenser Unit to Door: passo 10, imagem 2 %32
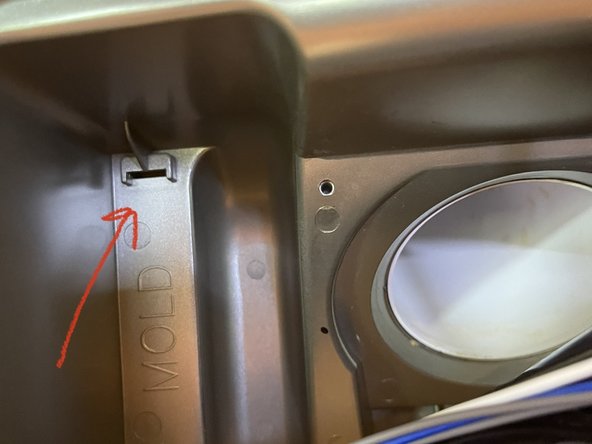
    • Before inserting the brass screws, the tab on the top left of the unit needs to be inserted into its slot to the left of the ice pipe. See arrow. Tilt the top of the unit in to the door, aligning this tab with the slot in the door, and slide it up. Then press unit into place. Check that the two screw holes are aligned and install Philips screws.

  11. Ge Profile Refrigerator with Bottom Freezer Drawer Model PFSS9PKYASS Ice and Water Dispenser Replacement, Reattach Control Panel: passo 11, imagem 1 %32 Ge Profile Refrigerator with Bottom Freezer Drawer Model PFSS9PKYASS Ice and Water Dispenser Replacement, Reattach Control Panel: passo 11, imagem 2 %32 Ge Profile Refrigerator with Bottom Freezer Drawer Model PFSS9PKYASS Ice and Water Dispenser Replacement, Reattach Control Panel: passo 11, imagem 3 %32
    • The control panel has a tab at top center. Insert this into a slot in the door located above the water hose by tilting the top of the panel into place first. Then press the panel into place on the two sides. Insert the Philips screw.

Conclusão

Plug unit back in or turn the breaker back on. Task completed!

bseagrave

Membro desde: 07/23/11

337 Reputação

Autoria de 2 guias

0 comentários

Adicione um comentário

Exibir estatísticas:

Últimas 24 horas: 0

Últimos 7 dias: 6

Últimos 30 dias: 29

Duração total: 776