Ir para o conteúdo principal

Gateway GWTC116-2BL Motherboard Replacement

O que você precisa

  1. Gateway GWTC116-2BL Motherboard Replacement, Back Panel: passo 1, imagem 1 %32
    • Ground yourself before disassembling and handling the computer.

    • Remove the ten 3.0 mm Phillips #00 screws from the back panel of the laptop.

  2. Gateway GWTC116-2BL Motherboard Replacement: passo 2, imagem 1 %32 Gateway GWTC116-2BL Motherboard Replacement: passo 2, imagem 2 %32
    • Use the spudger to pry the back panel away from the body of the laptop.

  3. Gateway GWTC116-2BL Motherboard Replacement, Battery: passo 3, imagem 1 %32
    • Remove the five 3.0 mm Phillips #00 screws.

  4. Gateway GWTC116-2BL Motherboard Replacement: passo 4, imagem 1 %32 Gateway GWTC116-2BL Motherboard Replacement: passo 4, imagem 2 %32
    • Using your fingers, flick open the battery connector bracket.

    • Remove the connector from bracket.

  5. Gateway GWTC116-2BL Motherboard Replacement: passo 5, imagem 1 %32
    • Pull up the battery to remove from the base.

  6. Gateway GWTC116-2BL Motherboard Replacement, Motherboard: passo 6, imagem 1 %32
    • Using your fingers, flick the cable connector bracket open.

    • Remove the cable from the connector.

  7. Gateway GWTC116-2BL Motherboard Replacement: passo 7, imagem 1 %32 Gateway GWTC116-2BL Motherboard Replacement: passo 7, imagem 2 %32
    • Using your fingers, disconnect the black and white connector brackets underneath the gray cable.

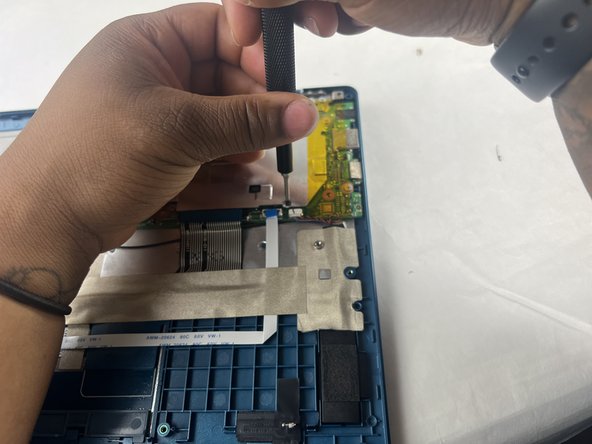
  8. Gateway GWTC116-2BL Motherboard Replacement: passo 8, imagem 1 %32 Gateway GWTC116-2BL Motherboard Replacement: passo 8, imagem 2 %32
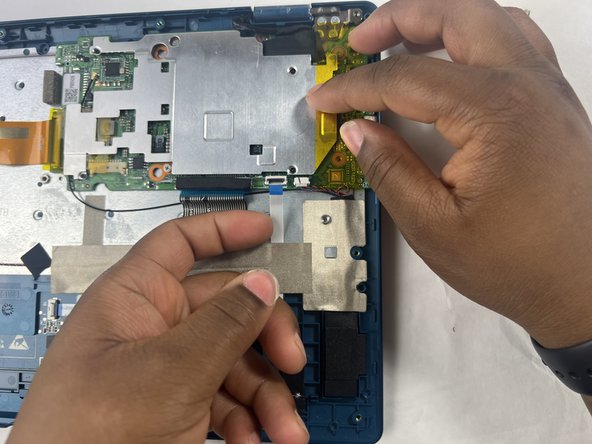
    • Remove the four 3.0 mm Phillips #00 screws located on the motherboard casing.

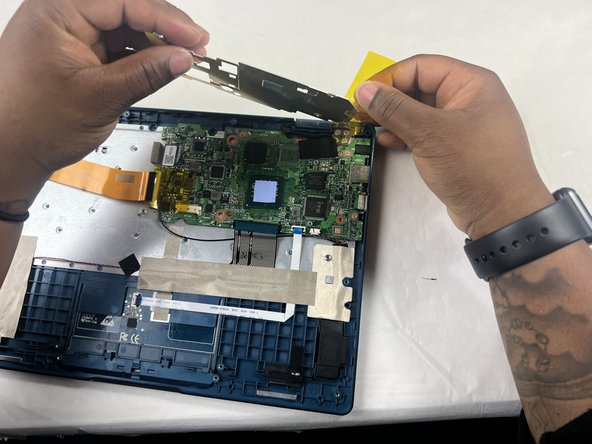
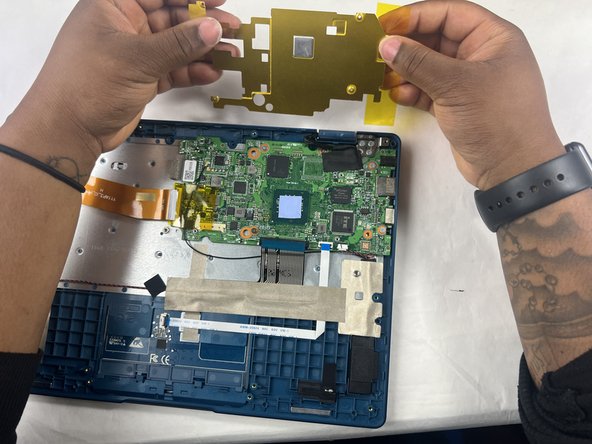
  9. Gateway GWTC116-2BL Motherboard Replacement: passo 9, imagem 1 %32 Gateway GWTC116-2BL Motherboard Replacement: passo 9, imagem 2 %32 Gateway GWTC116-2BL Motherboard Replacement: passo 9, imagem 3 %32
    • Peel the yellow tape off of the casing.

    • Lift the casing off of the motherboard.

  10. Gateway GWTC116-2BL Motherboard Replacement: passo 10, imagem 1 %32 Gateway GWTC116-2BL Motherboard Replacement: passo 10, imagem 2 %32
    • Peel off the yellow tape.

    • Remove four 3.0 mm Phillips #00 screws.

  11. Gateway GWTC116-2BL Motherboard Replacement: passo 11, imagem 1 %32 Gateway GWTC116-2BL Motherboard Replacement: passo 11, imagem 2 %32
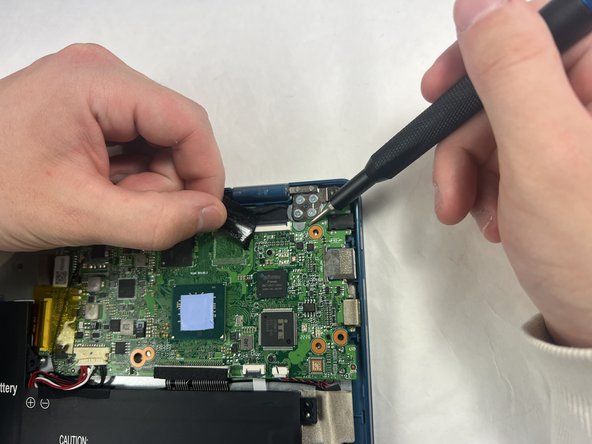
    • Peel off the black piece of tape covering the display cable.

  12. Gateway GWTC116-2BL Motherboard Replacement: passo 12, imagem 1 %32 Gateway GWTC116-2BL Motherboard Replacement: passo 12, imagem 2 %32
    • Flick open the bracket securing the display cable and disconnect the cable from the motherboard.

  13. Gateway GWTC116-2BL Motherboard Replacement: passo 13, imagem 1 %32
    • Remove the motherboard from the device.

Conclusão

To reassemble your device, follow these instructions in reverse order.

Christian Chapman

Membro desde: 03/25/24

183 Reputação

Autoria de 1 guia

Equipe

UMass Dartmouth, Team 6-2, Botvin Spring 2024 Membro de UMass Dartmouth, Team 6-2, Botvin Spring 2024

UMASSD-BOTVIN-S24S6G2

Membros da 3

Autoria de 5 guias

0 comentários

Adicione um comentário

Exibir estatísticas:

Últimas 24 horas: 1

Últimos 7 dias: 5

Últimos 30 dias: 40

Duração total: 92