Ir para o conteúdo principal

Esta versão pode conter edições incorretas. Mude para o último instantâneo verificado.

O que você precisa

  1. Este passo não foi traduzido. Ajude a traduzi-lo

    : passo 1, imagem 1 %32 : passo 1, imagem 2 %32 : passo 1, imagem 3 %32
    • To prevent injury, make sure the laptop is unplugged and turned off before removing the battery.

    • Push the two tabs in towards the laptop.

    • Lift the battery up and out from the frame of the laptop.

  2. Este passo não foi traduzido. Ajude a traduzi-lo

    : passo 2, imagem 1 %32 : passo 2, imagem 2 %32
    • Use a plastic opening tool to lift the back of the hinge cover on the left and right sides of the computer.

  3. Este passo não foi traduzido. Ajude a traduzi-lo

    : passo 3, imagem 1 %32
    • Lift the hinge cover.

    • The hinge cover is connected to the motherboard by a ribbon cable. To prevent damage, lift hinge cover slowly.

  4. Este passo não foi traduzido. Ajude a traduzi-lo

    : passo 4, imagem 1 %32 : passo 4, imagem 2 %32 : passo 4, imagem 3 %32
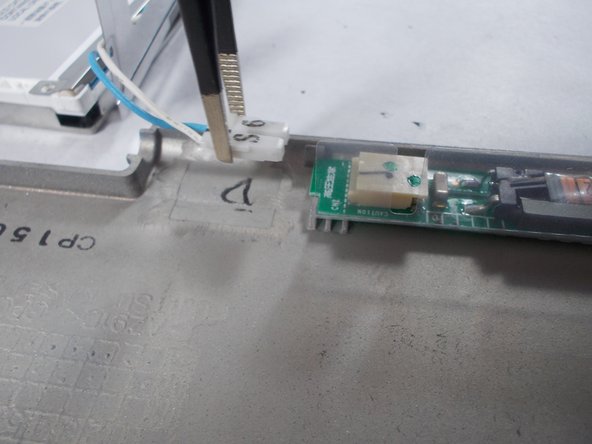
    • Use the tweezers to disconnect the ribbon cable from the motherboard.

  5. Este passo não foi traduzido. Ajude a traduzi-lo

    : passo 5, imagem 1 %32 : passo 5, imagem 2 %32 : passo 5, imagem 3 %32
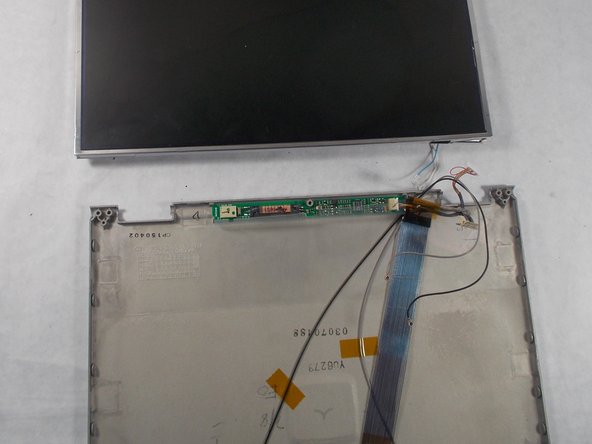
    • With the tweezers detach hinge cover cables from the motherboard.

    • Remove hinge cover.

  6. Este passo não foi traduzido. Ajude a traduzi-lo

    : passo 6, imagem 1 %32 : passo 6, imagem 2 %32 : passo 6, imagem 3 %32
    • Lift keyboard enough to show the ribbon cable.

    • The keyboard has a ribbon cable attached to the motherboard. Lift keyboard carefully to prevent damage.

  7. Este passo não foi traduzido. Ajude a traduzi-lo

    : passo 7, imagem 1 %32 : passo 7, imagem 2 %32 : passo 7, imagem 3 %32
    • Use a plastic opening tool to release the ribbon cable from the motherboard.

  8. Este passo não foi traduzido. Ajude a traduzi-lo

    : passo 8, imagem 1 %32 : passo 8, imagem 2 %32 : passo 8, imagem 3 %32
    • Push the secure clips outward.

    • The Adapter should pop up.

  9. Este passo não foi traduzido. Ajude a traduzi-lo

    : passo 9, imagem 1 %32 : passo 9, imagem 2 %32 : passo 9, imagem 3 %32
    • Use tweezers to remove the wires from the Adapter.

  10. Este passo não foi traduzido. Ajude a traduzi-lo

    : passo 10, imagem 1 %32 : passo 10, imagem 2 %32
    • Take out the Adapter and carefully pull the wires out from the metal casing.

  11. Este passo não foi traduzido. Ajude a traduzi-lo

    : passo 11, imagem 1 %32 : passo 11, imagem 2 %32
    • Remove the 4mm screws from the laptop with a Philips head #0

    • Remove the 4.5mm screws on the back of the laptop with a Philips #0

  12. Este passo não foi traduzido. Ajude a traduzi-lo

    : passo 12, imagem 1 %32 : passo 12, imagem 2 %32 : passo 12, imagem 3 %32
    • Use a plastic opening tool to lift up both sides of the white tab.

  13. Este passo não foi traduzido. Ajude a traduzi-lo

    : passo 13, imagem 1 %32 : passo 13, imagem 2 %32
    • Use tweezers to grab onto the lever to remove the chip from the motherboard.

  14. Este passo não foi traduzido. Ajude a traduzi-lo

    : passo 14, imagem 1 %32
    • Lift the screen up vertically

  15. Este passo não foi traduzido. Ajude a traduzi-lo

    : passo 15, imagem 1 %32 : passo 15, imagem 2 %32 : passo 15, imagem 3 %32
    • Remove rubber tabs with hands

    • Use a Philips head #0 to remove the 3mm screws

  16. Este passo não foi traduzido. Ajude a traduzi-lo

    : passo 16, imagem 1 %32 : passo 16, imagem 2 %32
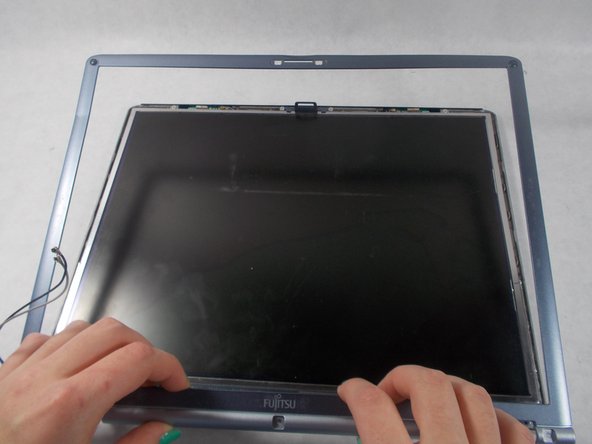
    • Use the metal spudger to pry up the edge of the plastic casing up.

    • Remove the plastic frame from the screen.

  17. Este passo não foi traduzido. Ajude a traduzi-lo

    : passo 17, imagem 1 %32
    • Remove the 3mm screws with a Philips head #00

  18. Este passo não foi traduzido. Ajude a traduzi-lo

    : passo 18, imagem 1 %32
    • Remove the 2.5mm screws with a Philips head #0 on both sides of the laptop

  19. Este passo não foi traduzido. Ajude a traduzi-lo

    : passo 19, imagem 1 %32 : passo 19, imagem 2 %32
    • Lift the screen from the frame

  20. Este passo não foi traduzido. Ajude a traduzi-lo

    : passo 20, imagem 1 %32 : passo 20, imagem 2 %32
    • Remove the ribbon from the back of the screen

  21. Este passo não foi traduzido. Ajude a traduzi-lo

    : passo 21, imagem 1 %32 : passo 21, imagem 2 %32 : passo 21, imagem 3 %32
    • Use a pair of tweezers remove the white connector

Linha de Chegada

Jessi Gallant

Membro desde: 03/19/18

899 Reputação

Autoria de 7 guias

Equipe

UMass Dartmouth, Team S5-G5, Peak Spring 2018 Membro de UMass Dartmouth, Team S5-G5, Peak Spring 2018

UMASSD-PEAK-S18S5G5

Membros da 3

Autoria de 18 guias

0 comentários

Adicione um comentário

Exibir estatísticas:

Últimas 24 horas: 2

Últimos 7 dias: 8

Últimos 30 dias: 13

Duração total: 937