Ir para o conteúdo principal

Fujifilm Instax Minion Camera Shell Replacement

O que você precisa

  1. Fujifilm Instax Minion Camera Shell Replacement, Camera Shell: passo 1, imagem 1 %32 Fujifilm Instax Minion Camera Shell Replacement, Camera Shell: passo 1, imagem 2 %32 Fujifilm Instax Minion Camera Shell Replacement, Camera Shell: passo 1, imagem 3 %32
    • Remove the six 4.5 mm #00 Phillips screws from the bottom, left, and right sides.

  2. Fujifilm Instax Minion Camera Shell Replacement: passo 2, imagem 1 %32 Fujifilm Instax Minion Camera Shell Replacement: passo 2, imagem 2 %32 Fujifilm Instax Minion Camera Shell Replacement: passo 2, imagem 3 %32
    • Use a spudger to remove the film slot guard on the top of the camera.

    • Remove the one 4.5 mm #00 Phillips screw under the slot guard.

  3. Fujifilm Instax Minion Camera Shell Replacement: passo 3, imagem 1 %32 Fujifilm Instax Minion Camera Shell Replacement: passo 3, imagem 2 %32 Fujifilm Instax Minion Camera Shell Replacement: passo 3, imagem 3 %32
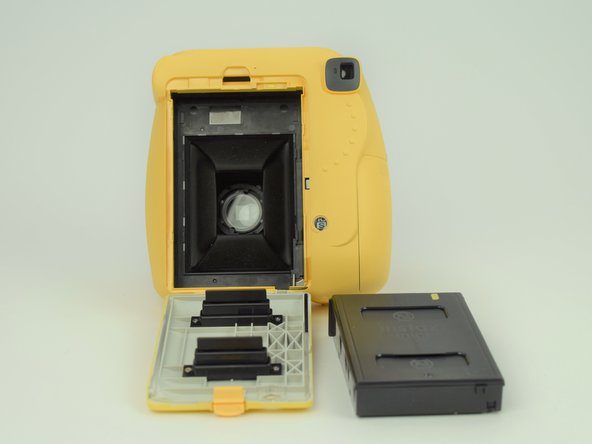
    • Press the release tab on the back of the camera to open the film compartment.

    • Remove the film cartridge within this compartment.

  4. Fujifilm Instax Minion Camera Shell Replacement: passo 4, imagem 1 %32 Fujifilm Instax Minion Camera Shell Replacement: passo 4, imagem 2 %32 Fujifilm Instax Minion Camera Shell Replacement: passo 4, imagem 3 %32
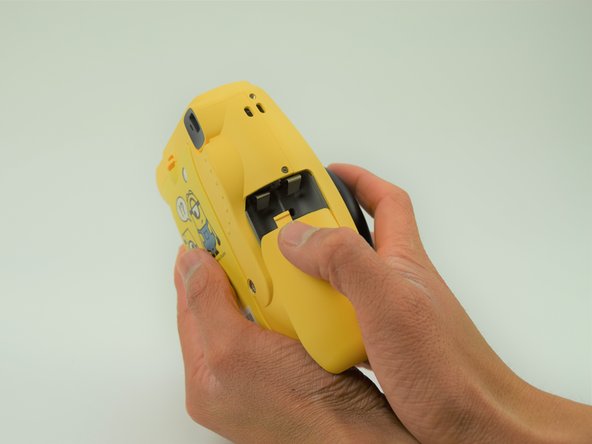
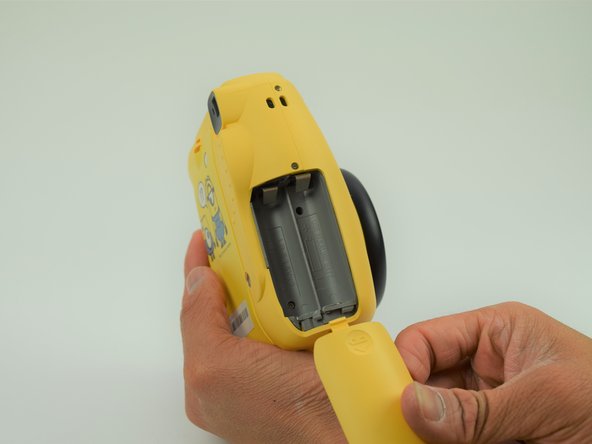
    • Press the battery cover in and down to remove it.

    • Remove any batteries within.

  5. Fujifilm Instax Minion Camera Shell Replacement: passo 5, imagem 1 %32 Fujifilm Instax Minion Camera Shell Replacement: passo 5, imagem 2 %32 Fujifilm Instax Minion Camera Shell Replacement: passo 5, imagem 3 %32
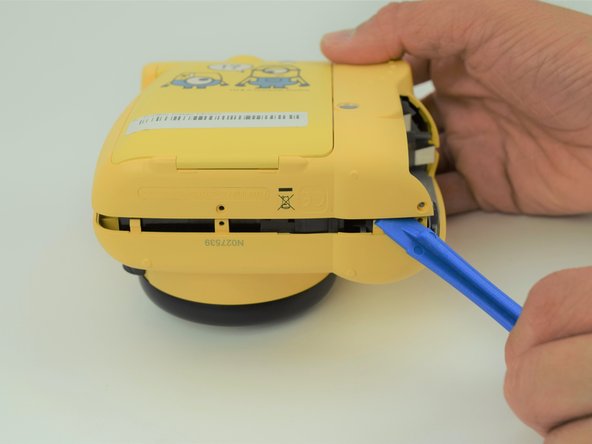
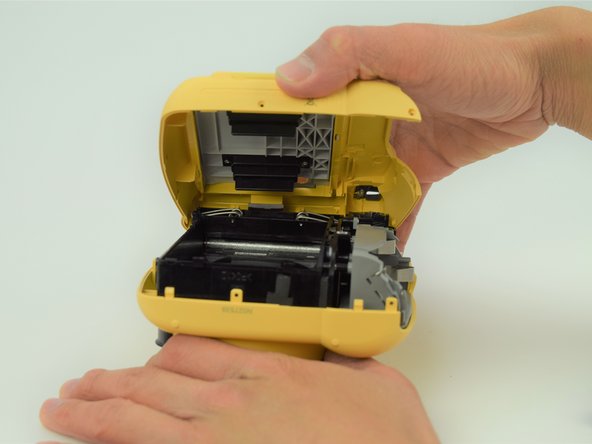
    • Use a plastic opening tool to help pry the front and back shells apart.

    • With the camera facing down, remove only the back shell.

  6. Fujifilm Instax Minion Camera Shell Replacement: passo 6, imagem 1 %32 Fujifilm Instax Minion Camera Shell Replacement: passo 6, imagem 2 %32 Fujifilm Instax Minion Camera Shell Replacement: passo 6, imagem 3 %32
    • Carefully peel the front side of the shell away.

    • As you lift the front shell, be careful to not pull too hard since there is a spring attached to the shell and the camera body.

    • Using a set of tweezers, detach the spring from the body. The spring will retract into the black and gray ring on the front shell.

Conclusão

To reassemble your device, follow these instructions in reverse order.

Jonnah Lee

Membro desde: 04/18/18

473 Reputação

Autoria de 3 guias

Equipe

Cal Poly, Team S18-G6, Livingston Spring 2018 Membro de Cal Poly, Team S18-G6, Livingston Spring 2018

CPSU-LIVINGSTON-S18S18G6

Membros da 4

Autoria de 10 guias

0 comentários

Adicione um comentário

Exibir estatísticas:

Últimas 24 horas: 2

Últimos 7 dias: 4

Últimos 30 dias: 29

Duração total: 1,969