Introdução
Dell U2415 (D) monitor can start to malfunction after few years. Its display panel can start to flicker more and more often. This is due to corrosion developing on board/tape contacts. This also can be due to failing capacitors. This guide will show how to access and clean all contacts and will also allow to access capacitors if one wishes to replace them.
This guide assumes one removed display stand or VESA mount first.
-
-
Insert pick and then opening tool starting from the bottom side of display.
-
Pry open bottom and then sides. You may need more picks (two on the corners) to prevent cover from snapping back.
-
Lift cover starting from the bottom side of display and remove it.
-
-
-
Gently remove the tape from connector.
-
Spray the connector and the tape with the contact cleaning spray. You can gently use a brush if you see more corrosion.
-
-
-
WARNING! POTENTIAL HIGH VOLTAGE! USE INSULATION!
-
Unplug marked connectors. USB tape has a little lever on the side opposite to the tape. Lift it to easily remove the tape without risking damage to it. USB box slides vertically (picture orientation) and can be removed easily.
-
Carefully peel of the tape from metal shielding and also from under the black insulator.
-
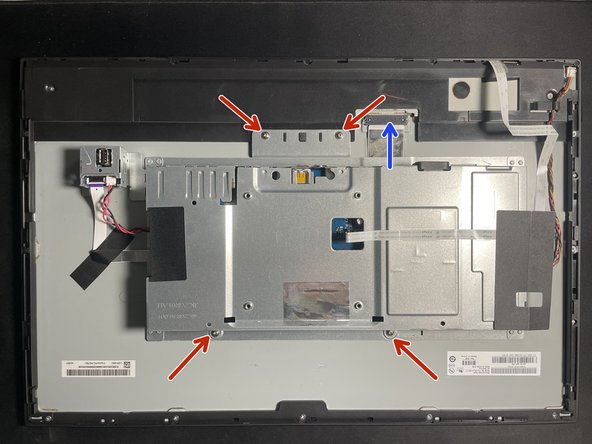
Unscrew 4 screws holding the control unit and PSU and unplug the display tape. It has two springs holding it.
-
Spray the control panel connector with the contact cleaning spray and gently brush it to remove corrosion. To the same with tape side.
-
-
-
-
WARNING! POTENTIAL HIGH VOLTAGE! USE INSULATION!
-
Unscrew power supply and control unit.
-
Unscrew 2 screws on the power connector on the unit side.
-
Lift the power supply board (Green) - it might require some force due to thermal tape holding it.
-
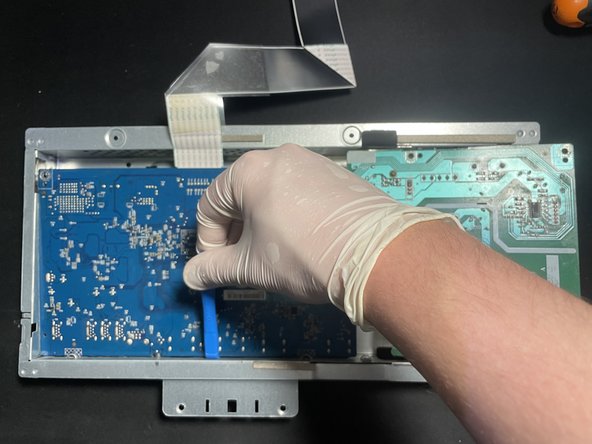
Lift the controller board (Blue) from the top and then push it to free connectors.
-
Now both boards should be removed and places on the insulated surface.
-
-
-
Remove display tape from the hinge connector. Treat connector and tape contacts with the contact cleaning spray an brush off all corrosion. Clean both sides of tape.
-
Capacitors with cross on their top will rise and leak like volcano. Ones without the cuts can leak on the PCB or corrode from their sides.
-
Any capacitors with signs of corrosion or bulges need to be replaced as they will destabilize the display gradually and can cause shorts and irreparable damage.
-
-
-
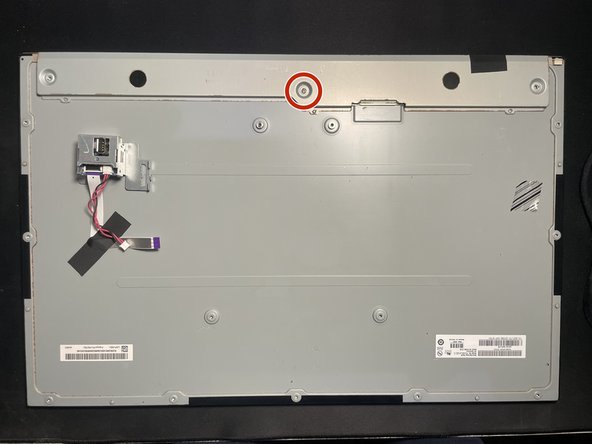
Unscrew all screws holding outer cover.
-
Lift cover to expose whole back of the panel and backlight board.
-
Unscrew the cover and lift it. Inspect circuit board for corrosion and treat it with the contact cleaning spray. Remember about the tape connector as it can have corrosion on its contacts.
-
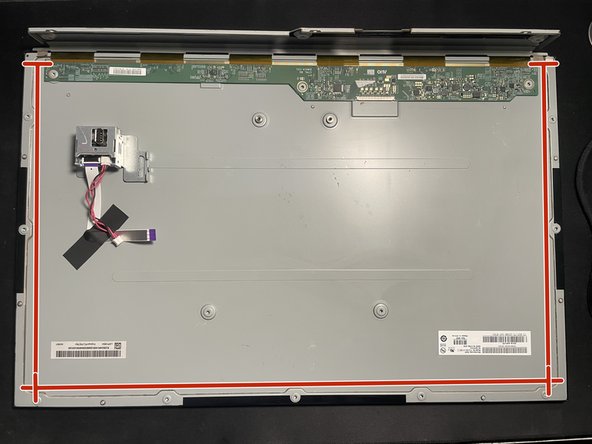
Also remove corrosion from the panel shielding. It usually spreads from the outer sides as marked on the picture. Corrosion can spread to connectors and circuit board. Make sure you removed all of it. You can use high gradation sandpaper, but do not do it over the display.
-
-
-
Put backlight board on it's place and screw it back.
-
Put back outer cover and screw it back. Remember about 4 little screws.
-
Re-assemble the controller board and PSU. Put the controller board first, then the PSU. Screw in all the screws. Remember about power connector screws.
-
Put controller board in the shield back on the panel. Remember to correctly place backlight tape so it faces the connector.
-
Plug in all connectors. USB and the front panel. Plug backlight tape back. Screw the controller and PSU back with screws.
-
Re-install back cover.
-


To reassemble your device, follow these instructions in reverse order.
To reassemble your device, follow these instructions in reverse order.
