Ir para o conteúdo principal

Fast Fix Dryer Power Cord Replacement

O que você precisa

  1. Fast Fix Dryer Power Cord Replacement, Dryer Power Cord: passo 1, imagem 1 %32 Fast Fix Dryer Power Cord Replacement, Dryer Power Cord: passo 1, imagem 2 %32 Fast Fix Dryer Power Cord Replacement, Dryer Power Cord: passo 1, imagem 3 %32
    • Before starting this guide, TURN OFF THE BREAKER SWITCH related to the dryer.

    • Doing this will help to avoid bodily harm, and also protect the wires from shorting out.

    • Locate your breaker box - (Some are outside and some are inside the house).

    • Once it is found, find the dryer switch and push it to the LEFT to turn it off.

  2. Fast Fix Dryer Power Cord Replacement: passo 2, imagem 1 %32 Fast Fix Dryer Power Cord Replacement: passo 2, imagem 2 %32 Fast Fix Dryer Power Cord Replacement: passo 2, imagem 3 %32
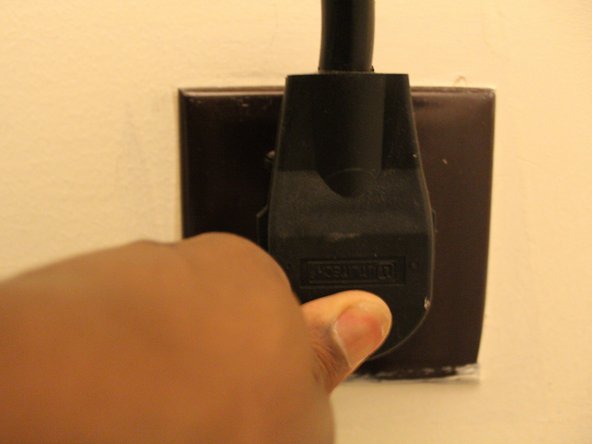
    • Unplug the dryer from the wall.

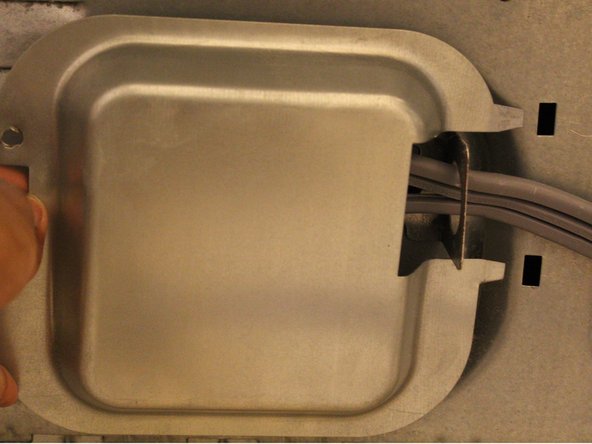
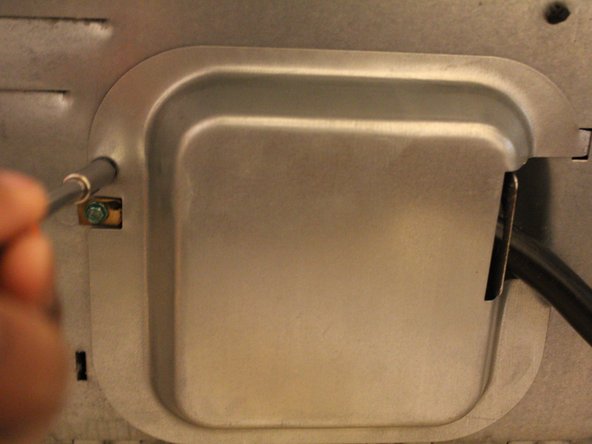
    • Use a screwdriver to remove any screws that secure the power cord cover.

  3. Fast Fix Dryer Power Cord Replacement: passo 3, imagem 1 %32 Fast Fix Dryer Power Cord Replacement: passo 3, imagem 2 %32
    • Remove the panel by sliding it to the LEFT.

  4. Fast Fix Dryer Power Cord Replacement: passo 4, imagem 1 %32
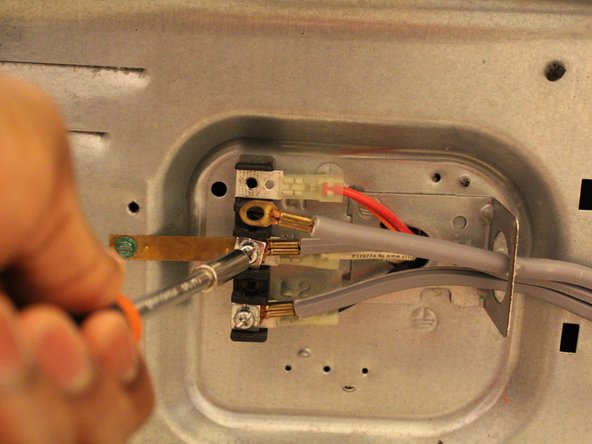
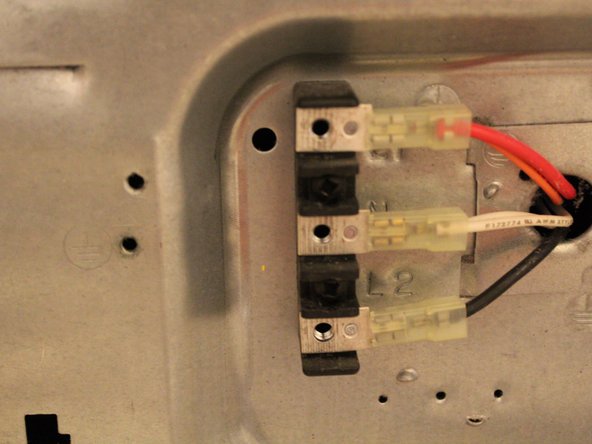
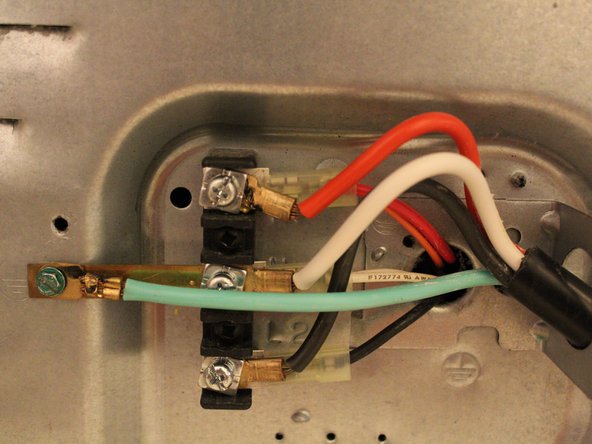
    • Now that the panel is off, you can see the wires needed to be replaced.

    • The configuration of the wires are power at the top (Usually represented as RED or BLACK)

    • The ground wire is in the middle (Usually represented as WHITE)

    • The bottom wire is also a power wire also (Usually represented as RED or BLACK)

  5. Fast Fix Dryer Power Cord Replacement: passo 5, imagem 1 %32 Fast Fix Dryer Power Cord Replacement: passo 5, imagem 2 %32 Fast Fix Dryer Power Cord Replacement: passo 5, imagem 3 %32
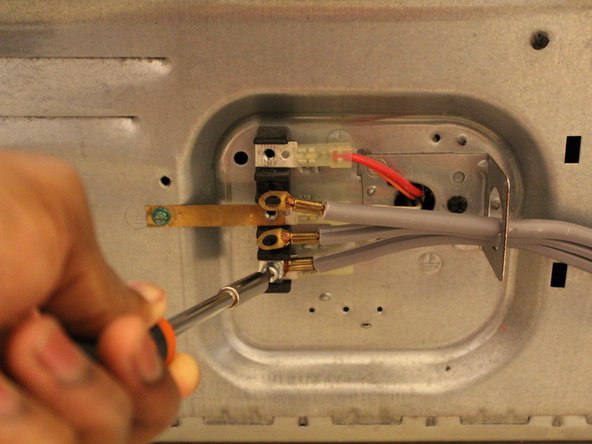
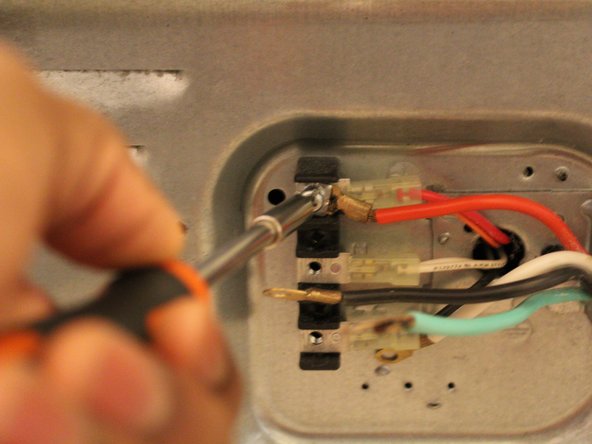
    • Remove the screws that hold the three wires in place.

  6. Fast Fix Dryer Power Cord Replacement: passo 6, imagem 1 %32 Fast Fix Dryer Power Cord Replacement: passo 6, imagem 2 %32
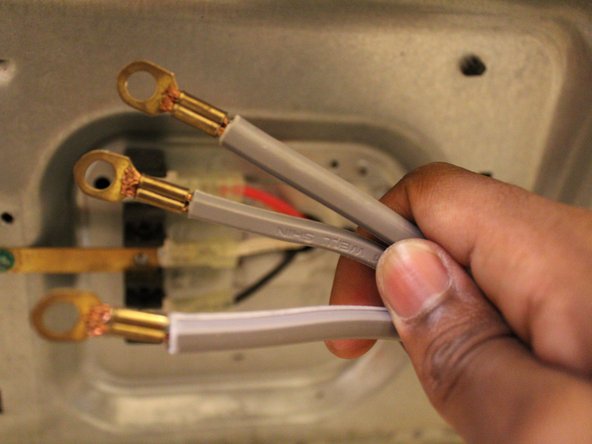
    • You should now be able to remove the power cord freely.

  7. Fast Fix Dryer Power Cord Replacement: passo 7, imagem 1 %32 Fast Fix Dryer Power Cord Replacement: passo 7, imagem 2 %32
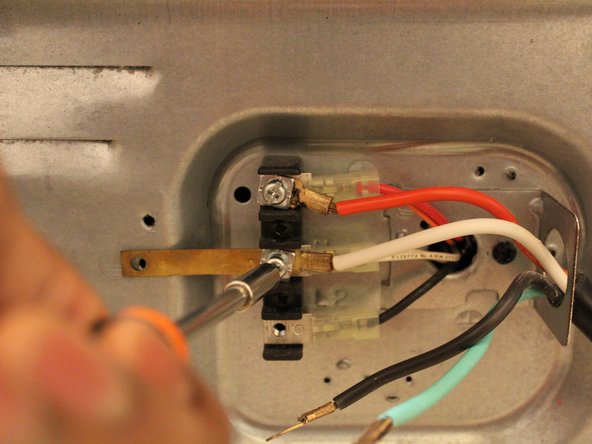
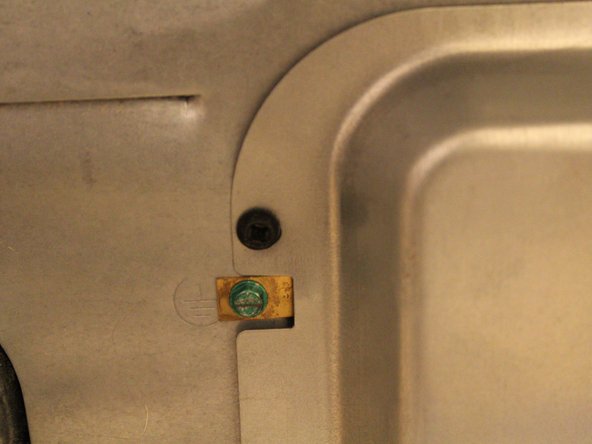
    • Now remove the green screw in order to remove the grounding bracket.

  8. Fast Fix Dryer Power Cord Replacement: passo 8, imagem 1 %32 Fast Fix Dryer Power Cord Replacement: passo 8, imagem 2 %32 Fast Fix Dryer Power Cord Replacement: passo 8, imagem 3 %32
    • With everything removed, you can now bring in your new 4 prong power cord.

    • Unlike the old power cord, the new power cord should have the color of what type of wire it is (ex. red for power and white for ground).

    • You can start screwing in the wires with the removed screws from the old cord to the new RED WIRE at the TOP.

    • With the WHITE WIRE, grab the gold plate and put it on top of the wire. Grab the screw and put it on top of the gold plate and screw it in the MIDDLE.

  9. Fast Fix Dryer Power Cord Replacement: passo 9, imagem 1 %32 Fast Fix Dryer Power Cord Replacement: passo 9, imagem 2 %32 Fast Fix Dryer Power Cord Replacement: passo 9, imagem 3 %32
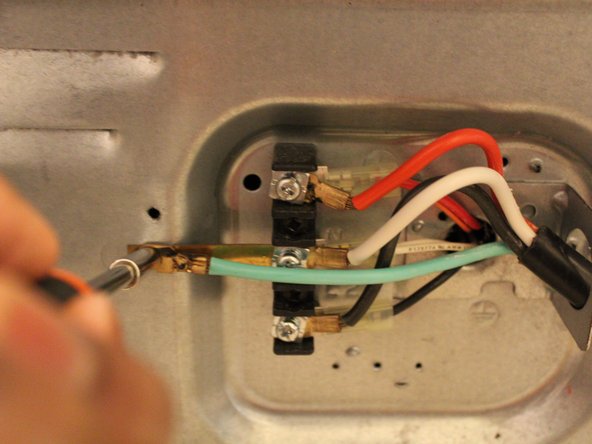
    • Screw the BLACK WIRE at the BOTTOM regularly like the red wire.

    • You should have an extra green wire as this is placed where you saw the green screw in the beginning.

    • Grab the green wire and put it at the end of the gold plate and grab the green screw to screw it in for a tight connection.

  10. Fast Fix Dryer Power Cord Replacement: passo 10, imagem 1 %32 Fast Fix Dryer Power Cord Replacement: passo 10, imagem 2 %32 Fast Fix Dryer Power Cord Replacement: passo 10, imagem 3 %32
    • Slide the panel back over the power cord and screw it back in.

  11. Fast Fix Dryer Power Cord Replacement: passo 11, imagem 1 %32 Fast Fix Dryer Power Cord Replacement: passo 11, imagem 2 %32
    • Plug your dryer back into the socket and go to your breaker box to turn the power back on.

    • You can now use your dryer in your new home.

    • If your dryer does not turn on check your breaker box to make sure it did not short your circuit. If so turn the breaker switch to the OFF position and check wiring connections.

Conclusão

To reassemble to the 3 prong configuration, follow these instructions in reverse order.

Ronnie Mitchell

Membro desde: 09/29/21

193 Reputação

Autoria de 1 guia

0 comentários

Adicione um comentário

Exibir estatísticas:

Últimas 24 horas: 0

Últimos 7 dias: 8

Últimos 30 dias: 24

Duração total: 438