Ir para o conteúdo principal

Eureka EasyClean 71C Belt Replacement

O que você precisa

  1. Eureka EasyClean 71C Belt Replacement, Bottom Cover: passo 1, imagem 1 %32
    • Unscrew the two 18.1 mm PH2 Phillips head screws on the bottom of the vacuum.

  2. Eureka EasyClean 71C Belt Replacement: passo 2, imagem 1 %32
    • Pry off the Riser Visor using the plastic opening tool.

  3. Eureka EasyClean 71C Belt Replacement: passo 3, imagem 1 %32
    • Remove the screw cap using the metal spudger.

    • First-time removal of the screw cap can be difficult. The screw cap isn’t vital, so don’t worry about damaging the screw cap and just keep trying until it comes out.

  4. Eureka EasyClean 71C Belt Replacement: passo 4, imagem 1 %32 Eureka EasyClean 71C Belt Replacement: passo 4, imagem 2 %32
    • Unscrew the 14mm PH2 Phillips head screw.

    • Pull the bottom cover off of the rest of the casing.

  5. Eureka EasyClean 71C Belt Replacement, Belt: passo 5, imagem 1 %32 Eureka EasyClean 71C Belt Replacement, Belt: passo 5, imagem 2 %32
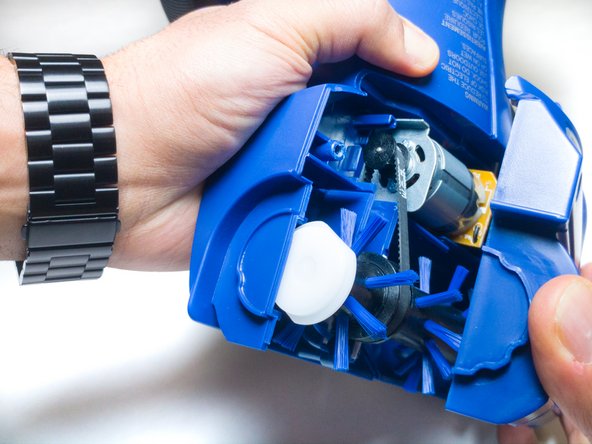
    • Pull the roller, motor, and belt out of the casing.

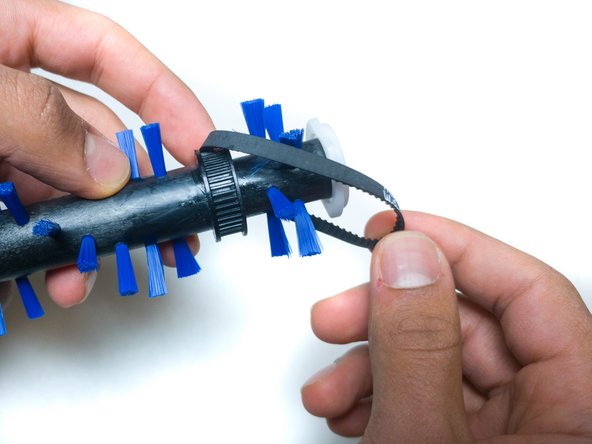
    • Separate the belt from both the roller and the motor.

Conclusão

To reassemble your device, follow these instructions in reverse order.

Tanner Durnil

Membro desde: 11/06/17

631 Reputação

Autoria de 6 guias

Equipe

IUPUI, Team S6-G4, Baechle Fall 2017 Membro de IUPUI, Team S6-G4, Baechle Fall 2017

IUPUI-BAECHLE-F17S6G4

Membros da 3

Autoria de 12 guias

Um comentário

Hello would you know what belt number this would use? I have looked everywhere. I would appreciate it

vdean4b - Responder

Adicione um comentário

Exibir estatísticas:

Últimas 24 horas: 0

Últimos 7 dias: 5

Últimos 30 dias: 11

Duração total: 1,517