Este guia tem alterações mais recentes. Mudar para a última versão não verificada.
Introdução
We have about 25 of these soldering stations in my workplace, but after 5 or 6 years of use, their display backlight started to fail. Without backlight, the display is almost ilegible. Since 4 stations have developed this problem so far, I've decided to look into it.
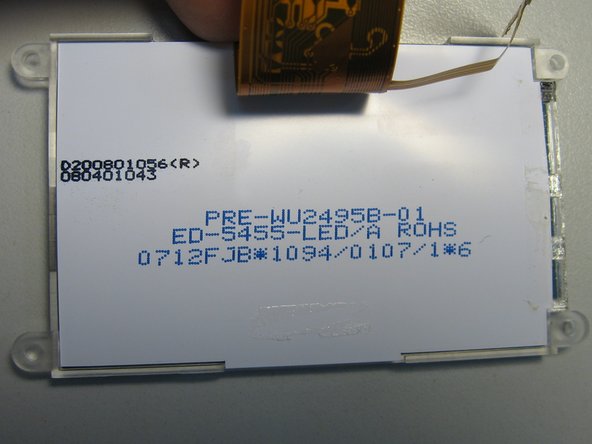
Ersa doesn't offer standalone replacement displays, they force you to buy a new control board. It costs whopping 160 EUR, which is almost half the price of a new soldering station. It is possible to buy replacement displays in this American e-shop, but shipping costs to Europe start around 100 USD. That's better, but still not exactly cost-effective (50 USD displays, 100 USD shipping). In reality, the displays are probably manufactured somewhere in China, but I couldn't identify their original manufacturer, nor I was able to find other source (Ebay, Alibaba...) for them. If someone finds them, please let me know in the comments. Here are markings that are on the back of the display:
PRE-WU2495B-01
ED-5455-LED/A ROHS
0712FJB*1094/0107/1*6
Anyway, since I couldn't get new displays for reasonable price, I decided to replace burned backlight LEDs in the displays. I used LTW-108DCG-HS10 as replacement LEDs in this guide, but any miniature white LEDs with at least 1000 mcd luminous intensity should do. See step 14 for more information.
O que você precisa
-
-
Pull off the control knob using flat-head screwdriver or similar tool.
-
-
-
Flip the station over and remove 4 screws with T20 screwdriver. Then flip the station back and pull up the top cover.
-
-
-
Remove 4 plastic nuts around the display with pliers or similar tool.
-
-
-
Carefully flip the display upwards. Then loosen the flat cable connector by pushing up small brown bars on both sides. Pull the flat cable from the connector.
-
-
-
Display backlight is hidden under white tape on the right side.
-
The second photo shows markings on the display.
-
-
-
-
Carefully remove the white cover tape. It's best to use a knife or similar tool.
-
-
-
You can hold down the circuit strip with a knife or similar tool to unstick it from the cover tape.
-
-
-
Carefully unstick the circuit strip from the plexiglass base with knife.
-
The strip is glued in with a thin transparent double-sided tape. Make sure the tape stays on the plexiglass base. If it tears away along with the strip, use knife tip to push it back onto the plexiglass.
-
-
-
Fold the circuit strip onto display's back cover and weigh it down. This will reveal the faulty original LEDs and some resistors.
-
-
-
I analyzed original backlight connections and it's apparent why it fails: Chinese comrades who designed the display wanted to save some money and/or space and connected the LEDs in parallel.
-
Of course, every LED has slightly different threshold voltage. As a consequence, one of them draws more current and fails (burns open) prematurely. The remaining two LEDs are then subjected to even higher currents and burn soon afterwards, too.
-
Thus I decided to change the connection according to the lower schematic - I shorted the original 22R resistors and put a 220R resistor in series with each new LED.
-
-
-
Fortunately, there is enough room on the strip to solder in new LEDs (red arrows) along with their 220R resistors (green arrows) on the original solder pads. It's ugly, but it works. You have to use resistors in 0603 package to fit them into the available space.
-
Note that I also desoldered the original 22R resistors and shorted their pads with a thin wire (purple arrow).
-
You can verify that all three new LEDs work by connecting a 5V power supply onto "A" and "K" pads on the strip.
-
-
-
Secure the strip in place with new tape cover. I used brown electrical tape in this photo.
-
Then you can reassemble the soldering station.
-
-
-
Here you can see comparison of original (left) and new backlight (center). The new backlight is slightly brighter than the original; you can use larger resistors (270 or 330R instead of 220R) to lower the brightness.
-
I also experimented with general-purpose VLMW11R2S2-5K8L-08 omidirectional LEDs. You can see the result on the station on the right - the display is rather dim and there is significant backlight bleed on its right edge, where the LEDs are located. Thus I recommend to use only directional, right-angle LEDs like LTW-108DCG-HS10.
-
Since new LEDs need lower current to achieve similar light output, they should outlast the soldering station. This "trick" is generally applicable; high-brightness LEDs always generate more light at 2 mA than ordinary LEDs at 20 mA. At the same time, they consume less power, generate less heat and last much longer.
Really great job!! I have similar problem. But when I strip soldering station I can see that those LED are still working. I can see light on them and around screen. Any idea, any help, please
If the backlight works, but the display is not legible, then your contrast setting may be wrong. It's somewhere in the config menu, check the user manual. There is also some way to reset all settings to default values, but I don't remember how.
The display can be found on DigiKey; drop in replacement for $18 USD.
-


To reassemble your device, follow these instructions in reverse order.
To reassemble your device, follow these instructions in reverse order.
Cancelar: não concluí este guia.
6 outras pessoas executaram este guia.
7 comentários
Thanks a ton. We have ~20 units in our facility and experiencing the same issue. I feel like writing a preventive action to ERSA. I've followed your steps, bought the LEDs and found some 120ohm (0603) resistors laying around. You are pretty accurate on the time. It's about 20mins after you get the first couple done. The results are night and day (pun intended...lol). I do like the irons and they work great, but just one drawback is the display design. Huge cost savings to do them yourself, but you need to have a light hand, and don't burn anything. I used 3 layer paper under the circuit, exacto blade and tweezers to peel the tape back. The recommended LED part number (LTW-108xxx) works great. Thanks for this awesome money saver, our employees are happy they can see the display again. You Rock!
Thank you for your detailled walktrough.
I have found two types of screen on my ersa icon1. Lucky me one of the screens had a sticker with the model identification and is equal to your screen. =)
The model is ES13BB0BMW, manufactured by EMERGING DISPLAY TECHNOLOGIES CORP.
The only place I could find it for sale was here:
https://www.questcomp.com/part/4/ES13BB0...
But i am still waiting for a quote, because unfortunly my screen is dead.
You can also find a link to the datasheet on the above link.
I attemped connecting the other screen, the different one, and found it to no work properly on the pcb. The text gets faint. Dont know why yet.
Hello Again,
I have just found the other display version. Is quite easy to find on the web.
AMG12864PR-G-B12WTDW
http://www.orientlcd.com/mobile/Product....
On the above link you can also find the datasheets.
It also looks like someone already figured it out befor me.
https://www.eevblog.com/forum/repair/rep...
However altough thee pcb is the same, there are some differences on the mounted components. A direct compatibility can not be possible.. Maybe even software is different.. I will walk through the displays datasheets and see what might be needed to ensure compatibility between the two versions.
If I can pull it out I will maybe do a walkthrough in this.
The LCD controller is the same on both LCDs .. SITRONIX7565P , meaning that software should be compatible.
The display from Orient is confirmed to work just by direct replacement. =)
A week ago I got a newer i-Con station with failed backlight, but the flexible PCB strip for the LEDs was different. The LED pads were much smaller and the PCB was covered with white silkscreen. Due to smaller pads, I tried to solder in LEDs with 0402 package resistors, but the LEDs didn’t work, because the minuscule PCB vias broke when I manipulated with the strip. The display had different marking too, here are some photos, so you know which displays to avoid:
In the end, I bought replacement displays, but I bought them via Digikey, because they had much smaller shipping costs to Europe:
Hmm, I see the original Digikey link is dead. The display has part number AMG12864PR-G-B12WTDW