Introdução
This guide is to assist you in removing the Epson VS240's shell for access into the projector. Removal of the shell will be necessary for any repairs of the eternal components of the projector.
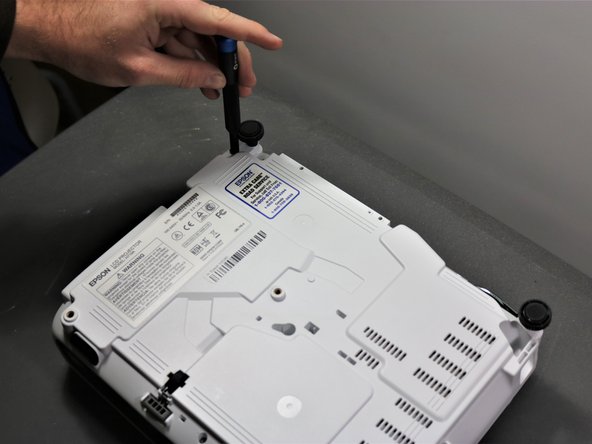
For this repair you will need a screwdriver extender to reach some of the screws.
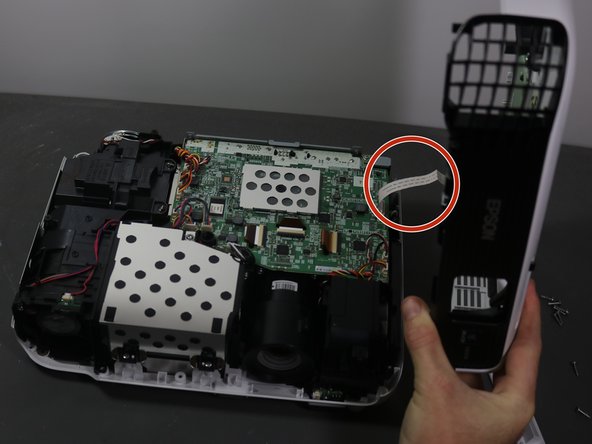
Be careful for the white ribbon cable in step 7, it is very fragile and you don't want to break it.
O que você precisa
-
-
Using the Phillips #2 screwdriver, loosen the single captive screw on the left side of the projector.
-
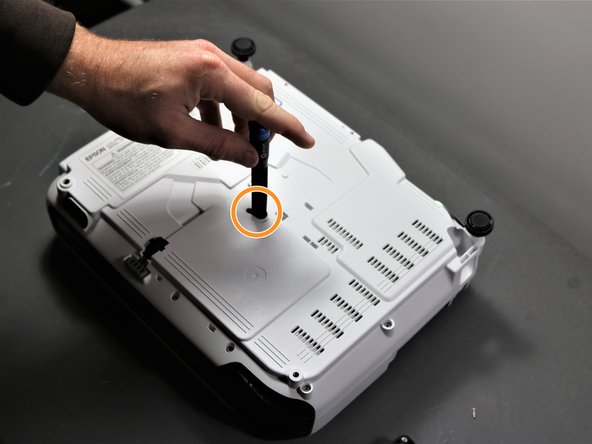
Slide the panel off and remove it from the device.
-
-


To reassemble your device, follow these instructions in reverse order.
To reassemble your device, follow these instructions in reverse order.
Equipe

Clemson, Team 5-3, Hunter Fall 2021 Membro de Clemson, Team 5-3, Hunter Fall 2021
CLEM-HUNTER-F21S5G3
Membros da 5
Autoria de 6 guias