Ir para o conteúdo principal

Ecovacs Deebot 900 Vacuum Motor Replacement

O que você precisa

  1. Ecovacs Deebot 900 Vacuum Motor Replacement, Battery: passo 1, imagem 1 %32
    • Remove all the brushes from the Deebot.

  2. Ecovacs Deebot 900 Vacuum Motor Replacement: passo 2, imagem 1 %32
    • Using a Phillips #0 screwdriver, remove the two 12.25 mm screws holding the battery cover in place.​

  3. Ecovacs Deebot 900 Vacuum Motor Replacement: passo 3, imagem 1 %32
    • Remove the battery cover.

  4. Ecovacs Deebot 900 Vacuum Motor Replacement: passo 4, imagem 1 %32
    • Using the two white straps on the sides of the battery, gently remove the battery. ​

    • Be careful not to rip out the battery cable.

  5. Ecovacs Deebot 900 Vacuum Motor Replacement: passo 5, imagem 1 %32
    • Carefully disconnect the battery cable by pulling near the connector at the bottom of the battery compartment.

  6. Ecovacs Deebot 900 Vacuum Motor Replacement, Front Bumper: passo 6, imagem 1 %32 Ecovacs Deebot 900 Vacuum Motor Replacement, Front Bumper: passo 6, imagem 2 %32
    • Using a Phillips #00 screwdriver, remove the eight screws on the bottom edge of the bumper. ​

  7. Ecovacs Deebot 900 Vacuum Motor Replacement: passo 7, imagem 1 %32
    • Remove the black strip on the bottom of the bumper.

  8. Ecovacs Deebot 900 Vacuum Motor Replacement: passo 8, imagem 1 %32 Ecovacs Deebot 900 Vacuum Motor Replacement: passo 8, imagem 2 %32
    • Carefully lift up the bumper untill it pops out of place.​

  9. Ecovacs Deebot 900 Vacuum Motor Replacement: passo 9, imagem 1 %32 Ecovacs Deebot 900 Vacuum Motor Replacement: passo 9, imagem 2 %32
    • Disconnect the two cables connecting the bumper to the body of the Deebot.

    • Remove the front bumper from the device.

  10. Ecovacs Deebot 900 Vacuum Motor Replacement, Bottom Case: passo 10, imagem 1 %32 Ecovacs Deebot 900 Vacuum Motor Replacement, Bottom Case: passo 10, imagem 2 %32
    • Using a Phillips #00 screwdriver, take out the six screws around the perimeter of the bottom case.

  11. Ecovacs Deebot 900 Vacuum Motor Replacement: passo 11, imagem 1 %32 Ecovacs Deebot 900 Vacuum Motor Replacement: passo 11, imagem 2 %32
    • Insert a Jimmy into the seam and work all the way around the robot.

    • Disconnect the two cables and remove the bottom case from the device.

  12. Ecovacs Deebot 900 Vacuum Motor Replacement, Vacuum Motor: passo 12, imagem 1 %32
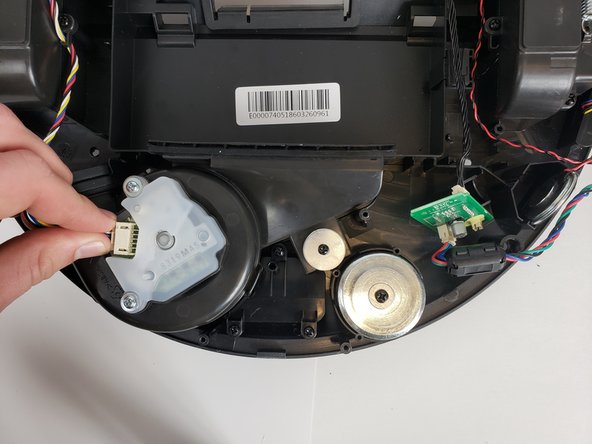
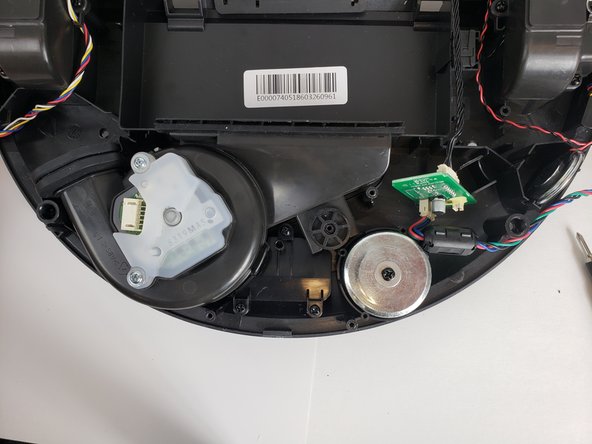
    • Using the Phillips #00 screwdriver, remove the three screws around the laser unit.

  13. Ecovacs Deebot 900 Vacuum Motor Replacement: passo 13, imagem 1 %32 Ecovacs Deebot 900 Vacuum Motor Replacement: passo 13, imagem 2 %32
    • Carefully lift the laser unit off of the motor assembly​.

  14. Ecovacs Deebot 900 Vacuum Motor Replacement: passo 14, imagem 1 %32
    • Remove the single screw holding the motor assembly in place using the Phillips #00 screwdriver.

  15. Ecovacs Deebot 900 Vacuum Motor Replacement: passo 15, imagem 1 %32 Ecovacs Deebot 900 Vacuum Motor Replacement: passo 15, imagem 2 %32
    • Disconnect the ribbon cable holding the assembly in place.

    • Be careful not to damage the cable.

  16. Ecovacs Deebot 900 Vacuum Motor Replacement: passo 16, imagem 1 %32
    • Lift and remove the motor assembly out of the Deebot.​

Conclusão

To reassemble your device, follow these instructions in reverse order.

5 outras pessoas executaram este guia.

Um comentário

Where can you find a replacement vacuum motor for the zoom 930?

Aaron Commons - Responder

Adicione um comentário

Exibir estatísticas:

Últimas 24 horas: 0

Últimos 7 dias: 19

Últimos 30 dias: 101

Duração total: 10,970