Introdução
Here is a DualShock 4 controller that had a drift to both analog joysticks. Fairly straight forward replacement of the joysticks resolved the issue.
The joysticks are soldered to the controller board. You'll need a soldering station to complete this repair.
O que você precisa
-
-
Check the model number on the back of your controller. This guide was written using model CUH-ZCT1U. If you have another model, the guide procedure and replacement parts may differ slightly.
-
-
-
Use a Phillips screwdriver to remove the four 6.4 mm-long screws securing the rear case.
-
-
-
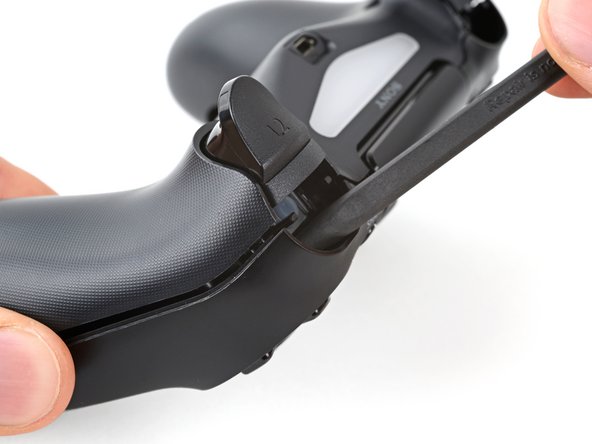
Use an opening pick to pry each corner of the L1 button from the front case.
-
Remove the button.
-
-
-
Use your opening pick to pry and remove the R1 button, just as you did for the L1 button.
-
-
-
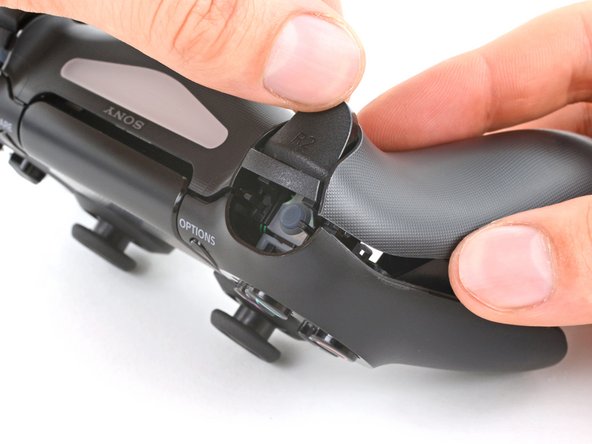
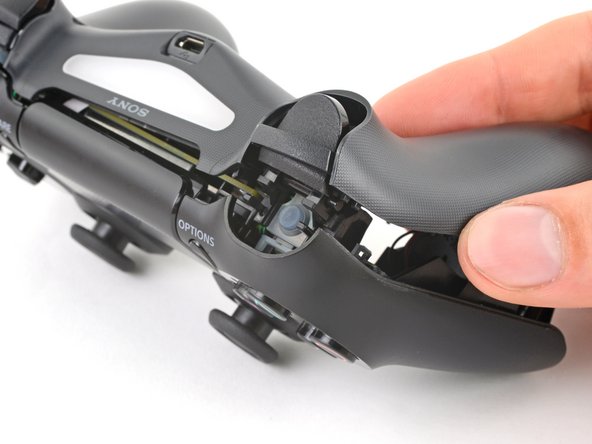
Insert your opening pick at a downward angle between the front case and rear case, halfway between the handle and the action buttons.
-
Slide your pick toward the handle and pry up to release the first clip.
-
Repeat this procedure on the other side of the controller to release the second clip.
-
-
-
-
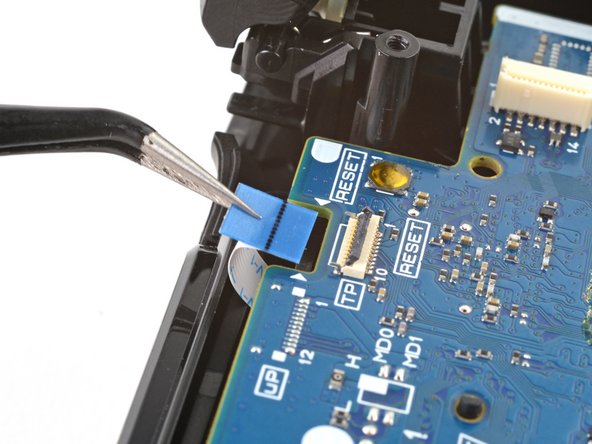
Use tweezers or your fingers to remove the interconnect cable by pulling its blue pull tab straight out of the socket.
-
-
-
Use tweezers or your fingers to grab and disconnect the head of the battery cable from the motherboard.
-
-
-
Grab and remove the reset button extension from its recess in the battery bracket.
-
-
-
Locate the two clips securing the battery bracket to the motherboard.
-
Insert the point of your spudger into the opening behind the right bracket clip.
-
Depress the clip to disengage it from the motherboard.
-
Lift up the right edge of the battery bracket.
-
-
-
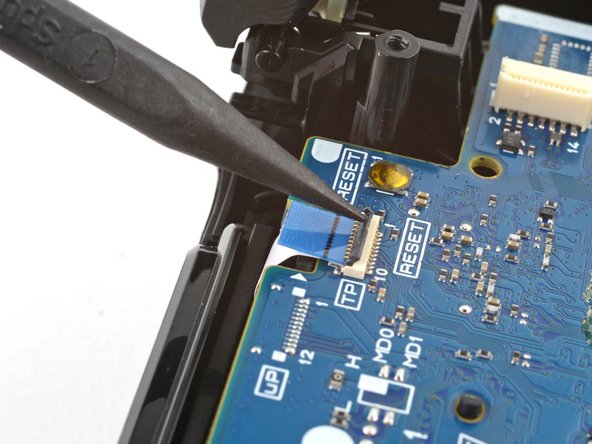
Use the point of your spudger to flip up the locking flap securing the touch pad cable ZIF connector.
-
Use tweezers or your fingers to disconnect the cable using its blue pull tab.
-
-
-
Use your Phillips screwdriver to remove the 6.4 mm screw securing the motherboard.
-
-
-
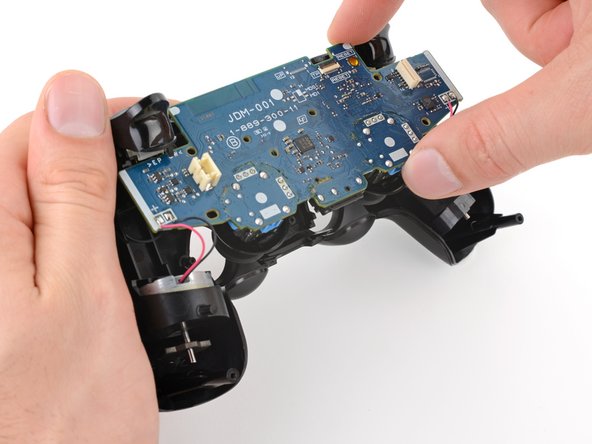
Lift the motherboard from the midframe.
-
Guide the analog stick covers through their cutouts in the front case.
-
Flip the motherboard over the bottom of the controller, leaving the vibration motor cables attached.
-
-
-
These are the solder connections that will need to be desoldered. Since the board is upside down, left will become right.
-
Use a desoldering wick and flux to melt and remove the solder
-
This may take a bit of practice since all the solder will have to be removed. It does help to pull a bit on the joystick while melting the solder and using the wick.
I'm new to solder/desoldering but i've been unable to get the solder to really melt or come loose enough to remove during this step. i have a solder remover/sucker but alas no luck.
any recommendations?
You need heat, solder wick (skip the solder sucker, those never work for me;-) and lots of flux. Place flux on your wick and tin the tip of your soldering iron with solder as well.
-
-
-
Once all the contacts are desoldered, the old joystick can be removed.
-
Check that all the holes are cleared of old solder. Hypodermic needles as well as very small drill bits can be used to clear the holes.
-
Insert the new joystick into the circuit board. Make sure it is properly seated and that all the contacts line up with the holes in the circuit board.
-


To reassemble your device, follow these instructions in reverse order.
To reassemble your device, follow these instructions in reverse order.
Cancelar: não concluí este guia.
33 outras pessoas executaram este guia.

Equipe

14 comentários
I just tried to remove both joystick and replaced them but unfortunately only one joystick works and that one that works it's stuck on and only moves in one direction.
I've not been able to actually get the solder out, would love any suggestions or tips.
send me a couple of pictures on what your repair looks like thus far. Send them to my email. Click on my username and my email address is on my profile. Let's see what you got so far.
This is a very difficult repair, what this guy didn't mention is you need a very expensive solder station with an electric solder sucker. The solder needs removing and it's nearly impossible without damaging the tracking.
You definitely need some soldering experience but the repairability is not that difficult. The soldering points are big enough for any cheap ($40) soldering iron can get too. As for removing them, it helps to use flux and also a soldering wick to absorb all the old solder. It is not easy but not the most difficult repair. P.S you do not need the expensive soldering stating with hot air etcetera. This works perfectly as it get hot beyond the required point to melt the solder
I've been repairing ps4 controllers along time and this isn't an easy fix. You need an electric solder sucker, to get all the solder out the holes with danagimv the tracking is near on impossible with a good solder
@dave2003 “what this guy didn't mention is you need a very expensive solder station with an electric solder sucker “, nope! All I used what a run-of-the-mill soldering iron and some soldering wick and flux. This is a straight forward repair that does not require any special tools!
Can someone suggest a good soldering gun and soldering metal ?
mine is for very thin wires.
What is the best soldering gun yet affordable that I can use to solder this in place ?
mine only works for thin wires.
Pro tip: If the button works properly and you only need to fix 1 axis, you only need to remove the 3 pins that holds the potentiometer. You can snap off the potmeter from the metal casing of the stick and replace that part only if you have a compatible one but you need to be carefull, as there are multiple size of analog sticks with different potmeters on the sides and sometimes the shaft doesn’t match. But if you have multiple spares analog stick you can try to find a matching one.
I took the ps4 controller apart, and the video I was watching said to pop off the green things that are around the analog stick with white things inside them, they have tiny pieces on top and bottom, i’m missing that little peice, does that matter
Link to purchase part takes you to N64 joystick part. Doesn't appear to be correct?
thank you🙏🏽