Esta versão pode conter edições incorretas. Mude para o último instantâneo verificado.
O que você precisa
-
Este passo não foi traduzido. Ajude a traduzi-lo
-
Check the model number on the back of your controller. This guide was written using model CUH-ZCT1U. If you have another model, the guide procedure and replacement parts may differ slightly.
-
-
Este passo não foi traduzido. Ajude a traduzi-lo
-
Use a Phillips screwdriver to remove the four 6.4 mm-long screws securing the rear case.
-
-
Este passo não foi traduzido. Ajude a traduzi-lo
-
Use an opening pick to pry each corner of the L1 button from the front case.
-
Remove the button.
-
-
Este passo não foi traduzido. Ajude a traduzi-lo
-
Use your opening pick to pry and remove the R1 button, just as you did for the L1 button.
-
-
Este passo não foi traduzido. Ajude a traduzi-lo
-
Insert your opening pick at a downward angle between the front case and rear case, halfway between the handle and the action buttons.
-
Slide your pick toward the handle and pry up to release the first clip.
-
Repeat this procedure on the other side of the controller to release the second clip.
-
-
-
Este passo não foi traduzido. Ajude a traduzi-lo
-
Two more clips secure the rear case near the extension port and the headphone jack.
-
Insert your opening pick between the front case and rear case at either side of the ports.
-
Twist your pick to unclip this section of the rear case from the front case.
-
-
Este passo não foi traduzido. Ajude a traduzi-lo
-
Locate the clips by looking through the gap above the R2 or L2 buttons.
-
-
Este passo não foi traduzido. Ajude a traduzi-lo
-
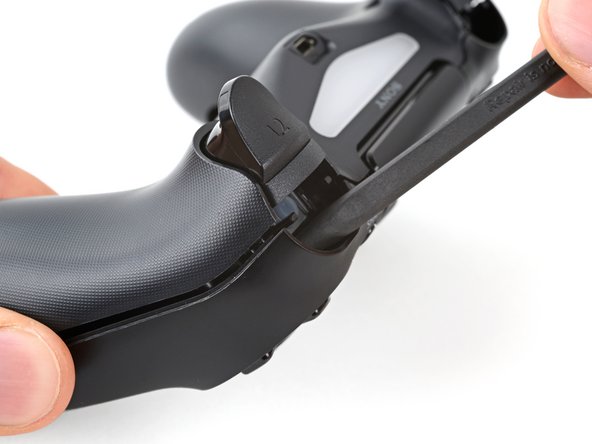
Insert the point of a spudger through the gap above the R2 button and push the retaining clip outward.
-
While pushing the clip outward, slowly pull the rear case away from the front case until you feel them separate.
-
Repeat this procedure for the clip near the L2 button.
-
-
Este passo não foi traduzido. Ajude a traduzi-lo
-
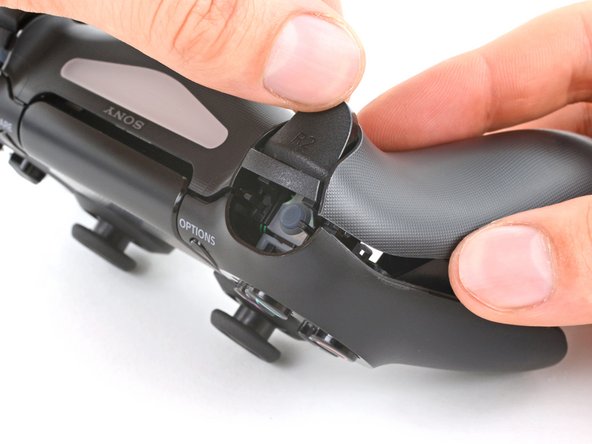
Press the R2 button and slide the rear case over it.
-
-
Este passo não foi traduzido. Ajude a traduzi-lo
-
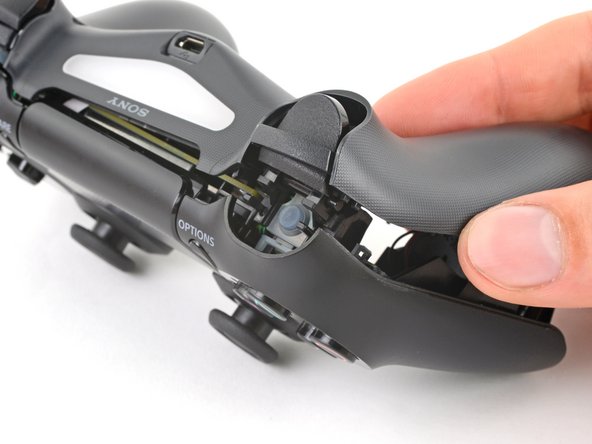
Press the L2 button and slide the rear case over it.
-
-
Este passo não foi traduzido. Ajude a traduzi-lo
-
Flip the rear case over the top of the controller and lay it down, being careful not to strain the interconnect cable.
-
-
Este passo não foi traduzido. Ajude a traduzi-lo
-
Use tweezers or your fingers to remove the interconnect cable by pulling its blue pull tab straight out of the socket.
-
-
Este passo não foi traduzido. Ajude a traduzi-lo
-
Use tweezers or your fingers to grab and disconnect the head of the battery cable from the motherboard.
-


Cancelar: não concluí este guia.
206 outras pessoas executaram este guia.


29 comentários
My Dualshock 4 wont turn on after the battery replacement.
Any idea on why this happened?
have you tried to charge it?
I found a replacement battery here, you have to mod the tray a little, but it works like a champ and doubles the life.
The x button on my controller want working properly so I ordered new rubber mounts. I followed the guide, taking my time to make sure I didn't damage anything.
With the new rubber in place I put everything back together and the controller was working fine but now I've realised it doesn't charge. The battery goes completely dead and switches off. If I then connect it with usb cable it doesn't charge but will turn on the controller for maybe 10 seconds before switching off again.
Anyone any idea what is going on? Thanks.