Ir para o conteúdo principal
Participe da comunidade de reparos - Criar conta

Dopo Double Power 7 Motherboard Replacement

O que você precisa

    1. Dopo Double Power 7 Motherboard Replacement, Rear Panel: passo 1, imagem 1 %32
      • The rear panel is secured to the front case and can simply be pried apart without damage.

      Pergunte ao FixBot

      Comentar

    2. Dopo Double Power 7 Motherboard Replacement: passo 2, imagem 1 %32
      • Carefully, wedge the plastic opening tool in-between the seam that separates both halves of the tablet.

      Pergunte ao FixBot

      Comentar

    3. Dopo Double Power 7 Motherboard Replacement: passo 3, imagem 1 %32
      • Run the plastic opening tool along the seam looking for the clips and lift up on the rear panel.

      Pergunte ao FixBot

      Comentar

    4. Dopo Double Power 7 Motherboard Replacement: passo 4, imagem 1 %32
      • The rear panel should come completely off.

      Pergunte ao FixBot

      Comentar

    1. Dopo Double Power 7 Motherboard Replacement, Motherboard: passo 5, imagem 1 %32
      • Remove any static tape covering the motherboard.

      Pergunte ao FixBot

      Comentar

    2. Dopo Double Power 7 Motherboard Replacement: passo 6, imagem 1 %32 Dopo Double Power 7 Motherboard Replacement: passo 6, imagem 2 %32
      Ferramenta utilizada neste passo:
      Tweezers
      $4.99
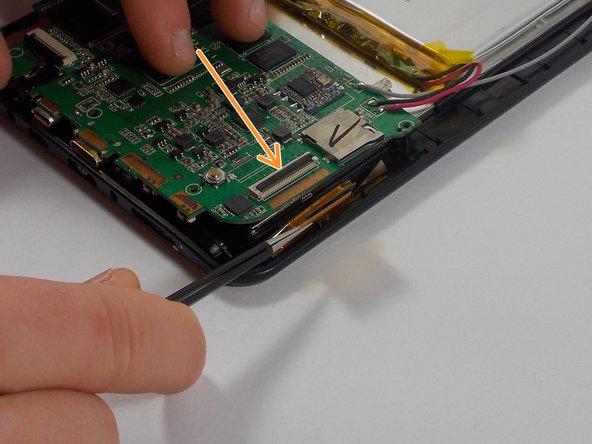
      • Using the flat end of a spudger or tweezers, remove the three cables connected to the motherboard.

      • The cables can be disconnected by lifting up on the black section of the socket, as shown by the arrow.

      • Once the lever is lifted, pull out the cable by gently tugging on it.

      Pergunte ao FixBot

      Comentar

    3. Dopo Double Power 7 Motherboard Replacement: passo 7, imagem 1 %32
      • Using a Phillips Head Screwdriver size 0, remove the four screws attaching the motherboard.

      Pergunte ao FixBot

      Comentar

    4. Dopo Double Power 7 Motherboard Replacement: passo 8, imagem 1 %32 Dopo Double Power 7 Motherboard Replacement: passo 8, imagem 2 %32
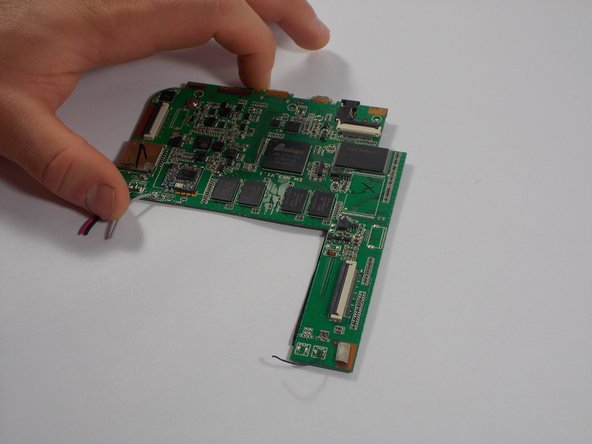
      • Using wire cutters, cut the red, black, and grays wires.

      • The motherboard can now be removed

      • Leave enough wire to be re-soldered back if possible.

      Pergunte ao FixBot

      Comentar

Conclusão

To reassemble your device, follow these instructions in reverse order.

Cancelar: não concluí este guia.

Uma outra pessoa concluiu este guia.

mike pelosi

Membro desde: 10/30/15

682 Reputação

Autoria de 6 guias

Equipe

UMass Dartmouth, Team 1-2, Miles Fall 2015 Membro de UMass Dartmouth, Team 1-2, Miles Fall 2015

UMASSD-MILES-F15S1G2

4 Membros

Autoria de 72 guias

0Comentários do guia

Comentar

Visualizações:

Últimas 24 horas: 4

Últimos 7 dias: 21

Últimos 30 dias: 56

Ao todo: 820