Esta versão pode conter edições incorretas. Mude para o último instantâneo verificado.
O que você precisa
-
Este passo não foi traduzido. Ajude a traduzi-lo
-
Apply pressure on the cover while simultaneously sliding the cover downward.
-
Remove the back battery cover.
-
-
Este passo não foi traduzido. Ajude a traduzi-lo
-
Insert the spudger between the base of the phone and the phone battery.
-
Position the phone so that the battery won't fall out of the phone.
-
Carefully lift the battery out of the phone.
-
-
Este passo não foi traduzido. Ajude a traduzi-lo
-
Use a Phillips #00 screwdriver or your fingers to remove the rubber tabs at top back of the phone.
-
-
-
Este passo não foi traduzido. Ajude a traduzi-lo
-
Remove four 5mm screws from the back of the phone using a T6 Torx screwdriver:
-
2 screws at the bottom
-
2 screws at the top
-
-
Este passo não foi traduzido. Ajude a traduzi-lo
-
Insert the spudger in tabs between the outer casing and the inside frame.
-
Slide the spudger upwards.
-
-
Este passo não foi traduzido. Ajude a traduzi-lo
-
The phone should now be in two different sections.
-
1) The rear case of the phone.
-
2) The motherboard and the rest of the phone.
-
-
Este passo não foi traduzido. Ajude a traduzi-lo
-
Use the spudger to lift off the yellow clip near the top right corner of the motherboard.
-
-
Este passo não foi traduzido. Ajude a traduzi-lo
-
Use the spudger to lift the motherboard out of the base of the phone.
-
Remove the motherboard from the base of the phone.
-
-
Este passo não foi traduzido. Ajude a traduzi-lo
-
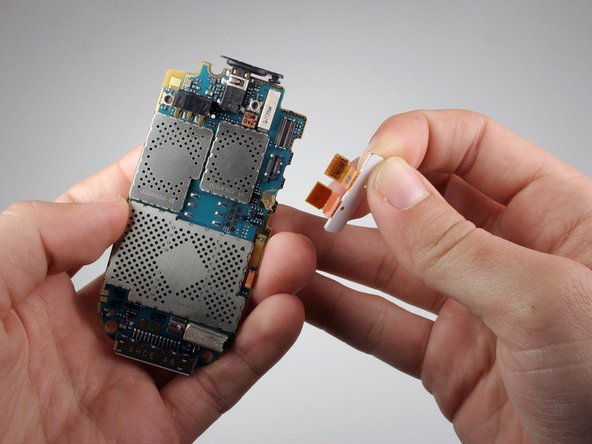
Use the spudger to pull off the top orange chip attached to the white tab.
-
-
Este passo não foi traduzido. Ajude a traduzi-lo
-
Lightly pull up on the white tab to remove the orange tab from the logic board.
-


