Esta versão pode conter edições incorretas. Mude para o último instantâneo verificado.
O que você precisa
-
Este passo não foi traduzido. Ajude a traduzi-lo
-
First be sure to turn the power switch to the off position.
-
Do this by turning the leftmost knob counter-clockwise as until the line points to "off."
-
-
Este passo não foi traduzido. Ajude a traduzi-lo
-
Now remove the battery.
-
On the back of the device locate the battery cover.
-
Remove it by pushing down on the clip.
-
Then pull the piece of fabric until the battery comes out.
-
-
-
Este passo não foi traduzido. Ajude a traduzi-lo
-
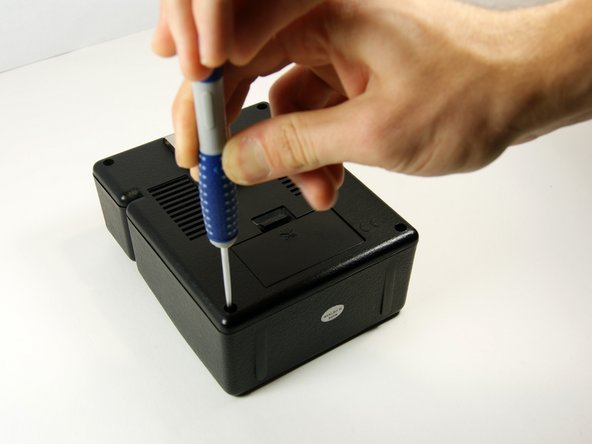
Use the long, skinny phillips head screwdriver to remove the 4 7/16" screws on the back of the device in the four corners.
-
-
Este passo não foi traduzido. Ajude a traduzi-lo
-
Now pull the back panel off and place it down as shown. Pull the panel straight up so you do not lose the screws.
-
Cancelar: não concluí este guia.
Uma outra pessoa concluiu este guia.


