Ir para o conteúdo principal

Disassembling Asus W2W-A1 Front Panel

O que você precisa

  1. Disassembling Asus W2W-A1 Front Panel, Keyboard: passo 1, imagem 1 %32 Disassembling Asus W2W-A1 Front Panel, Keyboard: passo 1, imagem 2 %32 Disassembling Asus W2W-A1 Front Panel, Keyboard: passo 1, imagem 3 %32
    • Remove the battery, then unscrew the 7 3 mm Phillips screws behind the battery. Make sure they go in separate, organized piles.

    • Unscrew the 2 4 mm Phillips head screws by the battery.

  2. Disassembling Asus W2W-A1 Front Panel: passo 2, imagem 1 %32
    • Remove the panel above the keyboard with a plastic spudger.

  3. Disassembling Asus W2W-A1 Front Panel: passo 3, imagem 1 %32
    • Once the panel is removed, use the spudger to pry out the keyboard.

    • Do not fully remove, for the keyboard is still attached to the ribbon cable.

  4. Disassembling Asus W2W-A1 Front Panel: passo 4, imagem 1 %32 Disassembling Asus W2W-A1 Front Panel: passo 4, imagem 2 %32
    • Detach the ribbon cable from the keyboard by pulling the end of the ribbon cable that is attached inside of the laptop.

    • Be sure to detach from the root rather than from near the middle. It should slide out with ease.

    • Now you can fully remove the keyboard from the laptop.

  5. Disassembling Asus W2W-A1 Front Panel, Front Panel: passo 5, imagem 1 %32
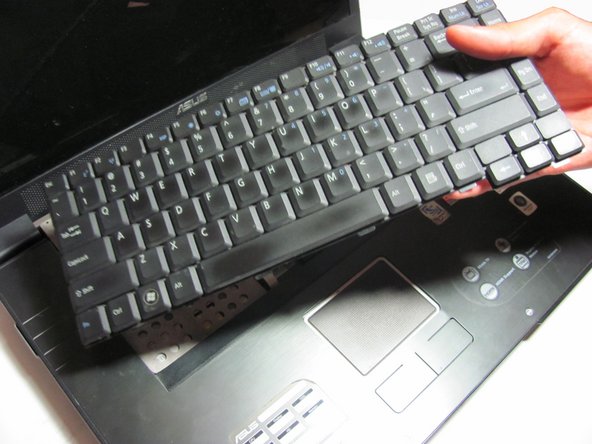
    • Place your fingers or a spudger between the front panel and the rest of the laptop.

    • Pull upwards gently to detach the side you are grabbing.

    • Repeat on the other side until the panel easily peels off the laptop.

Conclusão

To reassemble your device, follow these instructions in reverse order.

Nolan Schock

Membro desde: 04/14/14

501 Reputação

Autoria de 5 guias

Equipe

Cal Poly, Team 13-29, Maness Spring 2014 Membro de Cal Poly, Team 13-29, Maness Spring 2014

CPSU-MANESS-S14S13G29

Membros da 4

Autoria de 8 guias

0 comentários

Adicione um comentário

Exibir estatísticas:

Últimas 24 horas: 0

Últimos 7 dias: 0

Últimos 30 dias: 0

Duração total: 310