Ir para o conteúdo principal

Dewalt Air Compressor DWFP55126 2016 Control Rod Replacement

O que você precisa

  1. Dewalt Air Compressor DWFP55126 2016 Control Rod Replacement, Remove manifold cover: passo 1, imagem 1 %32 Dewalt Air Compressor DWFP55126 2016 Control Rod Replacement, Remove manifold cover: passo 1, imagem 2 %32 Dewalt Air Compressor DWFP55126 2016 Control Rod Replacement, Remove manifold cover: passo 1, imagem 3 %32
    • Disconnect the power cord, depressurize the compressor tank, and remove any hoses before starting this repair.

    • Use a long-shank T10 driver to remove the manifold cover screw.

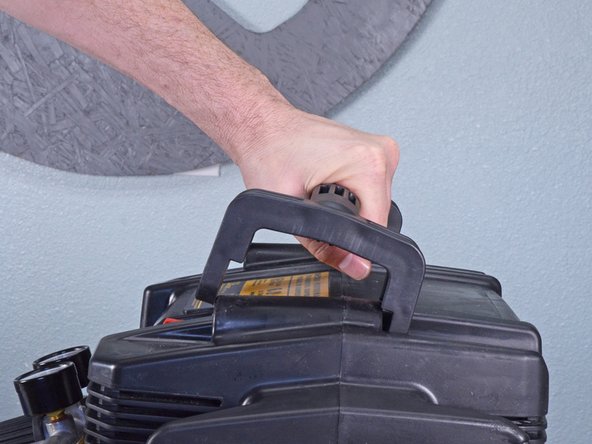
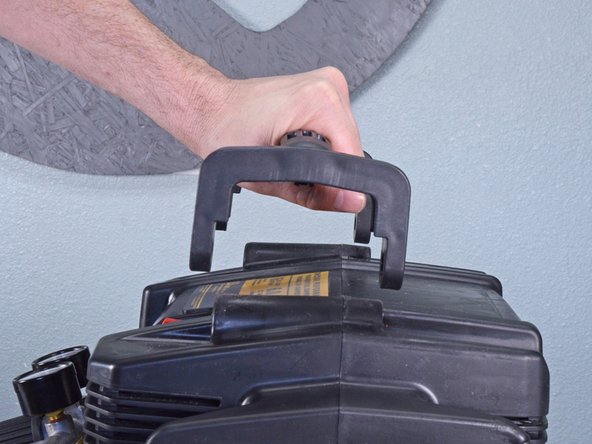
    • Lift the cover directly up off of the gauges to remove.

  2. Dewalt Air Compressor DWFP55126 2016 Control Rod Replacement, Remove handle: passo 2, imagem 1 %32 Dewalt Air Compressor DWFP55126 2016 Control Rod Replacement, Remove handle: passo 2, imagem 2 %32
    • Use a T20 driver to remove the two handle screws, one on each side.

  3. Dewalt Air Compressor DWFP55126 2016 Control Rod Replacement: passo 3, imagem 1 %32 Dewalt Air Compressor DWFP55126 2016 Control Rod Replacement: passo 3, imagem 2 %32 Dewalt Air Compressor DWFP55126 2016 Control Rod Replacement: passo 3, imagem 3 %32
    • Grab the handle like you would if you were to pick the compressor up. Pull up and push forward away from the gauges at the same time to rotate the handle up off the case.

    • Lift the handle off to remove.

  4. Dewalt Air Compressor DWFP55126 2016 Control Rod Replacement, Remove top case: passo 4, imagem 1 %32 Dewalt Air Compressor DWFP55126 2016 Control Rod Replacement, Remove top case: passo 4, imagem 2 %32 Dewalt Air Compressor DWFP55126 2016 Control Rod Replacement, Remove top case: passo 4, imagem 3 %32
    • Remove the following four screws:

    • Three 20 mm-long T20 screws.

    • One 20 mm-long Phillips #1 screw.

  5. Dewalt Air Compressor DWFP55126 2016 Control Rod Replacement: passo 5, imagem 1 %32 Dewalt Air Compressor DWFP55126 2016 Control Rod Replacement: passo 5, imagem 2 %32
    • Four metal tabs on the tank sit in four slots on the top plastic case to secure the case to the tank.

    • Firmly push the top case off of the four tabs to detach.

  6. Dewalt Air Compressor DWFP55126 2016 Control Rod Replacement: passo 6, imagem 1 %32 Dewalt Air Compressor DWFP55126 2016 Control Rod Replacement: passo 6, imagem 2 %32 Dewalt Air Compressor DWFP55126 2016 Control Rod Replacement: passo 6, imagem 3 %32
    • Carefully pull the half of the case that is opposite the manifold away from the tank.

    • The motor may shift once the case is removed, but it won't fall out.

    • Reassembly tip: align the power cord in the cord cutout so it doesn't get pinched.

  7. Dewalt Air Compressor DWFP55126 2016 Control Rod Replacement, Remove power switch: passo 7, imagem 1 %32 Dewalt Air Compressor DWFP55126 2016 Control Rod Replacement, Remove power switch: passo 7, imagem 2 %32 Dewalt Air Compressor DWFP55126 2016 Control Rod Replacement, Remove power switch: passo 7, imagem 3 %32
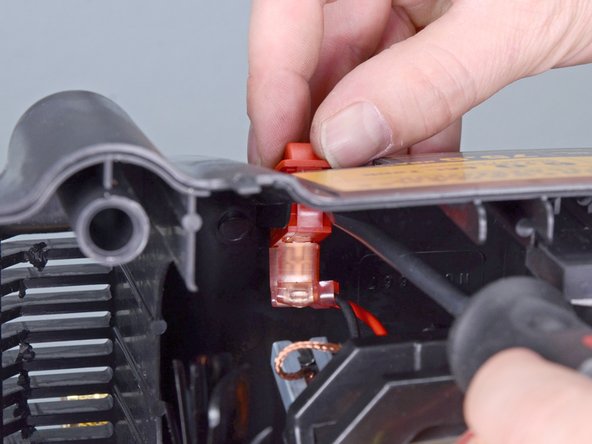
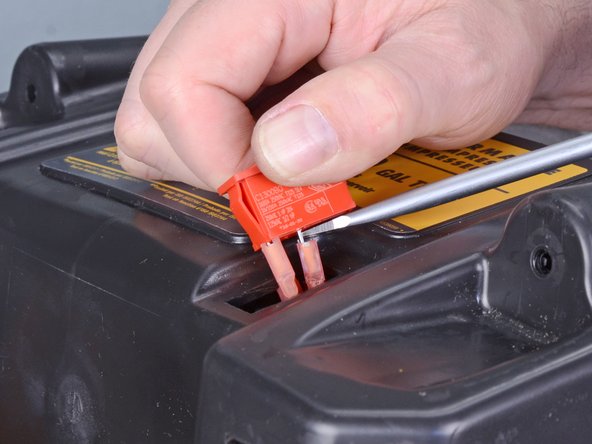
    • Use a large flathead screwdriver to depress the plastic tab on the red power switch closest to the open side of the case.

    • While keeping the tab depressed, grab the top side of the switch and pull directly up off the case.

    • Pull the switch farther out of the case.

    • Don't try to completely remove the switch; there are still wires attached below.

  8. Dewalt Air Compressor DWFP55126 2016 Control Rod Replacement: passo 8, imagem 1 %32 Dewalt Air Compressor DWFP55126 2016 Control Rod Replacement: passo 8, imagem 2 %32
    • Use a flathead screwdriver to pry both wire connectors slightly off the plugs on the bottom of the switch.

  9. Dewalt Air Compressor DWFP55126 2016 Control Rod Replacement: passo 9, imagem 1 %32 Dewalt Air Compressor DWFP55126 2016 Control Rod Replacement: passo 9, imagem 2 %32
    • Once the wires are loosened from the plugs on the switch, completely remove both wires.

    • Remove the power switch.

  10. Dewalt Air Compressor DWFP55126 2016 Control Rod Replacement, Remove ground wire: passo 10, imagem 1 %32 Dewalt Air Compressor DWFP55126 2016 Control Rod Replacement, Remove ground wire: passo 10, imagem 2 %32
    • Carefully pull to remove the connector on the ground wire located inside the case.

  11. Dewalt Air Compressor DWFP55126 2016 Control Rod Replacement, Remove check valve hose: passo 11, imagem 1 %32 Dewalt Air Compressor DWFP55126 2016 Control Rod Replacement, Remove check valve hose: passo 11, imagem 2 %32 Dewalt Air Compressor DWFP55126 2016 Control Rod Replacement, Remove check valve hose: passo 11, imagem 3 %32
    • Use needle nose pliers to bend the check valve hose clamp up away from the hose.

    • Once the hose clamp is bent enough to clear the hose, lift it up and off to remove.

    • We strongly suggest you replace this hose clamp during reassembly to prevent leaks during operation.

  12. Dewalt Air Compressor DWFP55126 2016 Control Rod Replacement: passo 12, imagem 1 %32 Dewalt Air Compressor DWFP55126 2016 Control Rod Replacement: passo 12, imagem 2 %32
    • Pull the hose off the fitting to remove.

  13. Dewalt Air Compressor DWFP55126 2016 Control Rod Replacement, Remove pump assembly: passo 13, imagem 1 %32 Dewalt Air Compressor DWFP55126 2016 Control Rod Replacement, Remove pump assembly: passo 13, imagem 2 %32
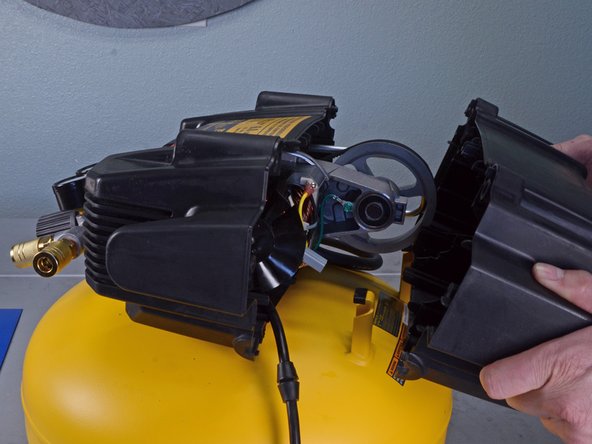
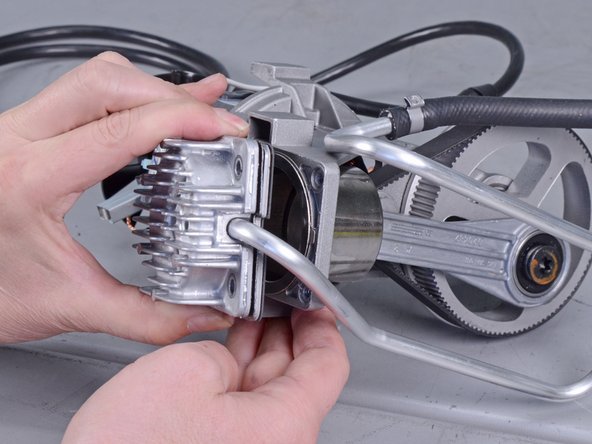
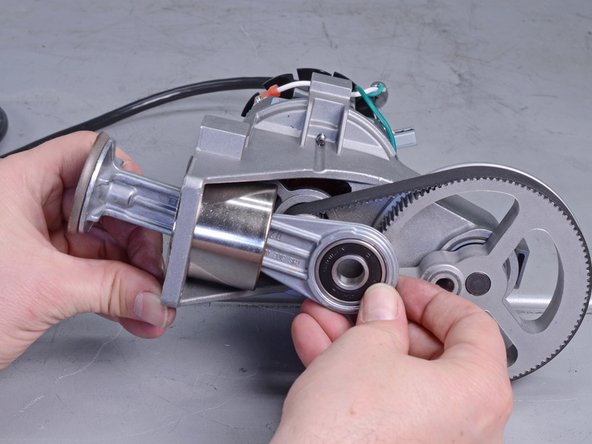
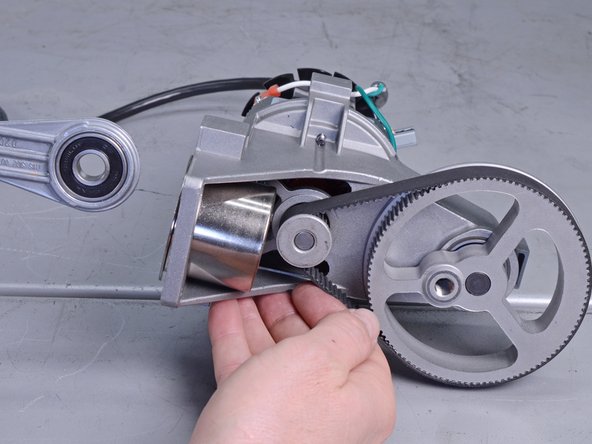
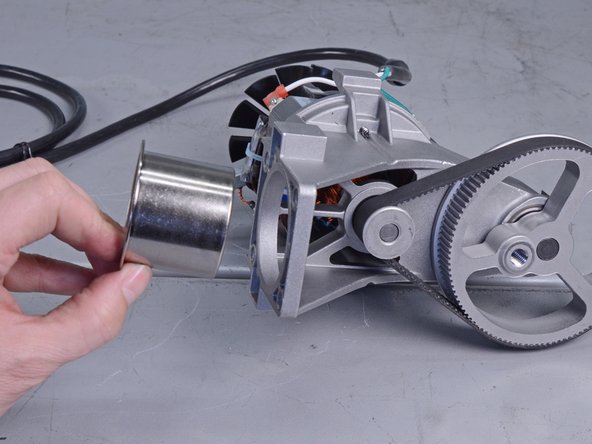
    • While holding the plastic housing, pull the pump assembly out, careful to not snag hoses or wires.

  14. Dewalt Air Compressor DWFP55126 2016 Control Rod Replacement, Remove cylinder head: passo 14, imagem 1 %32
    • Use a 5/8 inch socket to remove the four cylinder head bolts.

  15. Dewalt Air Compressor DWFP55126 2016 Control Rod Replacement: passo 15, imagem 1 %32 Dewalt Air Compressor DWFP55126 2016 Control Rod Replacement: passo 15, imagem 2 %32
    • Pull the cylinder head off of the pump assembly.

    • The cylinder head gaskets can be very sharp around the edges. Wear gloves if you need to.

  16. Dewalt Air Compressor DWFP55126 2016 Control Rod Replacement, Remove control rod assembly: passo 16, imagem 1 %32
    • Use a T45 driver to remove the control rod bolt.

  17. Dewalt Air Compressor DWFP55126 2016 Control Rod Replacement: passo 17, imagem 1 %32
    • Use a T20 driver to remove the piston screw.

  18. Dewalt Air Compressor DWFP55126 2016 Control Rod Replacement: passo 18, imagem 1 %32 Dewalt Air Compressor DWFP55126 2016 Control Rod Replacement: passo 18, imagem 2 %32 Dewalt Air Compressor DWFP55126 2016 Control Rod Replacement: passo 18, imagem 3 %32
    • Remove the top piston plate.

    • Remove the piston washer.

  19. Dewalt Air Compressor DWFP55126 2016 Control Rod Replacement: passo 19, imagem 1 %32 Dewalt Air Compressor DWFP55126 2016 Control Rod Replacement: passo 19, imagem 2 %32 Dewalt Air Compressor DWFP55126 2016 Control Rod Replacement: passo 19, imagem 3 %32
    • While holding the metal cylinder wall in place, push the control rod out to remove.

  20. Dewalt Air Compressor DWFP55126 2016 Control Rod Replacement: passo 20, imagem 1 %32 Dewalt Air Compressor DWFP55126 2016 Control Rod Replacement: passo 20, imagem 2 %32
    • Remove the cylinder wall.

    • A new cylinder wall is included in the new control rod assembly.

Conclusão

To reassemble your device, follow these instructions in reverse order.

Carsten Frauenheim

Membro desde: 03/10/20

112.911 Reputação

Autoria de 338 guias

Equipe

iFixit Membro de iFixit

Staff

Membros da 135

Autoria de 16.757 guias

0 comentários

Adicione um comentário

Exibir estatísticas:

Últimas 24 horas: 1

Últimos 7 dias: 3

Últimos 30 dias: 8

Duração total: 375