Esta versão pode conter edições incorretas. Mude para o último instantâneo verificado.
O que você precisa
-
Este passo não foi traduzido. Ajude a traduzi-lo
-
Push the sliding button near the battery compartment.
-
-
Este passo não foi traduzido. Ajude a traduzi-lo
-
Slide the button next to the battery and lift up on the lip of the battery edge.
-
-
Este passo não foi traduzido. Ajude a traduzi-lo
-
Remove the plastic trim at the base of the screen screen. Start from the tab on the right side and work to the left side.
-
-
Este passo não foi traduzido. Ajude a traduzi-lo
-
Remove the four screws from the top of the keyboard bracket.
-
-
-
Este passo não foi traduzido. Ajude a traduzi-lo
-
Remove the keyboard by sliding it forward, off of the clips, and then lifting up.
-
-
Este passo não foi traduzido. Ajude a traduzi-lo
-
Lift the keyboard about 2 inches up from the laptop platform.
-
From this angle the keyboard ribbon connector can be seen and disconnected.
-
-
Este passo não foi traduzido. Ajude a traduzi-lo
-
Remove 2 M2x3mm screws that are located at the bottom of the plastic bezel with a PH0 screwdriver.
-
-
Este passo não foi traduzido. Ajude a traduzi-lo
-
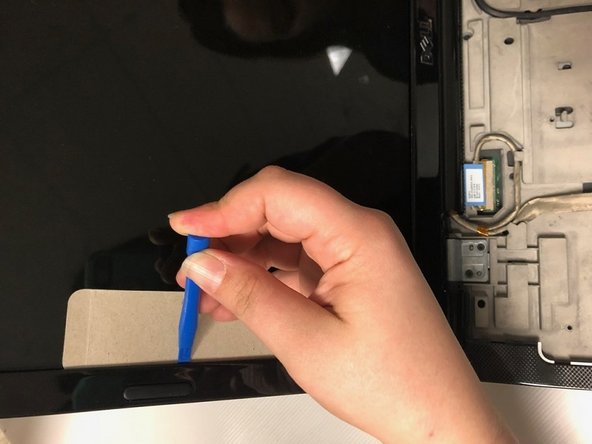
Use iFixit plastic tool and a cutout of cardboard to pry out the plastic bezel around the edges of the LCD screen
-
-
Este passo não foi traduzido. Ajude a traduzi-lo
-
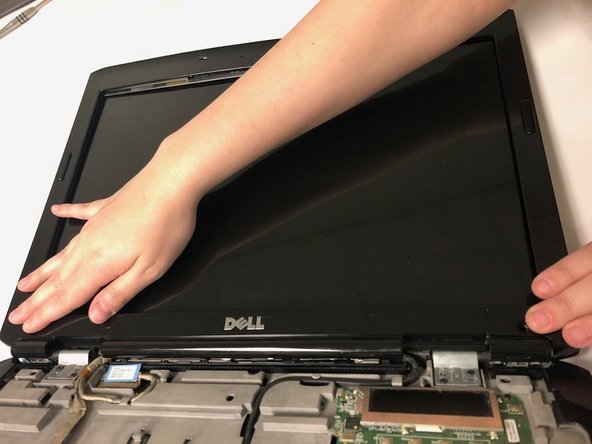
Disconnect the display connectors by removing them from the grooves and unplugging them.
-
-
Este passo não foi traduzido. Ajude a traduzi-lo
-
Remove 12 M2x3mm screws along the edge of the screen frame with a PH0 screwdriver.
-
-
Este passo não foi traduzido. Ajude a traduzi-lo
-
Disconnect the display connector behind the top of the screen.
-
-
Este passo não foi traduzido. Ajude a traduzi-lo
-
Remove the four screws (M2x3mm) surrounding the webcam
-
-
Este passo não foi traduzido. Ajude a traduzi-lo
-
Remove webcam bar and the metal tray underneath.
-
Your webcam is now removed.
-


Equipe

University of North Texas, Team S2-G6, Thomas Spring 2018 Membro de University of North Texas, Team S2-G6, Thomas Spring 2018
UNT-THOMAS-S18S2G6
Membros da 5
Autoria de 5 guias