Ir para o conteúdo principal

Dell Precision M4700 Memory Module Replacement

O que você precisa

  1. Dell Precision M4700 Memory Module Replacement, Battery: passo 1, imagem 1 %32 Dell Precision M4700 Memory Module Replacement, Battery: passo 1, imagem 2 %32
    • Slide the release latch to unlock the battery.

    • Flip and remove the battery from the computer.

  2. Dell Precision M4700 Memory Module Replacement, Base Cover: passo 2, imagem 1 %32 Dell Precision M4700 Memory Module Replacement, Base Cover: passo 2, imagem 2 %32
    • Remove the screws that secure the base cover to the computer. Press the rubber tabs towards the rear of the computer to disengage the base cover.

    • Flip and remove the base cover from the computer.

  3. Dell Precision M4700 Memory Module Replacement, Keyboard Trim: passo 3, imagem 1 %32 Dell Precision M4700 Memory Module Replacement, Keyboard Trim: passo 3, imagem 2 %32
    • Pry up the keyboard trim starting from the top-inner edge.

    • Pry up the bottom edge of the keyboard trim from the top-inner edge.

  4. Dell Precision M4700 Memory Module Replacement, Keyboard: passo 4, imagem 1 %32 Dell Precision M4700 Memory Module Replacement, Keyboard: passo 4, imagem 2 %32 Dell Precision M4700 Memory Module Replacement, Keyboard: passo 4, imagem 3 %32
    • Remove the screws that secure the keyboard to the computer.

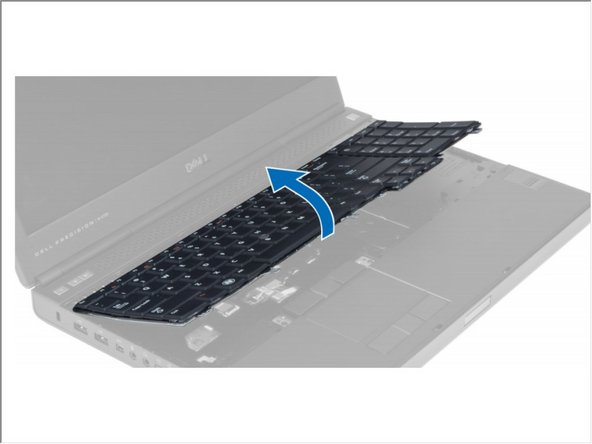
    • Starting from the bottom of the keyboard, separate the keyboard from the computer and flip the keyboard over.

    • Disconnect the keyboard-data cable from the system board and remove the keyboard.

  5. Dell Precision M4700 Memory Module Replacement, Memory Module: passo 5, imagem 1 %32
    • Flip Computer To its Back.

    • Pry the retention clips away from the memory module until it pops up. Lift up the memory module and remove it from the computer.

  6. Dell Precision M4700 Memory Module Replacement: passo 6, imagem 1 %32
    • Flip the Computer To its Top.

    • Pry the retention clips away from the memory module until it pops up. Lift up the memory module and remove it from the computer.

Conclusão

To reassemble your device, follow these instructions in reverse order.

Johnathan Hammond

Membro desde: 02/28/18

44.830 Reputação

Autoria de 408 guias

Equipe

RampUP America, Inc. Membro de RampUP America, Inc.

Community

Membros da 42

Autoria de 1.985 guias

0 comentários

Adicione um comentário

Exibir estatísticas:

Últimas 24 horas: 0

Últimos 7 dias: 3

Últimos 30 dias: 10

Duração total: 1,060