Introdução
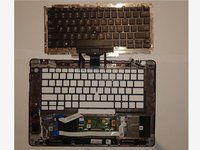
This guide is going to show you how to replace the keyboard, But first, we need to remove whatever covers the keyboard. So this is going to be time-consuming. Be patient!
Before you start your replacement, make sure that you have powered off your laptop completely
O que você precisa
-
-
Grab the two clips beside the RAM stick and pull them outward. The RAM stick should release.
-
Remove the RAM from the device.
-
Repeat this for second RAM stick
-
-
-
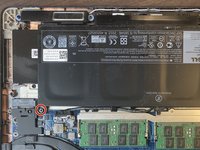
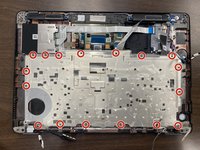
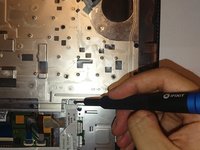
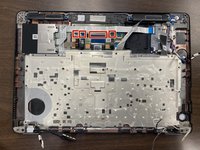
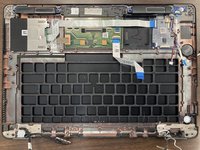
After opening the backcase of the computer, remove the screws using the Phillips #0 screwdriver.
-
Unplug and remove the wire from the socket.
-
-
-
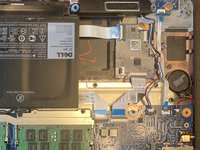
Use the pull tab on the battery connector to lift the connector straight up off its socket on the motherboard, disconnecting it.
-
-
-
-
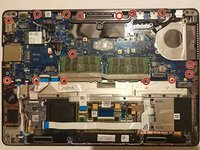
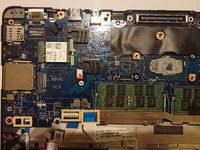
Remove all the screws using a Phillips #0 screwdriver.
-
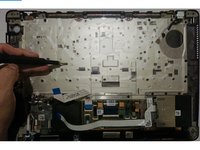
Disconnect all of the cables from the motherboard.
-


To reassemble your device, follow these instructions in reverse order.
To reassemble your device, follow these instructions in reverse order.
Cancelar: não concluí este guia.
7 outras pessoas executaram este guia.
Equipe

Duke University Pratt School of Engineering, Team S4-G3, Matos-Garner Fall 2019 Membro de Duke University Pratt School of Engineering, Team S4-G3, Matos-Garner Fall 2019
DUKEPSE-MATOS-GARNER-F19S4G3
Membros da 4
Autoria de 11 guias
5 comentários
Very useful photos. Keyboard changed successfully. Thank you.
Also was able to change keyboard successfully.
Will note that there are some screws noted for motherboard and keyboard that already removed in previous steps. Was confusing for a bit.
An interesting discovery - the keyboards for the UK and US versions are slightly different, and annoyingly don't fit.
However, an excellent guide - thank you for taking the time to compile it.
I have the E7470 without the pointer and the keyboard isn't backlit and it doesn't have the palm rest above the touchpad. I have found a backlit keyboard on eBay (unlike the keyboard in this tutorial) that looks identical to mine but only has 2 ribbons. I'm guessing one for the keyboard and for the backlight. My motherboard has a spare connector next to the main ribbon (here are the pics of my motherboard and the keyboard I'm referring to: https://www.dell.com/community/Latitude/... - the 2 pics at the bottom of the thread). The connector I'm referring to is the same as the one marked by the red square on the far right of the pic at Step 10 of this tutorial. Am I correct in assuming that this is the connector for the backlight?