Ir para o conteúdo principal

Dell Latitude E6510 Hard Drive Replacement

O que você precisa

  1. Dell Latitude E6510 Hard Drive Replacement, Hard Drive: passo 1, imagem 1 %32 Dell Latitude E6510 Hard Drive Replacement, Hard Drive: passo 1, imagem 2 %32 Dell Latitude E6510 Hard Drive Replacement, Hard Drive: passo 1, imagem 3 %32
    • Locate the tabs that lock the battery in place.

    • Push tabs towards each other while simultaneously pushing the battery away from the device.

  2. Dell Latitude E6510 Hard Drive Replacement: passo 2, imagem 1 %32 Dell Latitude E6510 Hard Drive Replacement: passo 2, imagem 2 %32
    • Locate and remove the four 3.2 mm screws that secure the hard drive located in the bottom righthand side of the device, assuming the device is upside down and battery side on top.

  3. Dell Latitude E6510 Hard Drive Replacement: passo 3, imagem 1 %32
    • Slide the hard drive out.

  4. Dell Latitude E6510 Hard Drive Replacement: passo 4, imagem 1 %32 Dell Latitude E6510 Hard Drive Replacement: passo 4, imagem 2 %32
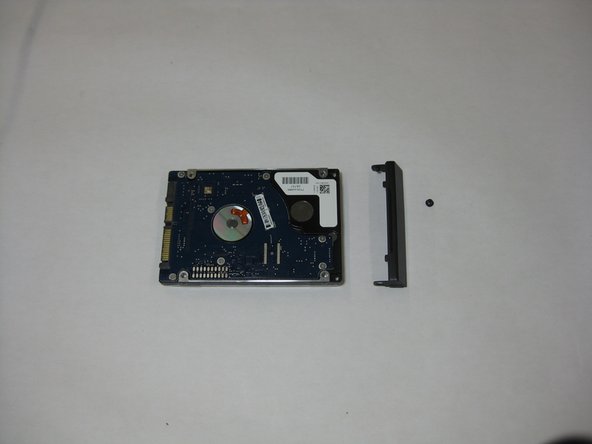
    • Locate and remove the screw that secures the hard drive to hard drive caddie.

    • Remove hard drive caddie.

Conclusão

To reassemble your device, follow these instructions in reverse order. Make sure to reinsert the hard drive with the hard drive caddie angle such that it will be flush with the device when completely inserted

0 comentários

Adicione um comentário

Exibir estatísticas:

Últimas 24 horas: 0

Últimos 7 dias: 2

Últimos 30 dias: 5

Duração total: 552